Posted on

Hitachi ZAXIS 70/75/85 Excavators Factory Service & Shop Manual


Pages from W1P1E00 – Hitachi ZX70-3, ZX70LC-3, ZX70LCN-3, ZX75US-3, ZX85US-3 Hydraulic Excavator Workshop Manual


INSTANT DOWNLOAD


Complete workshop & service manual with electrical wiring diagrams for Hitachi ZX70, ZX70LC, ZXZX70-3, ZX70LC-3, ZX70LCN-3, ZX75US-3, ZX75US, ZX75US-A, ZX75UR, ZX85US-3 Excavators. It’s the same service manual used by dealers that guaranteed to be fully functional and intact without any missing page.

This Hitachi ZX70, ZX70LC, ZXZX70-3, ZX70LC-3, ZX70LCN-3, ZX75US-3, ZX75US, ZX75US-A, ZX75UR, ZX85US-3 Excavators service & repair manual (including maintenance, overhaul, disassembling & assembling, adjustment, tune-up, operation, inspecting, diagnostic & troubleshooting…) is divided into different sections. Each section covers a specific component or system with detailed illustrations. A table of contents is placed at the beginning of each section. Pages are easily found by category, and each page is expandable for great detail. The printer-ready PDF documents work like a charm on all kinds of devices.

FILE LIST:
Hitachi ZAXIS 75US-A, 75UR Excavator Technical Manual (Operational Principle).pdf
Hitachi ZAXIS 75US-A, 75UR Excavator Technical Manual (Troubleshooting).pdf
TT1CDE00 – Hitachi ZAXIS 70, 70LC Excavator Technical Manual (Troubleshooting).pdf
TT1CDE00 attach to – Hitachi ZX70, ZX70LC Excavator Electrical Wiring Diagrams.pdf
TT1CDE01 – Hitachi ZAXIS 70, 70LC Excavator Technical Manual (Troubleshooting).pdf
TWDRE001 – Hitachi Win Dr. Technical Manual (ZX70-3 to ZX350-3, ZX450-3 to ZX870-3, ZX140W to ZX220W-3, ZW140-3 to ZW310-3).pdf
W1CCE00 – Hitachi ZAXIS 75US Excavator Workshop Manual.pdf
W1P1E00 – Hitachi ZX70-3, ZX70LC-3, ZX70LCN-3, ZX75US-3, ZX85US-3 Hydraulic Excavator Workshop Manual.pdf
EM1CD22 – Hitachi ZAXIS 70, 70LC, 80LCK, 75US-A Hydraulic Excavator Operator’s Manual.pdf
EM1CDEN42 – Hitachi ZAXIS 70, 70LC, 80SB, 80SBLC, 85US Hydraulic Excavator Operator’s Manual.pdf

EXCERPT:
FRONT ATTACHMENT / Cylinder
Removal of Arm Cylinder
1. Insert wooden block (3) between arm cylinder (1) and boom (2).
2. Stop the engine. Push the air bleed button and bleed air from the hydraulic oil tank. Remove the cap. (Refer to BLEED AIR FROM HYDRAULIC OIL TANK on W4-1-1.)
Release the pressure in the arm circuit.
(Refer to HYDRAULIC CIRCUIT PRESSURE RELEASE PROCEDURE on W4-2-1.)
3. Remove nuts (8) (2 used) and bolt (5) from arm (4). : 24 mm
CAUTION: Metal fragments may fly off when a hammer is used. Wear necessary protection, such as goggles and hard hats, in order to prevent personal injury.
4. Start the engine. While operating the boom and the arm, adjust the rod pin hole. Remove pin (7) and thrust plate (6) from arm (4). Lower boom (2) gently.
5. In order not to extend piston rod (9) of arm cylinder (1), pass wire (10) through the piston rod (9) pin hole and secure to the arm cylinder (1) tube.
6. Disconnect hoses (11) (2 used) from arm cylinder (1). Cap the open ends. : 27 mm
7. Disconnect lubrication pipe (12) from arm cylinder (1). : 17 mm


INSTANT DOWNLOAD


Posted on

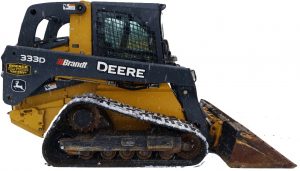
John Deere 329D/333D Skid Steer Loader Factory Service & Shop Manual


Download Link

INSTANT DOWNLOAD

Pages from TM11454 – John Deere 329D and 333D Skid Steer Loader(EH Controls) Operation and Test Manual

Complete workshop & service manual with electrical wiring diagrams for John Deere 329D and 333D Skid Steer Loader. It’s the same service manual used by dealers that guaranteed to be fully functional and intact without any missing page.

This John Deere 329D and 333D Skid Steer Loader service & repair manual (including maintenance, overhaul, disassembling & assembling, adjustment, tune-up, operation, inspecting, diagnostic & troubleshooting…) is divided into different sections. Each section covers a specific component or system with detailed illustrations. A table of contents is placed at the beginning of each section. Pages are easily found by category, and each page is expandable for great detail. The printer-ready PDF documents work like a charm on all kinds of devices.

“TM11454 – John Deere 329D and 333D Skid Steer Loader(EH Controls) Operation and Test Manual.pdf” – 923 pages

Table of Contents
Foreword 12
9000 – General Information 13
9000 – General Information 01 – Safety 13
Add and Operate Attachments Safely 13
Avoid Backover Accidents 14
Avoid High-Pressure Fluids 15
Avoid High-Pressure Oils 16
Avoid Machine Tip Over 17
Avoid Unauthorized Machine Modifications 18
Avoid Work Site Hazards 19
Clean Debris from Machine 20
Decommissioning Proper Recycling and Disposal of Fluids and Components 21
Drive Metal Pins Safely 22
Follow Safety Instructions 23
Handle Cab Door Safely 24
Handle Chemical Products Safely 25
Inspect and Maintain ROPS 26
Inspect Machine 27
Keep Riders Off Machine 28
Make Welding Repairs Safely 29
Operate Only If Qualified 30
Operating On Slopes 31
Operating Or Traveling On Public Roads 32
Park and Prepare for Service Safely 33
Prepare for Emergencies 34
Prevent Battery Explosions 35
Prevent Fires 36
Prevent Unintended Machine Movement 37
Recognize Safety Information 38
Remove Paint Before Welding or Heating 39
Service Cooling System Safely 40
Start Only From Operator’s Seat 41
Stay Clear of Moving Parts 42
Use and Maintain Seat Belt 43
Use Steps and Handholds Correctly 44
Wear Protective Clothing 45
Work In Ventilated Area 46
9001 – Diagnostic Trouble Codes (DTC) 47
000029.03 — Foot Throttle Sensor Out of Range High 47
000029.04 — Foot Throttle Sensor Out of Range Low 49
000029.14 — Foot Throttle Sensor (Out of Range High) 51
000070.02 — Park Brake Release Input Erratic or Bad Data 52
000070.04 — Park Brake Release Input Out of Range Low 55
000091.03 — Hand Throttle Sensor Out of Range High 57
000091.04 — Hand Throttle Sensor Out of Range Low 59
000091.14 — Hand Throttle Sensor (Out of Range High) 61
000096.03 — Fuel Level Sensor Out of Range High 62
000096.04 — Fuel Level Sensor Out of Range Low 65
000100.03 — Engine Oil Pressure High 67
000107.00 — Engine Air Filter Switch Data Above Normal 68
000158.00 — System Voltage Data Above Normal 71
000158.01 — System Voltage Data Below Normal 72
000162.04 — 2-Speed Switch Input Out of Range Low 75
000168.03 — Unswitched Power Input Out of Range High 79
000168.04 — Unswitched Power Input Out of Range Low 80
000171.03 — Ambient Air Temperature Out of Range High 82
000171.04 — Ambient Air Temperature Out of Range Low 84
000237.13 — Vehicle Identification Number 86
000647.05 — Fan Coil Output Driver Out of Range Low 87
000647.06 — Fan Coil Output Driver Out of Range High 89
000647.16 — Reversing Fan Switch Active Too Long 92
000647.30 — Fan Coil Output Driver Unknown Fault 94
000676.05 — Glow Plug Relay Output Out of Range Low 96
000676.06 — Glow Plug Relay Output Out of Range High 98
000920.05 — Alarm Output Out of Range Low 101
000920.06 — Alarm Output Out of Range High 104
001110.31 — Engine Protection Has Shut Down Engine 106
001196.11 — Anti Theft Unknown Fault 107
001321.05 — Starter Relay Output Out of Range Low 108
001321.06 — Starter Relay Output Out of Range High 110
001321.16 — Starter Relay Output Moderately High Value 113
001504.04 — Seat Switch Input Out of Range Low 114
001508.00 — Hydraulic Oil Temperature Data Above Normal 116
001508.03 — Hydraulic Oil Temperature Out of Range High 117
001508.04 — Hydraulic Oil Temperature Out of Range Low 119
001550.05 — AC Compressor Clutch Output Out of Range Low 121
001550.06 — AC Compressor Clutch Output Out of Range High 123
001594.00 — Left Speed Sensor Input Data Above Normal 125
001594.01 — Left Speed Sensor Input Data Below Normal 127
001594.02 — Left Speed Sensor Input Erratic or Bad Data 129
001594.14 — Left Speed Sensor Input 132
001595.00 — Right Speed Sensor Input Data Above Normal 134
001595.01 — Right Speed Sensor Input Data Below Normal 136
001595.02 — Right Speed Sensor Input Erratic or Bad Data 138
001595.14 — Right Speed Sensor Input 141
001713.00 — Hydraulic Filter Restriction Switch Data Above Normal 143
002000.09 — No ECU Data on CAN Bus Abnormal Data Range 145
002023.09 — No EMU on CAN Bus Abnormal Data Rate 146
002201.09 — Right Joystick CAN Data Abnormal Data Rate 147
002213.09 — Left Joystick CAN Data Abnormal Data Rate 148
002228.09 — No HCU Data on CAN Bus Abnormal Data Range 149
002660.03 — Right Joystick X-axis Out of Range High 150
002660.04 — Right Joystick X-axis Out of Range Low 153
002660.07 — Right Joystick X-axis Mechanical Fault 156
002660.13 — Right Joystick X-axis Calibrate Error 159
002660.14 — Right Joystick X-axis See Manual 162
002661.03 — Right Joystick Y-axis Out of Range High 165
002661.04 — Right Joystick Y-axis Out of Range Low 168
002661.07 — Right Joystick Y-axis Mechanical Fault 171
002661.13 — Right Joystick Y-axis Calibrate Error 174
002661.14 — Right Joystick Y-axis See Manual 177
002697.03 — Left Joystick X-axis Out of Range High 180
002697.04 — Left Joystick X-axis Out of Range Low 183
002697.07 — Left Joystick X-axis Mechanical Fault 186
002697.13 — Left Joystick X-axis Calibrate Error 189
002697.14 — Left Joystick X-axis Error 192
002698.03 — Left Joystick Y-axis Out of Range High 195
002698.04 — Left Joystick Y-axis Out of Range Low 198
002698.07 — Left Joystick Y-axis Mechanical Fault 201
002698.13 — Left Joystick Y-axis Calibrate Error 204
002698.14 — Left Joystick Y-axis Error 207
003413.04 — Door Switch Input Out of Range Low 210
003597.03 — 5 Volt Sensor Supply 1 Out of Range High 212
003597.04 — 5 Volt Sensor Supply 1 Out of Range Low 214
520194.13 — Machine Model ID Wrong or Missing Calibrate Error 217
520194.14 — Machine Model ID Wrong or Missing 218
520652.05 — Bucket Curl Solenoid Current Out of Range Low 219
520652.06 — Bucket Curl Solenoid Current Out of Range High 221
520652.16 — Bucket Curl Solenoid Current Moderately High Value 223
520653.05 — Bucket Dump Solenoid Current Out of Range Low 225
520653.06 — Bucket Dump Solenoid Current Out of Range High 227
520653.16 — Bucket Dump Solenoid Current Moderately High Value 229
520849.03 — Float Switch Input Out of Range High 231
520849.04 — Float Switch Input Out of Range Low 234
520850.04 — Over Ride Switch Input Out of Range Low 236
521050.04 — Aux Flow On-Off Switch Input Out of Range Low 238
522379.05 — Park Brake Release Output Out of Range Low 242
522379.06 — Park Brake Release Output Out of Range High 245
522398.02 — Park Brake Run Switch Input Erratic or Bad Data 247
522398.04 — Park Brake Run Switch Input Out of Range Low 250
522447.05 — Right Pump Fwd Sol Current Out of Range Low 252
522447.06 — Right Pump Fwd Sol Current Out of Range High 254
522447.16 — Right Pump Fwd Sol Current Moderately High Value 256
522448.05 — Right Pump Rev Sol Current Out of Range Low 258
522448.06 — Right Pump Rev Sol Current Out of Range High 260
522448.16 — Right Pump Rev Sol Current Moderately High Value 262
522449.05 — Left Pump Rev Sol Current Out of Range Low 264
522449.06 — Left Pump Rev Sol Current Out of Range High 266
522449.16 — Left Pump Rev Sol Current Moderately High Value 268
522450.05 — Left Pump Fwd Sol Current Out of Range Low 270
522450.06 — Left Pump Fwd Sol Current Out of Range High 272
522450.16 — Left Pump Fwd Sol Current Moderately High Value 274
522820.05 — High Flow Driver Out of Range Low 276
522820.06 — High Flow Driver Out of Range High 279
522826.04 — VSF Purge Switch Input Out of Range Low 281
522826.05 — Fan Reversing Coil Output Out of Range Low 283
522826.06 — Fan Reversing Coil Output Out of Range High 285
522827.04 — VSF Auto Switch Input Out of Range Low 287
522828.04 — Creep Mode Switch Input Out of Range Low 289
522859.04 — Lap Bar Switch Input Out of Range Low 291
523217.03 — Hydraulic Valve Power 3 to HCU Out of Range High 293
523217.04 — Hydraulic Valve Power 3 to HCU Out of Range Low 295
523217.06 — Hydraulic Valve Power 3 Out of Range High 297
523218.03 — Propel Valve Power 2 to HCU Out of Range High 301
523218.04 — Propel Valve Power 2 to HCU Out of Range Low 303
523218.06 — Propel Valve Power 2 to HCU Out of Range High 305
523219.03 — Hydraulic Valve Power 1 to HCU Out of Range High 307
523219.04 — Hydraulic Valve Power 1 to HCU Out of Range Low 309
523219.06 — Hydraulic Valve Power 1 Out of Range High 311
523411.05 — Boom Down Solenoid Current Out of Range Low 315
523411.06 — Boom Down Solenoid Current Out of Range High 317
523411.16 — Boom Down Solenoid Current Moderately High Value 319
523414.05 — Boom Up Solenoid Current Out of Range Low 321
523414.06 — Boom Up Solenoid Current Out of Range High 323
523414.16 — Boom Up Solenoid Current Moderately High Value 325
523426.05 — Hyd Port Lock Solenoid Current Out of Range Low 327
523426.06 — Hyd Port Lock Solenoid Current Out of Range High 329
523693.03 — Aux Hyd Channel 1 Input Out of Range High 331
523693.04 — Aux Hyd Channel 1 Input Out of Range Low 334
523694.03 — Aux Hyd Channel 2 Input Out of Range High 337
523694.04 — Aux Hyd Channel 2 Input Out of Range Low 340
523694.12 — Aux Hyd Channel 2 Input Device Fault 343
523822.04 — High Flow Switch Input Out of Range Low 346
523917.05 — Two Speed Output Out of Range Low 348
523917.06 — Two Speed Output Out of Range High 350
523935.05 — Aux Hyd Extend Output Out of Range Low 353
523935.06 — Aux Hyd Extend Output Out of Range High 355
523941.05 — Aux Hyd Retract Output Out of Range Low 359
523941.06 — Aux Hyd Retract Output Out of Range High 361
524225.04 — Remote Start Input Out of Range Low 365
524264.11 — Checksum Error Unknown Fault 367
Engagement and Monitor Unit (EMU) Diagnostic Trouble Codes 370
Engine Control Unit (ECU) Diagnostic Trouble Codes 371
Hydraulic Control Unit (HCU) Diagnostic Trouble Codes 372
Left Joystick Controller (JSL) Diagnostic Trouble Codes 373
Right Joystick Controller (JSR) Diagnostic Trouble Codes 374
9005 – Operational Checkout Procedure 375
9005 – Operational Checkout Procedure 10 – System Operational Checks 375
Operational Checkout 375
9010 – Engine 394
Cold Start Operation 394
Engine Cooling System Component Location 396
Engine Fuel System Component Location 397
Engine Hard to Start or Does Not Start When Cold 398
Engine Intake and Exhaust Component Location 401
Engine Power Test Using Turbocharger Boost Pressure 402
John Deere Engine 406
9015 – Electrical System 408
9015 – Electrical System 05 – System Information 408
Electrical Diagram Information 408
Electrical Schematic Symbols 410
9015 – Electrical System 10 – System Diagrams 412
Attachment Control Boom Harness (W12) Component Location 412
Attachment Control Boom Harness (W12) Wiring Diagram 413
Attachment Control Frame Harness (W11) Component Location 414
Attachment Control Frame Harness (W11) Wiring Diagram 415
Cab Harness (W2) Component Location 416
Cab Harness (W2) Wiring Diagram 418
Dual Flasher Harness (W5) Component Location 420
Dual Flasher Harness (W5) Wiring Diagram 421
Engine Harness (W1) Component Location 422
Engine Harness (W1) Wiring Diagram 423
Fan Bypass Solenoid Harness (W17) Component Location 424
Fan Bypass Solenoid Harness (W17) Wiring Diagram 425
Fan Speed Solenoid Harness (W9) Component Location 426
Fan Speed Solenoid Harness (W9) Wiring Diagram 427
Fuse and Relay Specifications 428
Heater and Air Conditioner Harness (W16) Component Location 431
Heater and Air Conditioner Harness (W16) Wiring Diagram 432
Hydraulic Valve Harness (W10) Component Location 433
Hydraulic Valve Harness (W10) Wiring Diagram 434
Main Harness (W3) Component Location 435
Main Harness (W3) Wiring Diagram 437
Quik-Tatch™ Actuator Harness (W15) Component Location 444
Quik-Tatch™ Actuator Harness (W15) Wiring Diagram 445
Quik-Tatch™ Boom Harness (W14) Component Location 446
Quik-Tatch™ Boom Harness (W14) Wiring Diagram 447
Quik-Tatch™ Frame Harness (W13) Component Location 448
Quik-Tatch™ Frame Harness (W13) Wiring Diagram 449
Radio Harness (W8) Component Location 450
Radio Harness (W8) Wiring Diagram 451
Rear Light Harness (W7) Component Location 452
Rear Light Harness (W7) Wiring Diagram 453
System Functional Schematic 454
System Functional Schematic, Wiring Diagram and Component Location Master Legend 459
9015 – Electrical System 15 – Sub-System Diagnostics 464
Back-Up Alarm Circuit Theory of Operation 464
Controller Area Network (CAN) Theory of Operation 465
Electrohydraulic (EH) Controls Circuit Theory of Operation 467
Engagement and Monitor Unit (EMU) Circuit Theory of Operation 471
Engine Control Unit (ECU) Circuit Theory of Operation 477
Quik-Tatch Circuit Theory of Operation 484
Starting Circuit Theory of Operation 485
9015 – Electrical System 16 – Monitor Operation 488
Anti-Theft Security System Configuration—If Equipped 488
Anti-Theft Security System Enable—If Equipped 492
Anti-Theft Security System Operation—If Equipped 494
Engagement and Monitor Unit Data Items 496
Engagement and Monitor Unit Display Messages 499
Engagement and Monitor Unit Initial Configuration 501
Engagement and Monitor Unit Operation 503
Engagement and Monitor Unit Service Menu Operation 507
9015 – Electrical System 20 – References 509
Alternator Test 509
Auxiliary Hydraulics Calibration 511
Backup Alarm Remove and Install 513
Battery Remove and Install 514
Boom and Bucket Calibration 515
Control Panel Remove and Install 517
Controller Area Network (CAN) Circuit Test 518
Electrical Component Checks 526
Electrical Component Specifications 540
Engagement and Monitor Unit (EMU) Remove and Install 544
Engine Control Unit (ECU) Remove and Install 546
Hydraulic Control Unit (HCU) Remove and Install 548
Hydrostatic System Calibration 550
Install CINCH™ Contact 553
Install DEUTSCH ™ Contact 554
Install WEATHER PACK ™ Contact 556
Joystick Disassemble and Assemble 558
Left Joystick Controller (JSL) Remove and Install 560
Manual Tracking Adjustment Procedure 564
Motor Speed Sensor Remove and Install 565
Reading Diagnostic Trouble Codes (DTCs) 576
Remove Connector Body from Blade Terminals 579
Repair 32 and 48 Way CINCH™ Connectors 580
Replace (Pull Type) Metri-Pack™ Connectors 585
Replace (Push Type) Metri-Pack™ Connectors 587
Replace CINCH™ Connectors 588
Replace DEUTSCH ™ Circular Connectors 591
Replace DEUTSCH ™ Connectors 593
Replace DEUTSCH ™ Rectangular or Triangular Connectors 595
Replace Metri-Pack™ Connectors 597
Replace WEATHER PACK ™ Connector 599
Right Joystick Controller (JSR) Remove and Install 601
Service ADVISOR™ Connection Procedure 605
Solenoid Test 607
9020 – Power Train 629
Check and Adjust Track Tension 629
Excessive Oil Leakage From Idlers And Rollers 633
Frequent Track Tension Adjustment Required 636
Hydrostatic Motor Gearbox Operation (S.N. 192142— ) 639
Hydrostatic Motor Gearbox Operation (S.N. —192141) 640
Individual Undercarriage Component Wear 641
Loose Track 644
Power Train Component Location 648
Power Train System Operation 650
Tight Track 651
Track Adjuster and Recoil Spring Operation 655
9025 – Hydraulic System 656
9025 – Hydraulic System 05 – Theory of Operation 656
High Flow Pump Operation—If Equipped 656
Hydraulic Control Valve Operation 658
Hydraulic Fan Operation 662
Hydraulic Oil Filter Manifold Operation 666
Hydraulic Pump Operation 667
Hydraulic System Operation 668
Self Leveling Valve Operation—If Equipped 669
9025 – Hydraulic System 15 – Diagnostic Informtion 670
Boom Drifts Down 670
Boom Drifts Up 674
Boom Will Not Lower 678
Boom Will Not Raise 682
Bucket Drifts Down 687
Bucket Drifts Up 691
Bucket Dumps During Self Leveling Cycle 695
Bucket Will Not Curl 699
Bucket Will Not Dump 704
Bucket Will Not Self Level When Boom is Raised 708
Diagnose Hydraulic System Malfunctions 710
Hydraulic Fan System Malfunctions 711
Hydraulic Fan Will Not Reverse Direction 716
Hydraulic Functions Slow or No Power 718
Hydraulic Functions “Jerky” or “Spongy” 723
Hydraulic Oil Overheats 727
Hydraulic System Component Location 732
Hydraulic System Noise 733
Hydraulic System Schematic 737
No Hydraulic Functions 742
9025 – Hydraulic System 25 – Tests 746
Boom Lowering Valve Test (S.N. —194401) 746
Boom Release Cable Adjustment (S.N. —194401) 748
Charge Pressure Relief Valve Test 749
Charge Pump Flow Test 751
Circuit Relief Valve Test 754
Fan Bypass Valve Test 761
Function Drift Test 765
Hydraulic Cylinder Leakage Test 771
Hydraulic Fan Motor Case Drain Test 774
Hydraulic Fan Motor Speed Test 776
Hydraulic Pump Flow Test 780
Hydraulic System Pressure Release 786
Hydraulic System Relief Valve Test 787
JT02156A Digital Pressure _ Temperature Analyzer Installation 790
JT05800 Digital Thermometer Installation 791
Pilot Control Accumulator Precharge Test 792
Port Lock Solenoid Valve and Port Lock Spool Test 795
Remote Start Box Installation 796
9026 – Hydrostatic System 798
9026 – Hydrostatic System 05 – Theory of Operation 798
Charge Pump Operation 798
Hydrostatic Control Valve Operation 799
Hydrostatic Motor Operation (S.N. 192142— ) 801
Hydrostatic Motor Operation—Single Speed (S.N. —192141) 804
Hydrostatic Motor Operation—Two Speed (S.N. —192141) 806
Hydrostatic Pump Operation 808
Hydrostatic System Operation 812
Park Brake System Operation 813
Steering Control Operation 814
9026 – Hydrostatic System 15 – Diagnostic Informtion 816
Grinding Noise While Operating Machine (Single Speed) 816
Grinding Noise While Operating Machine (Two Speed) 818
Hydrostatic Pump Or Hydrostatic Motor Noise 820
Hydrostatic System Component Location 823
Hydrostatic System Schematic 825
Low Power 830
Machine Does Not Move In Either Direction 832
Machine Will Not Shift Into Or Out Of High Speed 835
Mistracking 837
Park Brake Does Not Hold (Single Speed) 841
Park Brake Does Not Hold (Two Speed) 843
Park Brakes Do Not Release (Single Speed) 845
Park Brakes Do Not Release (Two Speed) 848
Slow Response To Changes In Speed 851
Wheels or Tracks Powered On One Side, Not The Other 853
9026 – Hydrostatic System 25 – Tests 855
Engine Speed Control for Testing 855
Hydrostatic Pump Control Neutral Adjustment 857
Hydrostatic Pump Flow Test 859
Hydrostatic Pump Mechanical Neutral Adjustment 862
Hydrostatic Pump System Pressure Relief Test 866
Park Brake Release Pressure Test 869
Track Speed Test 872
9031 – Heating and Air Conditioning 875
9031 – Heating and Air Conditioning 05 – Theory of Operation 875
Air Conditioning System Cycle of Operation 875
9031 – Heating and Air Conditioning 15 – Diagnostic Informtion 876
Air Conditioner Runs Constantly, Too Cool 876
Air Conditioning and Heater System Component Location 878
Air Conditioning Does Not Cool Interior of Cab 879
Air Conditioning System Does Not Operate 887
Heater Does Not Warm Interior of Cab 892
Heater System Does Not Operate 895
Interior Windows Continue to Fog 899
9031 – Heating and Air Conditioning 25 – Tests 901
Air Conditioner and Heater Operational Checks 901
Air Conditioner Compressor Clutch Test 905
Air Conditioner Freeze Control Switch Test 906
Air Conditioning High-Low Pressure Switch Test 908
Operating Pressure Diagnostic Chart 910
R134a Oil Charge Capacity 913
R134a Refrigerant Cautions 914
R134a Refrigerant Charge Capacity 915
Refrigerant Cautions and Proper Handling 916
Refrigerant Leak Testing 917
9900 – Dealer Fabricated Tools 918
DFT1318 Motor Speed Sensor Test Harness 918
DFT1325 Solenoid Power Harness 920
DFT1325 Solenoid Power Harness 923

FILELIST:
TX1076018A – DFT1325 Solenoid Power Harness
TX1067835A – DFT1318 Motor Speed Sensor Test Harness
T8426AD – Pressure Switch
TX1066728 – Heating and Air Conditioning System Component Location
T142307 – Refrigerant System Cycle Of Operation
TX1067839 – DFT1318 Motor Speed Sensor Test Harness Wiring Diagram
TX1108969 – Air Conditioner Freeze Control Switch Connector
T198387A – Air Conditioner Compressor Clutch Test
TX1065429 – Park Brake Release Line—Two Speed Shown
TX1182568 – Neutral Adjusting Screw
TX1070858 – Servo Cylinders and Test Ports
TX1064362 – Hydrostatic Pump Port Location (right side)
TX1064361 – Hydrostatic Pump Port Location (left side)
TX1080409 – 329D and 333D Two Speed Hydrostatic System Schematic (S.N. 192142— )
TX1071248 – 329D and 333D Two Speed Hydrostatic System Schematic (S.N. —192141)
TX1080408 – 329D Single Speed Hydrostatic System Schematic (S.N. 192142— )
TX1071247 – 329D Single Speed Hydrostatic System Schematic (S.N. —192141)
TX1067518A – Engine Speed Control
TX1065417A – Engine Speed Dial
TX1080617 – Hydrostatic System Component Location—329D and 333D Two Speed
TX1080613 – Hydrostatic System Component Location—329D Single Speed
TX1065634 – Left and Right Joystick—H Pattern of Control
TX1065429 – Park Brake Operation—Two Speed Shown
TX1082279 – Hydrostatic Motor Schematic
TX1082265A – Rotating Group Components
TX1081860A – Hydrostatic Motor Port Connections
TX1081859A – Hydrostatic Motor Components
TX1080456 – Hydrostatic Control Valve—Two Speed (S.N. 192142— )
TX1065321 – Hydrostatic Control Valve—Two Speed (S.N. —192141)
TX1064370 – Charge Pressure Relief Valve
TX1064369 – High Pressure Relief and Charge Check Valve relief mode)
TX1064368 – High Pressure Relief and Charge Check Valve (charging mode)
TX1032573 – Hydrostatic Pump (neutral position)
T198447 – Two Speed Operation
T198446 – Single Speed Operation
TX1065219 – Hydrostatic Motors—Two Speed
T210820 – Single Speed Operation
TX1065113 – Hydrostatic Motors—Single Speed
TX1071201 – Hydraulic Pump
TX1065780 – Charge Pump Location
TX1035736A – Left Joystick—ISO Pattern of Control
TX1082267A – Electrohydraulic (EH) Componentsf
TX1067163A – Hydraulic Fan Motor Case Drain Plumbing
TX1066796A – Fan Speed Test
TX1066797A – Rear Grille
TX1066785A – Charge Pump Outlet Port
TX1066651A – Auxiliary Couplers
TX1066650A – Digital Hydraulic Flowmeter Tester
TX1089590A – Hydraulic Pump Test Connections (318D EH machine shown)
TX1089640A – Hydraulic Pump Connections (318D EH machine shown)
T6222AM – Function Drift Measurement
TX1103368A – Fan Bypass Valve Test—326D, 328D, 329D, 332D, 333D Machines
TX1103369A – Fan Bypass Valve Test—318D, 319D, 320D and 323D Machines
TX1065376A – Fan Bypass Valve Test
TX1067164A – Hydraulic Fan Motor Case Drain Test
TX1067448A – Hydraulic System Relief Valve (manual controls shown, EH controls similar)
TX1066435 – Boom Release Cable Adjustment
TX1066129A – Boom Release Handle
TX1066128A – Boom Release Handle Access Cover
TX1066599A – Pilot Control Accumulator Precharge Test
TX1065417A – Remote Start Box Installation
T8543AI – JT02156A Digital Pressure
T6808CE – JT05800 Digital Thermometer
TX1066766A – Bucket Curl Circuit Relief Valve Test
TX1066765A – Bucket Dump Circuit Relief Valve Test
TX1066764 – Boom Step
TX1066768 – Electric
TX1066763A – Boom Up Circuit Relief Valve Test (right side) (328D shown, other machines similar)
TX1066762A – Boom Up Circuit Relief Valve Test (left side) (328D shown, other machines similar)
TX1065376A – Charge Pressure Relief Test
TX1064333 – Hydraulic System Component Location—333D Shown (329D is similar)
TX1085939 – Hydraulic System Schematic (S.N. 194402— ) (page 2 of 2)
TX1079998 – Hydraulic System Schematic (S.N. —194401) (page 2 of 2)
TX1101106 – Hydraulic System Schematic (S.N. —194401) (page 1 of 2)
TX1079997 – Hydraulic Control Valve Schematic
TX1101108 – Hydraulic Fan Component Location
TX1065006 – Hydraulic Pump
TX1064963 – Self Leveling Valve
TX1071201 – High Flow Pump
TX1064899 – High Flow Pump
TX1064672 – Hydraulic Oil Filter Manifold
TX1079996 – Hydraulic Control Valve Component Location
TX1101105 – Hydraulic Reversing Fan Schematic
TX1101112 – Hydraulic Reversing Fan Component Location
TX1101104 – Hydraulic Fan Schematic
TX1063673 – Power Train Component Location—329D, 333D Two Speed (S.N. —192141 shown)
TX1082421 – Hydrostatic Motor Gearbox Component Location (S.N. 192142— )
TX1064311 – Hydrostatic Motor Gearbox Component Location (two speed motor shown)
TX1064200 – Power Train Component Location—329D Single Speed (S.N. —192141 shown)
TX1064145 – Track Adjuster and Recoil Spring Component Location
RW4218 – Blade Terminals
T138057 – Tool Position For Insertion
TX1128310A – Motor Speed Sensor Remove and Install (right side shown)
TX1067295A – Backup Alarm
TX1093790A – Joystick Harness Routing
TX1070262 – Joystick Disassemble and Assemble
TX1128163 – Motor Speed Sensor Remove and Install (sensor installed)
TX1128164 – Motor Speed Sensor Remove and Install (air gap measurement)
TX1067293A – Right Joystick Controller Bracket
TX1067292A – Right Joystick Controller
TX1067291A – Right Joystick Controller
TX1067279A – Right Joystick Mounting Cap Screws
TX1067274A – Operators Station
TX1067278A – Left Joystick Controller Bracket
TX1067277A – Left Joystick Controller
TX1067276A – Left Joystick Controller
TX1067275A – Left Joystick Cap Screws
TX1067269A – Control Panel
TX1067244A – Engagement and Monitor Unit (EMU)
TX1071189 – Controller Area Network Circuit Schematic
TX1045884 – Common Alternator Circuit
TX1049045A – Service ADVISOR—Diagnostic Trouble Codes
TX1066930 – Service ADVISOR™ Connector
TX1067243A – Back of Engagement and Monitor Unit (EMU)
TX1067242A – Engagement and Monitor Unit (EMU)
TX1067224A – Engine Control Unit (ECU)
TX1168610 – Generic CAN Circuit Schematic
TX1071195 – Quik-Tatch™ Circuit Schematic
TX1120091 – Engine Control Unit Circuit Schematic (2 of 2)
TX1102491 – Engine Control Unit Circuit Schematic (1 of 2)
TX1102490 – Start and Charge Circuits Schematic
TX1071200 – Back-Up Alarm Circuit Schematic
TX1110212 – Electrohydraulic (EH) Controls Circuits Schematic
TX1110211 – Engagement and Monitor Unit (EMU) Circuit Schematic (2 of 2)
TX1071197 – Engagement and Monitor Unit (EMU) Circuit Schematic (1 of 2)
TX1101634 – Quik-Tatch Boom Harness (W14) Wiring Diagram
TX1065063 – Quik-Tatch Frame Harness (W13) Wiring Diagram
TX1065859 – Quik-Tatch Frame Harness (W13) Component Location
TX1065061 – Attachment Control Boom Harness (W12) Wiring Diagram
TX1065060 – Attachment Control Frame Harness (W11) Wiring Diagram
TX1066623 – Attachment Control Frame Harness (W11) Component Location
TX1157033 – Hydraulic Valve Harness (W10) Wiring Diagram
TX1157021 – Hydraulic Valve Harness (W10) Component Location
TX1101636 – Fan Bypass Solenoid Harness Wiring Diagram
TX1101000 – Heater and Air Conditioner Harness (W16) Wiring Diagram
TX1067558 – Heater and Air Conditioner Harness (W16) Component Location
TX1065065 – Quik-Tatch Actuator Harness (W15) Wiring Diagram
TX1132686 – Dual Flasher Harness (W5) Wiring Diagram (later machines)
TX1065051 – Dual Flasher Harness (W5) Wiring Diagram (early machines)
TX1132687 – Dual Flasher Harness (W5) Component Location (later machines)
TX1065488 – Dual Flasher Harness (W5) Component Location (early machines)
TX1065056 – Fan Speed Solenoid Harness (W9) Wiring Diagram
TX1067238 – Fan Speed Solenoid Harness (W9) Component Location
TX1065055 – Radio Harness (W8) Wiring Diagram
TX1065487 – Radio Harness (W8) Component Location
TX1065054 – Rear Light Harness (W7) Wiring Diagram
TX1101703 – Main Harness (W3) Wiring Diagram—Without Heater and Air Conditioning (S.N. 196102— ) (1 of 3)
TX1089177 – Main Harness (W3) Wiring Diagram—With Heater and Air Conditioning (S.N. 196102— ) (3 of 3)
TX1101702 – Main Harness (W3) Wiring Diagram—With Heater and Air Conditioning (S.N. 196102— ) (2 of 3)
TX1101699 – Main Harness (W3) Wiring Diagram—With Heater and Air Conditioning (S.N. 196102— ) (1 of 3)
TX1065981 – Main Harness (W3) Wiring Diagram (S.N. —196101) (3 of 3)
TX1101698 – Main Harness (W3) Wiring Diagram (S.N. —196101) (2 of 3)
TX1089180 – Main Harness (W3) Wiring Diagram—Without Heater and Air Conditioning (S.N. 196102— ) (3 of 3)
TX1101705 – Main Harness (W3) Wiring Diagram—Without Heater and Air Conditioning (S.N. 196102— ) (2 of 3)
TX1101678 – Main Harness (W3) Component Location (1 of 2)
TX1071786 – Cab Harness (W2) Wiring Diagram (2 of 2)
TX1071783
TX1091128 – Cab Harness (W2) Component Location
TX1101697 – Main Harness (W3) Wiring Diagram (S.N. —196101) (1 of 3)
TX1066727 – Main Harness (W3) Component Location (2 of 2)
TX1120090 – System Functional Schematic (SE4—SE6)
TX1101626 – System Functional Schematic (SE1—SE3)
TX1041975 – Test Connection for Relays B
T141788 – Test Connection for Relays A
TX1085648 – Relay Center
TX1080101 – Fuse Blocks
T143000 – Electrical Schematic Symbols
TX1020361 – Wiring Diagram Example
TX1001190 – System Functional Schematic Example
TX1123662 – System Functional Schematic (SE19—SE21)
TX1132692 – System Functional Schematic (SE16—SE18)
TX1071185 – System Functional Schematic (SE13—SE15)
TX1110210 – System Functional Schematic (SE10—SE12)
TX1157032 – System Functional Schematic (SE7—SE9)
TX1064680 – Engine Intake and Exhaust Component Location
TX1064639 – Engine Fuel System Component Location (if equipped)
TX1064678 – Engine Fuel System Component Location
TX1064630 – Engine Cooling System Component Location

EXCERPT:
Manual Tracking Adjustment Procedure
Manual tracking adjustment (MTA) allows for the fine adjustment of higher speed tracking so the machine travels in a straighter path when the travel function is not commanding a steer. Using MTA can help compensate for machine variations, such as differences in tire size from side-to-side or uneven tire inflation, beyond what can be done using hydrostatic system calibration.
Upon completion of hydrostatic system calibration, the MTA setting is reset to 0.
The stored MTA setting is applied to both forward and reverse travel.
1. With machine systems at operating temperatures, drive machine with travel function in straight forward to check current machine tracking.
2. Press and hold the MENU button on the engagement and monitor unit (EMU) for 5 seconds to access the service menu.
3. Press NEXT until MAIN MENU MANUAL TRACKING displays. Press SELECT.
4. NEXT TO GO RIGHT BACK TO GO LEFT SELECT TO STORE displays. The display shows the current MTA setting with an arrow pointing left or right and a numerical value.
5. NOTE:
Press the MENU button to exit MTA and return to the normal runtime display. Change MTA setting as needed. Press the NEXT button to increment MTA setting to right. Press the BACK button to increment the MTA setting to the left.
Possible MTA setting values are 0—100 for both right and left.
6. Press the SELECT button to save the MTA setting and return to the normal runtime display.
7. Drive machine to verify manual tracking adjustment. Repeat procedure as necessary.

Posted on

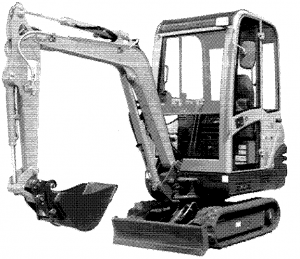
Hitachi ZX27U, ZX30U, ZX35U, ZX40U, ZX50U Hydraulic Excavator Factory Service & Shop Manual


Pages from Hitachi ZX40U, ZX50U Hydraulic Excavator Workshop Manual


Download Link

INSTANT DOWNLOAD (add to cart)

Complete workshop & service manual with electrical wiring diagrams for Hitachi ZX27U, ZX30U, ZX35U, ZX40U, ZX50U Hydraulic Excavator. It’s the same service manual used by dealers that guaranteed to be fully functional and intact without any missing page.

This Hitachi ZX27U, ZX30U, ZX35U, ZX40U, ZX50U Hydraulic Excavator service & repair manual (including maintenance, overhaul, disassembling & assembling, adjustment, tune-up, operation, inspecting, diagnostic & troubleshooting…) is divided into different sections. Each section covers a specific component or system with detailed illustrations. A table of contents is placed at the beginning of each section. Pages are easily found by category, and each page is expandable for great detail. The printer-ready PDF documents work like a charm on all kinds of devices.

FILELIST:
Hitachi ZX27U, ZX30U, ZX35U Hydraulic Excavator Technical Manual.pdf
Hitachi ZX27U, ZX30U, ZX35U Hydraulic Excavator Workshop Manual.pdf
Hitachi ZX40U, ZX50U Hydraulic Excavator Technical Manual.pdf
Hitachi ZX40U, ZX50U Hydraulic Excavator Workshop Manual.pdf
T1M9-E-00 – Hitachi ZAXIS 40U-2, ZAXIS 50U-2 Excavator Technical Manual.pdf
T1M9-E-01 – Hitachi ZX40U-2, ZX50U-2 Hydraulic Excavator Technical Manual.pdf
T1NG-E-00 – Hitachi ZX40U-3, ZX40U-3F, ZX50U-3, ZX50U-3F Hydraulic Excavator Technical Manual.pdf
W1M9-E – Hitachi ZAXIS 40U-2, ZAXIS 50U-2 Excavator Workshop Manual.pdf
W1MJ-E-00 – Hitachi ZAXIS 27U-2, 30U-2, 35U-2 Workshop Manual [incld. Engine Manual for 3TNV82A, 3TNV84(T), 3TNV88, 4TNV84(T), 4TNV88, 4TNV94L, 4TNV98(T), 4TNV106(T)].pdf
W1NG-E-00 – Hitachi ZX40U-3, ZX40U-3F, ZX50U-3, ZX50U-3F Hydraulic Excavator Workshop Manual.pdf
Electrical Circuit Diagrams.pdf
EM1LA21 – Hitachi ZAXIS 27U, 30U, 35U, 40U, 50U Excavator Operator’s Manual.pdf
EM1LNEN11 – Hitachi ZAXIS 16, ZAXIS 18, ZAXIS 25 Excavator Operator’s Manual.pdf
EM1M7-OP2-1 – Hitachi ZAXIS 30U-2, 35U-2, 40U-2, 50U-2 PAT Blade, Hydraulic Angle & Tilt Operator’s Manual.pdf
EM1M722 – Hitachi ZAXIS 27U-2, 30U-2, 35U-2, 40U-2, 50U-2 Hydraulic Excavator Operator’s Manual.pdf

EXCERPT:
UNDERCARRIAGE / Swing Bearing
REMOVE AND INSTALL SWING BEARING
The procedures described below starts after removing the upper structure.
Removal
1. Put matching marks on inner race (1) of the swing bearing and track frame (2).
2. Remove mounting bolts (3) (20 used) of the swing bearing inner race.: 19 mm
CAUTION: Swing bearing weight: 55 kg (121 lb)
3. Attach lifting tools (ST 0052) to swing bearing (4) outer race, lift swing bearing (4) by crane and remove it.

Posted on

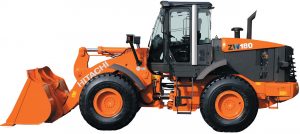
Hitachi ZW220, ZW250, ZW310 Wheel Loader Factory Service & Shop Manual


Pages from W4HA-E-00 – Hitachi ZW310 Wheel Loader Workshop Manual


INSTANT DOWNLOAD


Complete workshop & service manual with electrical wiring diagrams for Hitachi ZW220, ZW250, ZW310 Wheel Loader. It’s the same service manual used by dealers that guaranteed to be fully functional and intact without any missing page.

This Hitachi ZW220, ZW250, ZW310 Wheel Loader service & repair manual (including maintenance, overhaul, disassembling & assembling, adjustment, tune-up, operation, inspecting, diagnostic & troubleshooting…) is divided into different sections. Each section covers a specific component or system with detailed illustrations. A table of contents is placed at the beginning of each section. Pages are easily found by category, and each page is expandable for great detail. The printer-ready PDF documents work like a charm on all kinds of devices.

FILELIST:
TT4GB-E-00 – Hitachi ZW220, ZW250 Wheel Loader Technical Manual (Troubleshooting).pdf
TT4HA-E-00 – Hitachi ZW310 Wheel Loader Technical Manual (Troubleshooting).pdf
W4GC-E-00 – Hitachi ZW220, ZW250 Wheel Loader (Standard Specification) Workshop Manual.pdf
W4HA-E-00 – Hitachi ZW310 Wheel Loader Workshop Manual.pdf
WCLA-0595-ZW – Hitachi ZW220, ZW250, ZW310 Transmission Control (TCM Transmission).pdf
WCLA-0596-ZW – Hitachi ZW310 Hydraulic Circuit Diagram (EU Standard).pdf
EM4GF-EN2-1 – Hitachi ZW180, ZW220, ZW250, ZW310 Wheel Loader Operator’s Manual.pdf
TO4HA-E-00 – Hitachi ZW310 Wheel Loader Technical Manual (Operational Principle).pdf

EXCERPT:
BODY (TRAVEL SYSTEM) / Drive Unit
Disassembly of Drive Unit
Removal and Disassembly of Torque Converter
Drainage of Oil and Removal of Charging Pump
1. Hoist the drive unit vertically or place it on a stand.
Remove drain plug (83) from transmission case
(30). Drain oil from transmission case (30). :17 mm
CAUTION: Drive unit weight: 890 kg (2000 lb)
2. Remove bolts (107) (4 used) and washers (108) (4 used) from suction tube (28). Remove gasket (109), O-ring (110) and strainer (29) from transmission case (30). : 19 mm
3. Remove bolts (111) (8 used) from split flanges (112) (4 used). Remove suction tubes (3) (2 used) and O-rings (113) (2 used) from charging pump (4). : 17 mm, 36 mm
4. Remove bolts (114) (2 used) and washers (115) (2 used) from charging pump (4). : 19 mm


INSTANT DOWNLOAD


Posted on

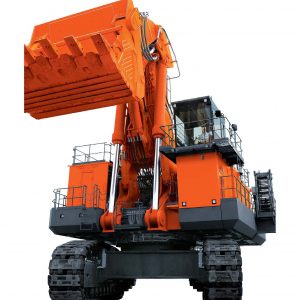
Hitachi EX5500 Hydraulic Excavator Factory Service & Shop Manual


Pages from W118E00 – Hitachi EX5500 Hydraulic Excavator Workshop Manual


INSTANT DOWNLOAD


Complete workshop & service manual with electrical wiring diagrams for Hitachi EX5500 Hydraulic Excavator. It’s the same service manual used by dealers that guaranteed to be fully functional and intact without any missing page.

This Hitachi EX5500 Hydraulic Excavator service & repair manual (including maintenance, overhaul, disassembling & assembling, adjustment, tune-up, operation, inspecting, diagnostic & troubleshooting…) is divided into different sections. Each section covers a specific component or system with detailed illustrations. A table of contents is placed at the beginning of each section. Pages are easily found by category, and each page is expandable for great detail. The printer-ready PDF documents work like a charm on all kinds of devices.

FILELIST:
T118E00 – Hitachi EX5500 Hydraulic Excavator Technical Manual.pdf
W118E00 – Hitachi EX5500 Hydraulic Excavator Workshop Manual.pdf
Attach to TT18BE-00 – EX5500-5 Hydraulic Circuit Diagram (Loading Shove).pdf
Attach to TT18BE-00 – Hitachi EX5500-5 Excavator Connectors.pdf
EM18A22 – Hitachi EX3500-2 Hydraulic Excavator Operator’s Manual.pdf
Hitachi EX5500-5 Electrical Circuit Diagram 1 of 3.pdf
Hitachi EX5500-5 Electrical Circuit Diagram 2 of 3.pdf
Hitachi EX5500-5 Electrical Circuit Diagram 3 of 3.pdf

EXCERPT:
UPPERSTRUCTURE / Pilot Valve
REMOVE AND INSTALL FRONT / SWING PILOT VALVE
CAUTION:
1. Escaping fluid under pressure can penetrate the skin and eyes,causing serious injury. Avoid this hazard by relieving pressure before disconnecting hydraulic or other lines.
2. Hydraulic oil may be hot just after operation. Hot hydraulic oil may spout, possibly causing severe burns. Be sure to wait for oil to cool before starting work.
3. Do not quickly loosen air breather cap (1) on the hydraulic oil tank. Air breather cap (1) may pop off due to internal pressure.
Always turn air breather cap (1) slowly to release any remaining pressure before removing it.
Preparation:
1. Park the machine on a level solid surface. Lower the front attachment to the ground.
2. Stop the engine. Turn air breather cap (1) on the hydraulic oil tank approximately 30° counterclockwise to release any remaining pressure.


INSTANT DOWNLOAD