Pages from DG715 – Dump Truck 210E Shop Manual
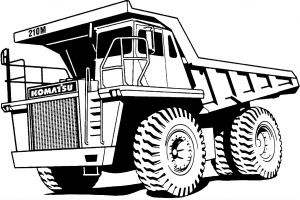
Complete workshop & service manual with electrical wiring diagrams for Komatsu Dump Truck 210E. It’s the same service manual used by dealers that guaranteed to be fully functional and intact without any missing page.
This Komatsu Dump Truck 210E service & repair manual (including maintenance, overhaul, disassembling & assembling, adjustment, tune-up, operation, inspecting, diagnostic & troubleshooting…) is divided into different sections. Each section covers a specific component or system with detailed illustrations. A table of contents is placed at the beginning of each section. Pages are easily found by category, and each page is expandable for great detail. The printer-ready PDF documents work like a charm on all kinds of devices.
DG610 – Dump Truck 210E Shop Manual.pdf
DG615 – Dump Truck 210E Operation & Maintenance Manual.pdf
DG692 – Dump Truck 210E Operation & Maintenance Manual.pdf
DG694 – Dump Truck 210E Shop Manual.pdf
DG714 – Dump Truck 210E Operation & Maintenance Manual.pdf
DG715 – Dump Truck 210E Shop Manual.pdf
DG725 – Dump Truck 210E Operation & Maintenance Manual.pdf
EXCERPT:
TABLE OF CONTENTS
SUBJECT . . . . . SECTION
GENERAL INFORMATION . . . . . A
STRUCTURES . . . . . . . . . . . . B
ENGINE, FUEL, COOLING AND AIR CLEANER . . . . . . . C
ELECTRIC SYSTEM (24 VDC. NON-PROPULSION) . . . . . D
TRANSMISSION AND PTO . . . . . F
DRIVE AXLE, SPINDLES AND WHEELS . . . . . . . . G
HYDRAIR® II SUSPENSIONS . . . . . . H
BRAKE CIRCUIT . . . . . . . . . . . J
HYDRAULIC SYSTEM . . . . . . . . L
OPTIONS AND SPECIAL TOOLS . . . . . . . . . . . . M
OPERATOR’S CAB . . . . . . . . N
LUBRICATION AND SERVICE . . . . . . P
ALPHABETICAL INDEX . . . . . . Q
SYSTEM SCHEMATICS . . . . . . . R
…
STEERING CONTROL VALVE
Removal
1. Shut down engine and bleed down steering circuit.
Allow at least 90 seconds for system to bleed.
Open the manual bleeddown valves to release the pressure from the brake accumulators.
NOTE: To insure the hydraulic oil has completely drained from the accumulator, turn the steering wheel.
If the wheels do not turn, all the hydraulic pressure has been drained from accumulator.
2. Clean exterior of steering control valve thoroughly.
3. Tag and disconnect hydraulic lines. Plug lines and ports securely to prevent spillage and possible contamination to the system.
4. Remove capscrews at flange (3, Figure 5-1).
Remove nuts (6), washers (7 & 8) and capscrew at each rubber bushing. Lower and remove valve.
Installation
1. Assemble steering control valve (10, Figure 5-1) to mounting plate (11). Insert assembly through bottom of cab floor and align splines on valve column (4) with the flange assembly (3). Install capscrews (9), from bottom side of mounting
plate, through the rubber bushings (12). Install flatwashers, lockwashers and nuts. Tighten to standard torque.
2. Install capscrews in flange (3) and tighten to standard torque.
3. Remove caps from hydraulic lines. Be certain that previously tagged lines are connected to their respective ports according to the markings on the steering control valve assembly.
…
