Pages from CEBD008300 – Dump Truck 530M Shop Manual
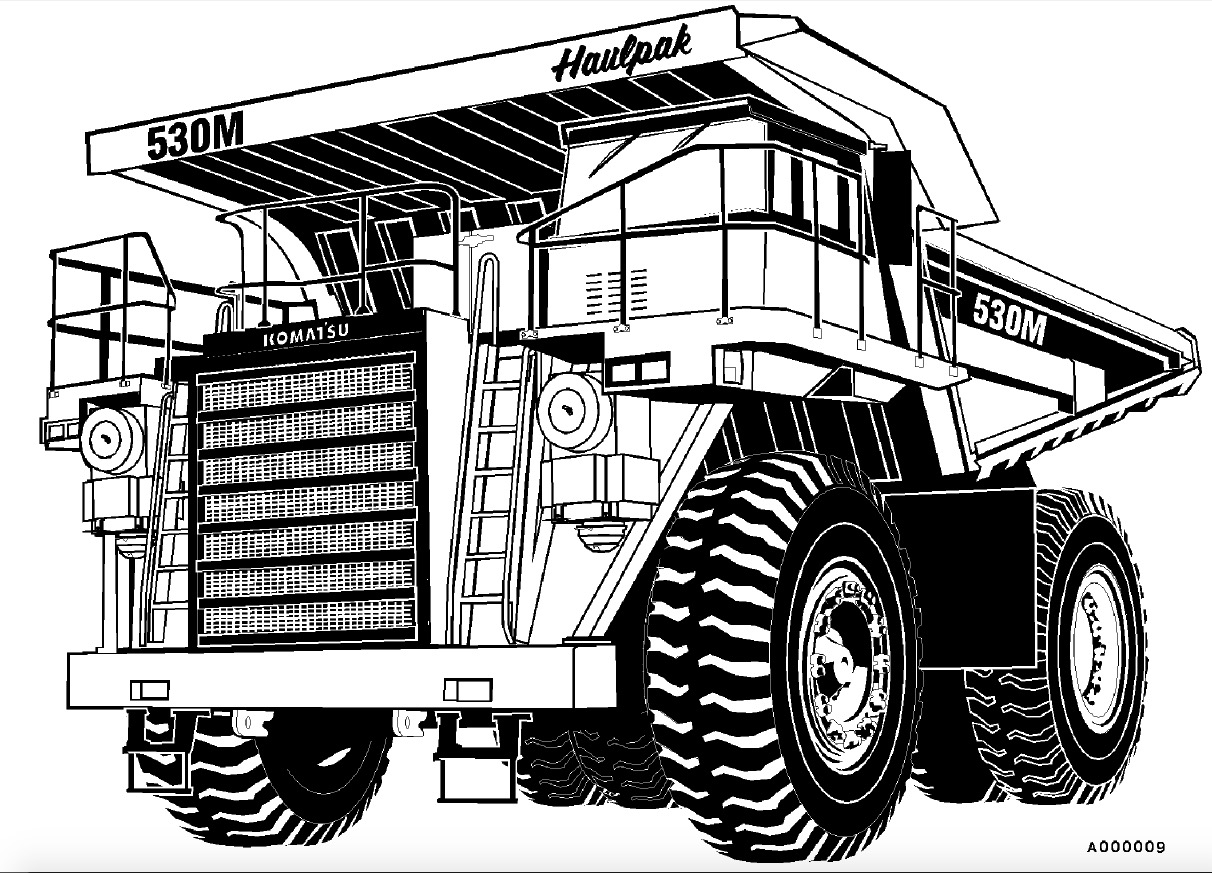
Complete workshop & service manual with electrical wiring diagrams for Komatsu Dump Truck 530M. It’s the same service manual used by dealers that guaranteed to be fully functional and intact without any missing page.
This Komatsu Dump Truck 530M service & repair manual (including maintenance, overhaul, disassembling & assembling, adjustment, tune-up, operation, inspecting, diagnostic & troubleshooting…) is divided into different sections. Each section covers a specific component or system with detailed illustrations. A table of contents is placed at the beginning of each section. Pages are easily found by category, and each page is expandable for great detail. The printer-ready PDF documents work like a charm on all kinds of devices.
CEBD008300 – Dump Truck 530M Shop Manual.pdf
DG716 – Dump Truck 530M Operation & Maintenance Manual.pdf
EXCERPT:
TABLE OF CONTENTS
SUBJECT . . . SECTION
GENERAL INFORMATION . . . A
STRUCTURES . . . . . B
ENGINE, FUEL, COOLING AND AIR CLEANER . . . . . . C
ELECTRIC SYSTEM (24 VDC. NON-PROPULSION) . . . . D
TRANSMISSION AND TORQUE CONVERTER . . . . . . . F
DRIVE AXLE, SPINDLES AND WHEELS . . . . . G
SUSPENSIONS . . . H
BRAKE CIRCUIT . . . . J
AIR SYSTEM (NO AIR SYSTEM ON THIS TRUCK) . . . . . . K
HYDRAULIC SYSTEM . . . . . . L
OPTIONS AND SPECIAL TOOLS . . . . M
OPERATOR’S CAB . . . . . . N
LUBRICATION AND SERVICE . . . . . . P
ALPHABETICAL INDEX . . . . Q
SYSTEM SCHEMATICS . . . . . R
…
Assembly
1. Refer to ‘‘Seal Replacement’’ for flange plate seal installation instructions.
2. Place rear pump body (11, Figure 3-6) so that the matching mark made in disassembly step 2 will be facing you. If a new body must be used, make sure the side facing you is the same as the one marked on the old body.
NOTE: Observe that the body has a wide and a narrow boss. The side having the wide boss is always the suction side of the body.
3. Using clean hydraulic oil, coat the inside of pump body (11).
4. Out of the group of parts from the rear section, examine the two isolation plates. You will find that they are slightly different. Choose the one having the rounded edge as shown by the arrow in Figure 3-11. With the rounded edge down, install the plate (on the suction side) in the bottom of the body.
5. Install back-up ring (7, Figure 3-12), O-ring (6), and ring retainer (2).
6. With the bronze side facing up and the rounded trap slots toward the outlet side of the body, slide pressure plate (2, Figure 3-13) down into the gear bores until it rests firmly at the bottom of the pump body. Do not force the plate down the gear bores.
If the plate hangs or binds on the way down, work it back and forth carefully until it slides freely into position.
…