Posted on

Hyster H150-275H, P150-200B (C007) Repair Service Manual


INSTANT DOWNLOAD


Complete service repair manual with electrical wiring diagrams for Hyster H150-275H, P150-200B (C007) Forklifts Trucks, with all the shop information to maintain, diagnose, repair, and rebuild like professional mechanics.

Hyster H150-275H, P150-200B (C007) workshop service & repair manual includes:
* Numbered table of contents easy to use so that you can find the information you need fast.
* Detailed sub-steps expand on repair procedure information
* Numbered instructions guide you through every repair procedure step by step.
* Troubleshooting and electrical service procedures are combined with detailed wiring diagrams for ease of use.
* Notes, cautions and warnings throughout each chapter pinpoint critical information.
* Bold figure number help you quickly match illustrations with instructions.
* Detailed illustrations, drawings and photos guide you through every procedure.
* Enlarged inset helps you identify and examine parts in detail.

Total Pages: 765 pages
File Format: PDF
Language: English
Section
Part No.
SRM Number Rev Date
FRAME
910051

0100 SRM 0141

10/88
PERKINS DIESEL ENGINES 6.3544, T6.3544
910054

0600 SRM 0007

05/97
GM ENGINE V8-350 (5.7L)
599805

0600 SRM 0104

09/93
COOLING SYSTEM
897934

0700 SRM 0626

11/01
TWO-BARREL CARBURETOR
910058

0900 SRM 0012

03/97
LPG FUEL SYSTEM
910060

0900 SRM 0016

03/97
WEBER CARBURETOR WITH GOVERNOR
897128

0900 SRM 0347

12/92
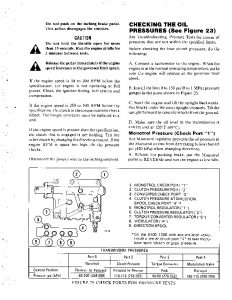
OIL CLUTCH and JET PUMP
910062

1200 SRM 0022

02/97
THREE-SPEED PS TRANS – DESCR / OPER
899661

1300 SRM 0033

03/97
FIVE-SPEED MANUAL TRANSMISSION
910066

1300 SRM 0039

10/87
SPEED REDUCER
910068

1300 SRM 0044

01/97
THREE-SPEED PS TRANSMISSION – REPAIR
910070

1300 SRM 0142

04/83
DIFFERENTIAL
910072

1400 SRM 0046

11/03
PLANETARY GEAR AXLE
910030

1400 SRM 0047

11/03
DRIVE AXLE
910073

1400 SRM 0049

09/03
DRIVE AXLE
910076

1600 SRM 0054

10/03
STEERING AXLE
910031

1600 SRM 0071

07/97
BRAKE SYSTEM (AIR)
910084

1800 SRM 0083

10/95
BRAKE SYSTEM (HYDRAULIC)
910085

1800 SRM 0084

10/81
PARKING BRAKE
910088

1800 SRM 0146

06/87
AIR COMPRESSOR
910089

1800 SRM 0150

08/87
HYDRAULIC GEAR PUMPS
910091

1900 SRM 0097

10/03
FLOW CONTROL VALVE
910093

1900 SRM 0147

02/79
MAIN CONTROL VALVE (PARKER)
910098

2000 SRM 0099

02/97
MAIN CONTROL VALVE (HUSCO)
910099

2000 SRM 0100

02/97
TILT CONTROL VALVE
910101

2100 SRM 0102

07/94
TILT CYLINDERS
910102

2100 SRM 0103

10/03
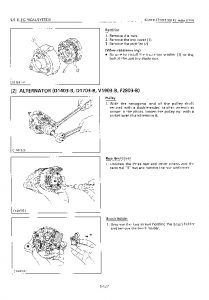
ALTERNATOR
899784

2200 SRM 0002

10/03
STARTER
910107

2200 SRM 0106

02/01
HIGH ENERGY IGNITION SYSTEM
899788

2200 SRM 0107

03/02
INSTRUMENT PANEL INDICATORS and SENDERS
910110

2200 SRM 0143

12/03
ELECTRICAL WARNING DEVICES
910111

2200 SRM 0144

05/97
ELECTRICAL SYSTEM TROUBLESHOOTING
899793

2200 SRM 0153

07/97
UPRIGHT
910117

4000 SRM 0127

09/84
PULPWOOD LOADER
910122

5000 SRM 0154

04/79
DIAGRAMS
910138

8000 SRM 0148

01/79
PERIODIC MAINTENANCE
910140

8000 SRM 0151

04/87
CAPACITIES and SPECIFICATIONS
910141

8000 SRM 0152

01/82

PART NO. 599795
Rev. 12/03

hyster-599805-09-93-srm0104…3
Cooling System…47
Safety Precautions Maintenance and Repair…48
General…51
Description…52
Radiator…52
Radiator Cap…52
Thermostat…52
Water Pump…53
Fan and Fan Shroud…53
Cooling System Checks…53
Radiator…53
Thermostat…53
Water Pump…54
Exhaust Leaks…54
Fan and Fan Shroud…54
Radiator Cleaning…54
Drain…54
Clean…54
Fill…55
Troubleshooting…56
hyster-899784-10-03-srm0002…91
toc…91
Alternator with Regulator…91
Safety Precautions Maintenance and Repair…92
General…95
Description…95
Alternator Repair…97
Alternator Type A…97
Remove and Disassemble…97
Clean…98
Assemble…99
Install…99
Alternator Type B…102
Remove and Disassemble…102
Clean…102
Assemble…103
Install…104
General Check and Adjustment…105
Low Output Check (Type A or Type B)…105
High Output Check (Type A or Type B)…107
Brushes Circuit Check…108
Delco Alternators…108
Motorola Alternators…109
Diodes Check…110
Diode Bridge Check…110
Delco and Leece-Neville Alternators…110
Motorola Alternators…110
Rotor Field Winding Check…111
Stator Windings Check…112
Voltage Regulator Check…112
Troubleshooting…112
hyster-899788-03-02-srm0107…117
toc…117
High Energy Ignition (HEI) System…117
Safety Precautions Maintenance and Repair…118
Description…121
Distributor Repair…123
Remove…123
Disassemble…123
Assemble…128
Install, If Crankshaft WAS NOT Rotated when Distributor was Remo…129
Install, If Crankshaft WAS Rotated when Distributor was Removed…129
Ignition Coil Replacement…130
Some Four- and Six-Cylinder Models…130
Remove…130
Install…131
V8, Some Four- and Six-Cylinder Models…131
Remove…131
Install…132
Electronic Module Replacement…133
Remove…133
Install…133
Sensing Coil Replacement…134
Remove…134
Install…134
Spark Plugs Replacement…134
Remove…134
Install…135
Visual Check…135
High Voltage Wires Check…135
Ignition Coil Check…136
Coil in Distributor Cap Design…136
Separate Coil Design…136
Sensing Coil, Check…137
Electronic Module Check…137
Ignition Timing Adjustment…137
GM V8-366 (6-liter) Ignition System Check…139
GM V6-LPG (4.3 liter) GM V6-LPG (4.3 liter) Ignition Timing and …139
Specifications…139
Troubleshooting…140
hyster-910030-11-03-srm0047…209
toc…209
Planetary Gear Axle…209
Safety Precautions Maintenance and Repair…210
General…213
Description…213
Operation…214
Planetary Gear Axle Repair…215
Remove…215
Disassemble…215
Planetary Axle, Disassemble…218
Assemble and Install…222
Planetary Axle, Assemble…223
Torque Specifications…228
Troubleshooting…231
tables…209
Table 1. Axle-to-Frame Fasteners…222
Table 2. Standard Torque Values for Axle Fasteners…228
Table 3. Drive Wheel Nut Torque…228
Differential…407
Safety Precautions Maintenance and Repair…408
General…411
Description…411
Differential Repair…411
Remove…411
Differential Carrier From Axle Housing, Remove…411
Differential and Ring Gear From Differential Carrier, Remove…415
Drive Pinion and Pinion Carrier From Differential Carrier, Remov…417
Disassemble…418
Differential and Ring Gear Assembly, Disassemble…418
Drive Pinion and Pinion Carrier, Disassemble…420
Clean and Inspect…422
Assemble…423
Pinion, Bearings, and Pinion Carrier, Assemble…423
Pinion Bearings, Adjust Preload…424
Press Method…424
Yoke or Flange Method…424
Triple-Lip Seal, Install…425
Pinion Carrier Shim Set, Adjust Thickness (Depth of Pinion)…426
Differential and Ring Gear, Assemble…428
Differential Gears Rotating Torque, Check…431
Differential and Ring Gear Assembly, Install…432
Differential Bearings, Preload Adjust…433
Ring Gear, Runout Check…434
Ring Gear Backlash, Adjust…434
Gear Set, Tooth Contact Pattern Check…436
Thrust Screw, Install and Adjust…438
Install…439
Differential Assembly Into Axle Housing, Install…439
Specifications…441
Troubleshooting…445
tables…407
Table 1. Ring Gear Backlash Adjustment Specifications…435
Table 2. Ring and Pinion Tooth Contact Adjustment…437
Table 3. General Specifications…441
Table 4. Rivet Installation Pressure…441
Table 5. Pinion Adjustment…441
Table 6. Pinion Preload Pressure…442
Table 7. Torque Specifications…443
Table 8. Torque Specifications for Metric Hardware…444
Table 9. Torque Specifications for Metric (Fine) Hardware…444
hyster-910073-09-03-srm0049…449
toc…449
Drive Axle…449
Safety Precautions Maintenance and Repair…450
General…453
Description…453
Drive Axle Repair…454
Disassemble (Type 1 Shown)…454
Clean…457
Inspect…457
Assemble (Type 1 Shown)…458
Torque Specifications…461
Troubleshooting…462
Steering Control Unit…465
Safety Precautions Maintenance and Repair…466
General…469
Description…469
Operation…469
Steering Wheel and Column Assembly Repair…471
Steering Column Assembly Repair…471
Type A Steering Column Assembly…471
Remove and Disassemble…471
Assemble and Install…473
Type B Steering Column Assembly…475
Remove and Disassemble…475
Assemble and Install…475
Steering Control Unit…478
Disassemble…478
Clean…481
Assemble…482
System Air Removal…487
Troubleshooting…487
Hydraulic Gear Pumps…543
Safety Precautions Maintenance and Repair…544
Description…547
Operation…548
Flow Control Valve…548
Relief Valve…549
Hydraulic Gear Pump Repair…549
Remove…549
Disassemble…550
Clean…550
Inspect…551
Assemble…554
Install…556
Pump Output Check…556
Method No. 1…556
Method No. 2…557
Hydraulic System Air Check…558
Tilt Cylinders…609
Safety Precautions Maintenance and Repair…610
General…613
Description…613
Tilt Cylinder Repair…613
Remove…613
Disassemble…613
Clean…613
Assemble…614
Tilt Cylinders With O-Ring or Single-Lip Seals…614
Tilt Cylinders for XM and XMS Models…615
Tilt Cylinders for H700-800A and Early Model H700-920B…616
Install…617
Tilt Cylinders Using Chevron Packing…618
Install…619
Tilt Cylinder Leak Check…621
Tilt Cylinder Stroke and Mast Tilt Angle Adjustment…622
Torque Specifications…623
Piston Rod Nut…623
Retainer…624
Troubleshooting…626
tables…609
Table 1. Movement Rates (Maximum) for Tilt Cylinders…622
Starter…629
Safety Precautions Maintenance and Repair…630
General…633
Description and Operation…633
Starter Repair…635
Remove…635
Disassemble…635
Clean…636
Assemble…636
Install…637
General Checks and Adjustments…637
Troubleshooting…640
Instrument Panel Indicators and Senders…645
Safety Precautions Maintenance and Repair…646
General…649
Description…650
Steering Column Gauges, Meters, and Indicators…650
LED Display Panel…650
Battery Discharge Indicators…650
Brush Wear Indicators…657
Motor Temperature Indicators…657
LX Series Display Panel…659
Hourmeter Functions…659
Battery Indicator Function…660
Status Code Function…661
ZX Series Display Panels…661
Display Panel…661
Basic Display Panels…661
Performance Display…664
Brush Wear Indicators…667
Adjustments – General…668
Replacement – General Information…668
Meter Replacement…669
Sender Replacement…670
Fuel Level Sender…670
Pressure and Temperature Sender…670
ITW Display Panel Replacement…671
Remove…671
Column Mount Display Panel (EV-100/200ZX Motor Controllers) Repl…672
Remove…672
Display Panel Assembly, Replace…672
Indicator LEDs…673
Battery Indicators…673
Digital Display (Performance Display Panel Only)…673
Status Code or Performance Level Switches and Indicator LEDs (Pe…673
Basic Display Panel, Replace Parts…673
Performance Display Panel, Replace Parts…675
Dash Mount Display Panel (EV100/200ZX Motor Controllers) Replace…676
Remove and Replace…676
Specifications…676
Meter Specifications…676
Sender Specifications…677
Troubleshooting…677
Meter…677

Hyster H150-275H, P150-200B (C007) Repair Service Manual

INSTANT DOWNLOAD


Posted on

Hyster S60-120E (C004) Repair Service Manual


INSTANT DOWNLOAD


Complete service repair manual for Hyster S60-120E (C004) Forklifts Trucks, with all the shop information to maintain, diagnose, repair, and rebuild like professional mechanics.

Hyster S60-120E (C004) workshop service & repair manual includes:
* Numbered table of contents easy to use so that you can find the information you need fast.
* Detailed sub-steps expand on repair procedure information
* Numbered instructions guide you through every repair procedure step by step.
* Troubleshooting and electrical service procedures are combined with detailed wiring diagrams for ease of use.
* Notes, cautions and warnings throughout each chapter pinpoint critical information.
* Bold figure number help you quickly match illustrations with instructions.
* Detailed illustrations, drawings and photos guide you through every procedure.
* Enlarged inset helps you identify and examine parts in detail.

Total Pages: 745 pages
File Format: PDF
Language: English

Section Part No. SRM Number Rev Date
FRAME 910230 0100 SRM 0164 05/88
GM ENGINE 899766 0600 SRM 0003 08/03
PERKINS ENGINES 4.236, 4.2482 910150 0600 SRM 0105 06/97
COOLING SYSTEM 899771 0700 SRM 0108 06/97
ROCHESTER CARBURETOR 910057 0900 SRM 0011 02/97
LPG FUEL SYSTEM 899772 0900 SRM 0015 09/93
OIL CLUTCH 910232 1200 SRM 0190 10/81
SINGLE-SPEED PS TRANS – DESCR / OPER 899774 1300 SRM 0113 06/97
SINGLE-SPEED PS TRANSMISSION – REPAIR 910234 1300 SRM 0122 06/85
TWO-SPEED MANUAL TRANSMISSION 910235 1300 SRM 0187 04/84
DRIVE AXLE 910236 1400 SRM 0092 01/83
STEERING CONTROL UNIT 910076 1600 SRM 0054 10/03
STEERING AXLE 899777 1600 SRM 0060 02/97
MASTER CYLINDER 910082 1800 SRM 0013 02/97
BRAKE SYSTEM 910237 1800 SRM 0087 02/97
HYDRAULIC PUMP DRIVE ASSEMBLY 899779 1900 SRM 0064 07/97
HYDRAULIC GEAR PUMPS 910091 1900 SRM 0097 10/03
FLOW CONTROL VALVE 910239 1900 SRM 0123 02/81
MAIN CONTROL VALVE 899783 2000 SRM 0090 10/03
TILT CYLINDERS 910102 2100 SRM 0103 10/03
ALTERNATOR 899784 2200 SRM 0002 10/03
STARTER 910107 2200 SRM 0106 02/01
HIGH ENERGY IGNITION SYSTEM 899788 2200 SRM 0107 03/02
INSTRUMENT PANEL INDICATORS and SENDERS 910110 2200 SRM 0143 11/99
ELECTRICAL WARNING DEVICES 910111 2200 SRM 0144 05/97
ELECTRICAL SYSTEM TROUBLESHOOTING 899793 2200 SRM 0153 07/97
UPRIGHTS – REPAIR 910116 4000 SRM 0115 07/97
LIFT CYLINDERS 910119 4000 SRM 0135 10/03
UPRIGHTS – DESCRIPTION 899796 4000 SRM 0167 07/97
VISTA UPRIGHTS – DESCR / OPER 899797 4000 SRM 0197 01/97
VISTA UPRIGHTS – REPAIR 899798 4000 SRM 0198 05/97
PERIODIC MAINTENANCE 599904 8000 SRM 0186 06/88
CAPACITIES and SPECIFICATIONS 910241 8000 SRM 0188 05/84
DIAGRAMS 899807 8000 SRM 0189 09/81
INCH (SAE) and METRIC FASTENERS 910442 8000 SRM 0231 03/03

PART NO. 599763
Rev 10/03

GM Engines…27
Safety Precautions Maintenance and Repair…28
General…31
Description…31
Engine Removal and Installation…33
Cylinder Head and Valve Mechanism Repair…33
Cylinder Head, Remove…33
Cylinder Head, Disassemble…33
Clean and Inspect…33
Valves and Valve Seats…36
Studs for Rocker Arms…36
Hydraulic Valve Lifters, Replace…37
Hydraulic Valve Lifters, Clean and Inspect…37
Cylinder Head, Assemble…37
Cylinder Head, Install…37
Valve Clearance, Adjust…38
Rocker Arm Cover, Install…39
Timing Gear Cover Repair…39
Remove…39
Install…40
Camshaft Repair…41
Remove…41
Inspect…41
Camshaft Bearing…42
Remove…42
Install…42
Distributor Repair…43
Remove…43
Install…43
Lubrication System Repair…44
Oil Sump…44
Remove…44
Install…44
Oil Pump…44
Remove…44
Disassemble and Repair…44
Assemble…45
Install…45
Piston and Connecting Rod Assemblies Repair…45
Connecting Rod Bearings, Replace…45
Piston and Connecting Rod Assemblies, Remove…46
Piston and Connecting Rod Assemblies, Disassemble…47
Piston, Clean and Inspect…47
Cylinder Bores, Inspect and Repair…47
Piston Rings, Inspect…48
Piston and Connecting Rod Assemblies, Assemble…48
Piston and Connecting Rod Assemblies, Install…50
Crankshaft Repair…50
Main Bearings, Replace…50
Oil Seal for Rear Main Bearing, Replace (GM 4-181 and 3.0L Only)…51
Oil Seal for Rear Main Bearing, Replace (Engines That Have Two-P…51
Remove…53
Inspect and Repair…53
Main Bearing and Journal Clearance, Check…54
Install…54
Flywheel and Flywheel Housing Repair…55
Remove…56
Ring Gear, Replace…57
Install…57
Cooling System Repair…57
Coolant Pump…57
Fan Drive…57
Viscous Fan Drive…57
Engine Specifications…59
Engine Data…59
Cylinder Head…60
Hydraulic Valve Lifter…60
Camshaft…61
Pistons…62
Cylinder Bore…62
Crankshaft…63
Connecting Rods…63
Cooling System…64
Lubrication System…64
Torque Specifications…64
Troubleshooting…65
toc…171
Main Control Valve…171
Safety Precautions Maintenance and Repair…172
General…175
Description…175
Operation…178
Lift Spool…178
Tilt Spool…179
Tilt Backward…179
Tilt Forward…180
Single-Stage Relief Valve…182
Two-Stage Relief Valve…183
Main Control Valve Repair…184
Remove and Disassemble…184
Clean and Inspect…184
Assemble…184
Install…185
Single-Stage Relief Valve Adjustment…185
Two-Stage Relief Valve…186
Auxiliary Control Valve Relief Valve Adjustment (H60-110E Only)…186
Troubleshooting…187
tables…171
Table 1. Relief Pressures (Oil temperature at 55 to 66 C ( 131 t…185
hyster-899784-10-03-srm0002…191
toc…191
Alternator with Regulator…191
Safety Precautions Maintenance and Repair…192
General…195
Description…195
Alternator Repair…197
Alternator Type A…197
Remove and Disassemble…197
Clean…198
Assemble…199
Install…199
Alternator Type B…202
Remove and Disassemble…202
Clean…202
Assemble…203
Install…204
General Check and Adjustment…205
Low Output Check (Type A or Type B)…205
High Output Check (Type A or Type B)…207
Brushes Circuit Check…208
Delco Alternators…208
Motorola Alternators…209
Diodes Check…210
Diode Bridge Check…210
Delco and Leece-Neville Alternators…210
Motorola Alternators…210
Rotor Field Winding Check…211
Stator Windings Check…212
Voltage Regulator Check…212
Troubleshooting…212
hyster-899788-03-02-srm0107…217
toc…217
High Energy Ignition (HEI) System…217
Safety Precautions Maintenance and Repair…218
Description…221
Distributor Repair…223
Remove…223
Disassemble…223
Assemble…228
Install, If Crankshaft WAS NOT Rotated when Distributor was Remo…229
Install, If Crankshaft WAS Rotated when Distributor was Removed…229
Ignition Coil Replacement…230
Some Four- and Six-Cylinder Models…230
Remove…230
Install…231
V8, Some Four- and Six-Cylinder Models…231
Remove…231
Install…232
Electronic Module Replacement…233
Remove…233
Install…233
Sensing Coil Replacement…234
Remove…234
Install…234
Spark Plugs Replacement…234
Remove…234
Install…235
Visual Check…235
High Voltage Wires Check…235
Ignition Coil Check…236
Coil in Distributor Cap Design…236
Separate Coil Design…236
Sensing Coil, Check…237
Electronic Module Check…237
Ignition Timing Adjustment…237
GM V8-366 (6-liter) Ignition System Check…239
GM V6-LPG (4.3 liter) GM V6-LPG (4.3 liter) Ignition Timing and …239
Specifications…239
Troubleshooting…240
hyster-899793-07-97-srm0153…245
hyster-910076-10-03-srm0054…401
toc…401
Steering Control Unit…401
Safety Precautions Maintenance and Repair…402
General…405
Description…405
Operation…405
Steering Wheel and Column Assembly Repair…407
Steering Column Assembly Repair…407
Type A Steering Column Assembly…407
Remove and Disassemble…407
Assemble and Install…409
Type B Steering Column Assembly…411
Remove and Disassemble…411
Assemble and Install…411
Steering Control Unit…414
Disassemble…414
Clean…417
Assemble…418
System Air Removal…423
hyster-910091-10-03-srm0097…435
toc…435
Hydraulic Gear Pumps…435
Safety Precautions Maintenance and Repair…436
Description…439
Operation…440
Flow Control Valve…440
Relief Valve…441
Hydraulic Gear Pump Repair…441
Remove…441
Disassemble…442
Clean…442
Inspect…443
Assemble…446
Install…448
Pump Output Check…448
Method No. 1…448
Method No. 2…449
Hydraulic System Air Check…450
Troubleshooting…451
hyster-910102-10-03-srm0103…457
toc…457
Tilt Cylinders…457
Safety Precautions Maintenance and Repair…458
General…461
Description…461
Tilt Cylinder Repair…461
Remove…461
Disassemble…461
Clean…461
Assemble…462
Tilt Cylinders With O-Ring or Single-Lip Seals…462
Tilt Cylinders for XM and XMS Models…463
Tilt Cylinders for H700-800A and Early Model H700-920B…464
Install…465
Tilt Cylinders Using Chevron Packing…466
Install…467
Tilt Cylinder Leak Check…469
Tilt Cylinder Stroke and Mast Tilt Angle Adjustment…470
Torque Specifications…471
Piston Rod Nut…471
Retainer…472
Troubleshooting…474
tables…457
Table 1. Movement Rates (Maximum) for Tilt Cylinders…470
hyster-910107-02-01-srm0106…477
toc…477
Starter…477
Safety Precautions Maintenance and Repair…478
General…481
Description and Operation…481
Starter Repair…483
Remove…483
Disassemble…483
Clean…484
Assemble…484
Install…485
General Checks and Adjustments…485
Troubleshooting…488
Lift Cylinders…525
Safety Precautions Maintenance and Repair…526
Safety Procedures When Working Near Mast…529
General…533
Description…533
Lowering Control Valve…533
Cylinders (General)…536
Cylinders (H520-620B, H700-800A)…536
Retainer, Install…536
Cylinders (H360-460B)…538
Cylinders (Two-Speed)…540
Lift Cylinder Repair…542
Lift Cylinder Removal Without Removing Mast…542
Standard Masts With Main Lift Cylinder Fastened to Crossmember o…542
Standard and Full Free-Lift Masts With Lift Cylinder Fastened to…542
Masts That Have Two Cylinders, Main Lift Cylinder and Free-Lift …542
Disassemble…544
Assemble…544
Lift Cylinder Installation in Mast…546
Standard Masts With Main Lift Cylinder Fastened to Crossmember o…546
Standard and Full Free-Lift Masts With Lift Cylinder Fastened to…546
Chevron-Style Packing…546
Chevron-Style Packing Installation on Piston…547
Chevron-Style Packing Installation in Packing Gland…549
Lift Cylinders for VISTA® Masts…550
Description…550
Lowering Control Valve…550
Remove…552
Disassemble…553
Assemble…554
Install…555
Main Lift Cylinders…555
Free-Lift Cylinder…555
Lift System Leak Check…556
Specifications…557
Troubleshooting…558
tables…525
Table 1. Lift Trucks with Two-Speed Lift Cylinders…541
Table 2. Cylinder Retainer Torque Specifications and Weight Guid…557
Metric and Inch (SAE) Fasteners…733
Safety Precautions Maintenance and Repair…734
General…737
Threaded Fasteners…737
Nomenclature, Threads…737
Strength Identification…738
Cotter (Split) Pins…738
Fastener Torque Tables…743
Conversion Table…745
tables…733
Table 1. Bolts and Screws…739
Table 2. Studs and Nuts…740
Table 3. Torque Nuts…741
Table 4. Torque Nuts With Nylon Insert…742
Table 5. Torque Values for Metric Fasteners*…743
Table 6. Torque Values for Inch Fasteners*…744
Table 7. Conversion Table for Metric and English units…745
Table 8. Cotter Pin Dimensional Data…746

Hyster S60-120E (C004) Repair Service Manual


INSTANT DOWNLOAD


Posted on

Hyster Spacesaver S30-40-50B, S30-40-50C Repair Service Manual (599663)


INSTANT DOWNLOAD


Complete service repair manual for Hyster Spacesaver S30-40-50B, S30-40-50C, with all the shop information to maintain, diagnose, repair, and rebuild like professional mechanics.

Hyster Spacesaver S30B, S40B, S50B, S30C, S40C, S50C workshop service & repair manual includes:
* Numbered table of contents easy to use so that you can find the information you need fast.
* Detailed sub-steps expand on repair procedure information
* Numbered instructions guide you through every repair procedure step by step.
* Troubleshooting and electrical service procedures are combined with detailed wiring diagrams for ease of use.
* Notes, cautions and warnings throughout each chapter pinpoint critical information.
* Bold figure number help you quickly match illustrations with instructions.
* Detailed illustrations, drawings and photos guide you through every procedure.
* Enlarged inset helps you identify and examine parts in detail.

599663 – Hyster Service Manual Spacesaver S30-40-50B, S39-40-50C.pdf

Total Pages: 444 pages
File Format: PDF
Language: English

TABLE OF CONTENTS
A Engine
B Fuel
C Electrical
D Clutch & Transmission
E Drive Axle
F Brakes
G Hydraulic
H Steering
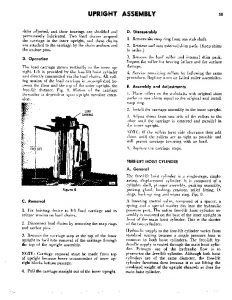
I Upright Assembly
J Miscellaneous

Hyster Spacesaver S30-40-50B, S30-40-50C Repair Service Manual (599663)


INSTANT DOWNLOAD


Posted on

Hyster Challenger H30H, H40H, H50H, H60H Lift Trucks Service Manual (599351)


INSTANT DOWNLOAD


Complete service repair manual for Hyster Challenger H30H, H40H, H50H, H60H, with technical information to maintain, diagnosd, repair, and service like professional mechanics.

Hyster Challenger H30H, H40H, H50H, H60H workshop service repair manual includes:
* Numbered table of contents easy to use so that you can find the information you need fast.
* Detailed sub-steps expand on repair procedure information
* Numbered instructions guide you through every repair procedure step by step.
* Troubleshooting and electrical service procedures are combined with detailed wiring diagrams for ease of use.
* Notes, cautions and warnings throughout each chapter pinpoint critical information.
* Bold figure number help you quickly match illustrations with instructions.
* Detailed illustrations, drawings and photos guide you through every procedure.
* Enlarged inset helps you identify and examine parts in detail.

599351 – Hyster Challenger H30H, H40H, H50H, H60H Service Manual.pdf

Total Pages: 362 pages
File Format: PDF
Language: English

TABLE OF CONTENTS

1 Introduction
2 Specifications
3 Troubleshooting
4 Maintenance & Tune-up
5 Fuel Systems
6 Electrical System
7 Steering System
8 Hoist System
9 Brake System
10 Transmission & Differential
11 Drive Axles & Drive Wheels
12 Engines
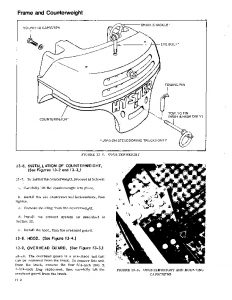
13 Frame and Counterweight

Hyster Challenger H30H, H40H, H50H, H60H Lift Trucks Service Manual (599351)


INSTANT DOWNLOAD


Posted on

Hitachi EX12, EX15, EX18, EX22, EX25, EX30, EX35, EX40, EX45 Excavators Service Repair Manuals


INSTANT DOWNLOAD


Complete service manual for your Hitachi EX12-2, EX15-2, EX18-2, EX22-2, EX25-2, EX30-2, EX35-2, EX40-2, EX45-2 Excavator, with all the technical information to maintain, diagnose, repair, and rebuild like professional mechanics.

Hitachi EX12-2, EX15-2, EX18-2, EX22-2, EX25-2, EX30-2, EX35-2, EX40-2, EX45-2 Excavators workshop service & repair manual includes:
* Numbered table of contents easy to use so that you can find the information you need fast.
* Detailed sub-steps expand on repair procedure information
* Numbered instructions guide you through every repair procedure step by step.
* Troubleshooting and electrical service procedures are combined with detailed wiring diagrams for ease of use.
* Notes, cautions and warnings throughout each chapter pinpoint critical information.
* Bold figure number help you quickly match illustrations with instructions.
* Detailed illustrations, drawings and photos guide you through every procedure.
* Enlarged inset helps you identify and examine parts in detail.

EM1BD-1-2 – EX12, EX15, EX22, EX25, EX30, EX35, EX40, EX45 Excavator Operator’s Manual.pdf
W587E-01 – Workshop Manual (EX12-2, EX15-2, EX18-2, EX22-2, EX25-2, EX30-2, EX35-2, EX40-2, EX45-2).pdf
T587E-01 – Technical Manual (EX12-2, EX15-2, EX18-2, EX22-2, EX25-2, EX30-2, EX35-2, EX40-2, EX45-2).pdf

Total Pages: 1,123 pages
File Format: PDF
Language: English

TABLE OF CONTENTS
GENERAL INFORMATION
UPPERSTRUCTURE
UNDERSTRUCTURE
UNDERCARRIAGE
FRONT ATTACHMENT
SYSTEM / Hydraulic System
COMPONENT OPERATION / Pump Device
COMPONENT OPERATION / Swing Device
COMPONENT OPERATION / Control Valve
COMPONENT OPERATION / Pilot Valve
COMPONENT OPERATION / Travel Device
COMPONENT OPERATION / Others (Undercarriage)
COMPONENT OPERATION / Others (Upperstructure)
OPERATIONAL PERFORMANCE TEST
TROUBLESHOOTING
ATTACHED DIAGRAM LIST

EM1BD-1-2 – EX12, EX15, EX22, EX25, EX30, EX35, EX40, EX45 Excavator Operator's Manual…2
FRONT COVER…2
INTRODUCTION…4
CONTENTS…6
SAFETY…8
SAFETY SIGNS…26
OPERATOR’S STATION…28
BREAK-IN…41
OPERATING THE ENGINE…42
DRIVING THE MACHINE…47
OPERATING THE MACHINE…50
TRANSPORTING…77
MAINTENANCE…82
STORAGE…136
TROUBLESHOOTING…137
SPECIFICATIONS…143
MACHINE NUMBER…173
T587E-01 – Technical Manual (EX12-2, EX15-2, EX18-2, EX22-2, EX25-2, EX30-2, EX35-2, EX40-2, EX45-2)…176
W587E-01 – Workshop Manual (EX12-2, EX15-2, EX18-2, EX22-2, EX25-2, EX30-2, EX35-2, EX40-2, EX45-2)…378

Hitachi EX12, EX15, EX18, EX22, EX25, EX30, EX35, EX40, EX45 Excavators Service Repair Manuals


INSTANT DOWNLOAD