Posted on

Ford New Holland 40 Series (5640, 6640, 7740, 7840, 8240, 8340) Tractors Factory Service & Shop Manual

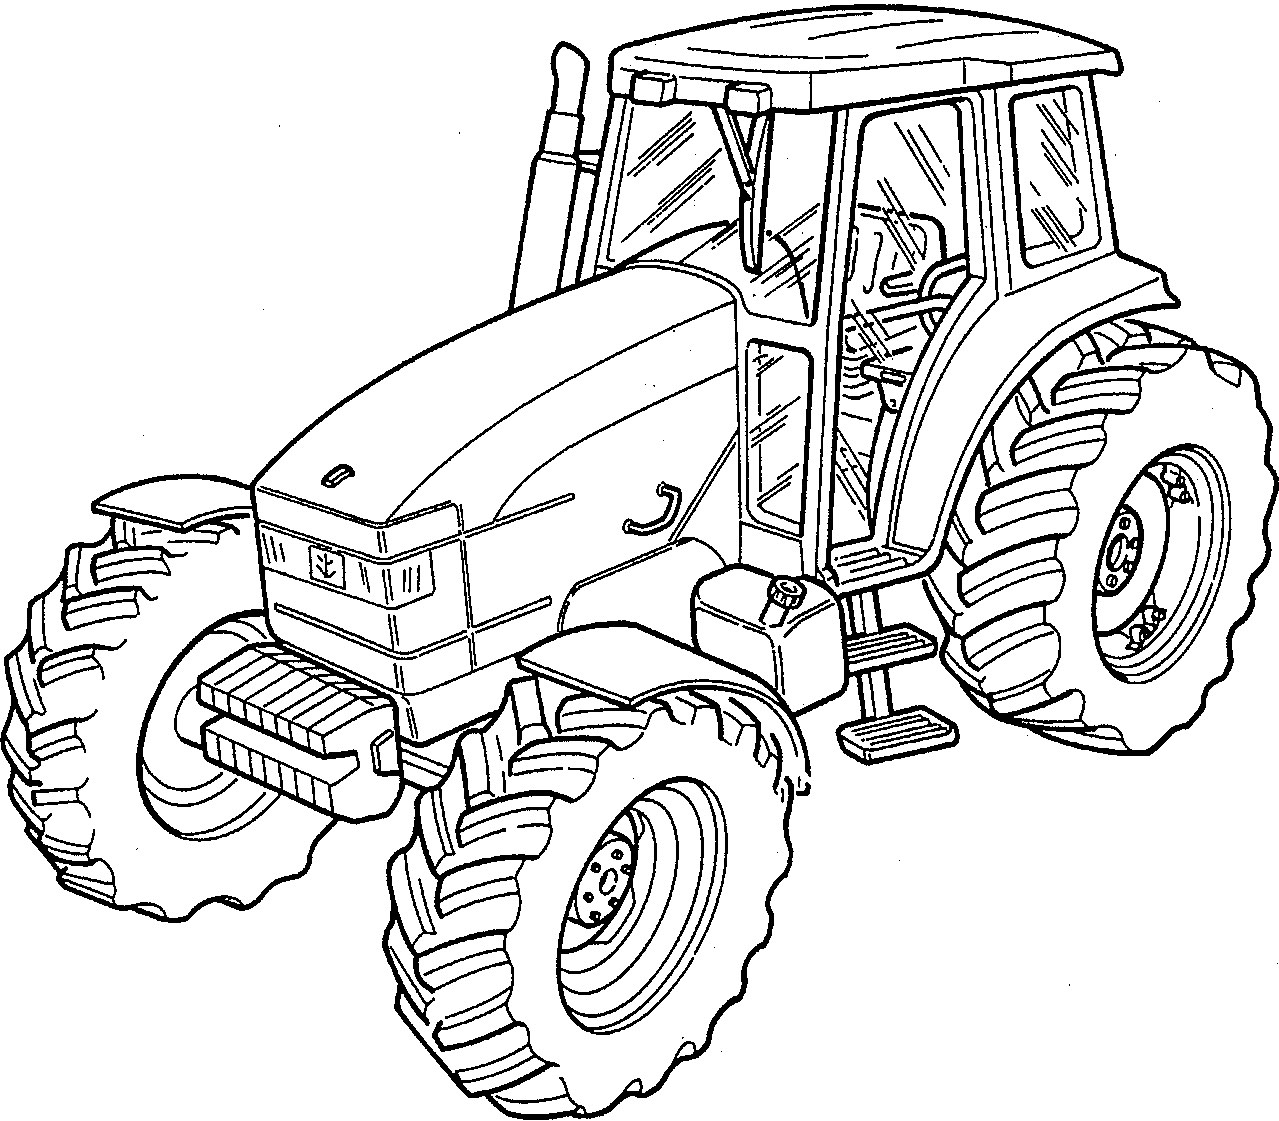
New Holland_Ford 5640, 6640, 7740, 7840, 8240, 8340


INSTANT DOWNLOAD


Complete workshop & service manual with electrical wiring diagrams for Ford New Holland 40 Series (5640, 6640, 7740, 7840, 8240, 8340) Tractors. It’s the same service manual used by dealers that guaranteed to be fully functional and intact without any missing page.

This Ford New Holland 40 Series (5640, 6640, 7740, 7840, 8240, 8340) Tractors service & repair manual (including maintenance, overhaul, disassembling & assembling, adjustment, tune-up, operation, inspecting, diagnostic & troubleshooting…) is divided into different sections. Each section covers a specific component or system with detailed illustrations. A table of contents is placed at the beginning of each section. Pages are easily found by category, and each page is expandable for great detail. The printer-ready PDF documents work like a charm on all kinds of devices.

“840564061.pdf”
Ford New Holland 40 Series (5640, 6640, 7740, 7840, 8240, 8340) Tractors Service Manual
1,452 pages PDF
Part number 840564061 English
Ford New Holland 5640, 6640, 7740, 7840, 8240, 8340 Tractors Repair Manual

EXCERPT:
8. HYDRAULIC CIRCUIT DESCRIPTION
The circuits provided with oil by the transmission mounted hydraulic pumps can be separated into the following categories:
Tractors With Closed Centre Load Sensing Variable Displacement Hydraulic Pump:
• High pressure circuit oil up to a maximum pressure of 2800 lbf/in2 (193 bar) for operation of the hydraulic lift assembly, remote control valves and auxiliary hydraulic equipment, where fitted.
• Low pressure circuit oil for operation of the 16 x 16 transmission control circuits, PTO, differential lock, electronic draft control valve pilot pressure and four wheel drive circuits, where fitted.
• Hydrostatic steering system oil up to a maximum pressure of 2500 lbf/in2 (172 bar) which is then regulated to provide low pressure oil for lubrication of the PTO and 16 x 16 transmission.
Tractors With Fixed Displacement Tandem Gear Type Pump:
• High pressure oil up to a maximum pressure of 2650 lbf/in2 (183 bar) for operation of the hydraulic lift assembly, remote control valves and auxiliary hydraulic equipment, where fitted.
• Hydrostatic steering system oil up to a maximum pressure of 2500 lbf/in2 (172 bar) which is then regulated to provide low pressure oil for operation of the PTO, four wheel drive disengagement system, differential lock and lubrication of 12 x 12 transmission synchronizers, bearings, output shaft and PTO.
The basic hydraulic circuits for each type of installation are shown in schematic format in Figure 7, Figure 8 and Figure 9 of this Chapter.
For a detailed description and operation of the high pressure hydraulic lift circuits on Series 40 tractors refer to the following Chapters in this Part of the Repair Manual.
For tractors installed with the variable displacement hydraulic pump and electronic draft control, refer to Chapters 2 and 3.
For tractors installed with the variable displacement hydraulic pump and top link sensing, refer to Chapters 2 and 4.
For tractors installed with fixed displacement gear type hydraulic pumps, refer to Chapter 5.
For the hydraulic operation of the transmission, PTO, differential lock, steering and four wheel drive disengagement systems, refer to the appropriate Part and Chapters of this Repair Manual which describe the operation of the component.


INSTANT DOWNLOAD


Posted on

New Holland 100 – 115 – 135 – 160 HP Tractors Factory Service & Shop Manual


New Holland 100, 115, 135, 160 HP Tractors

MNH100160HPOPES.zip
Price: $29.99 USD

Complete workshop & service manual with electrical wiring diagrams for New Holland 100 – 115 – 135 – 160 HP Tractors. It’s the same service manual used by dealers that guaranteed to be fully functional and intact without any missing page.

This New Holland 100 – 115 – 135 – 160 HP Tractors service & repair manual (including maintenance, overhaul, disassembling & assembling, adjustment, tune-up, operation, inspecting, diagnostic & troubleshooting…) is divided into different sections. Each section covers a specific component or system with detailed illustrations. A table of contents is placed at the beginning of each section. Pages are easily found by category, and each page is expandable for great detail. The printer-ready PDF documents work like a charm on all kinds of devices.

“6035432100.pdf”
New Holland 100 – 115 – 135 – 160 HP Tractors Repair Manual
Part number 6035432100 English March 05/1996
1,214 pages

New Holland 100 – 115 – 135 (T) – 160 (T) HP Tractors

— — — — — — — — — — — — — — — — — — — — —

“84993509”
New Holland 100HP – 115HP – 135HP – 160HP Tractors Repair Manual
Part number 84993509 – 03.2003 English Brasil CEP 81450-903
1,205 pages

New Holland TM115, TM125, TM135, TM150, TM165 Tractors

EXCERPT:

SECTION 10 – ENGINE – CHAPTER 1

Inspection and repair of gears

1. Wash the gears using a suitable solvent, and examine gear teeth for wear, burrs, or scratches. Minor marks can be removed using a fine abrasive, thoroughly clean before re-assembly.

2. Ensure the camshaft idler gear adaptor is free from obstruction and bushing is not damaged. Camshaft key and key-way should be checked for damage and repaired as required.

Installation

1. If the rear cover was removed thoroughly clean the mating surfaces between the cover and engine block, using a suitable solvent cleaner and carefully apply a thin bead, approximately 2mm, of the recommended flexible gasket sealant, Type ‘L’, to the cover. Assemble the cover to the engine and tighten the two lower retaining bolts to a torque of 37Nm, (281bf.ft.) and the remaining four bolts to a torque of 24Nm (181bf.ft)

2. Position piston no.1 at Top Dead Centre, install the spacer, key, and camshaft gear, and tighten to 69N m (51 lbf ft) Figure 49.

3. Install the camshaft idler gear to the block, aligning the timing marks to the crankshaft and camshaft gears. Install the eccentric adjuster into the idler gear and initially position the larger of the two holes of the eccentric in the 6-9 O’Clock position, relative to the oil pan face of the block.

4. With piston No1 at Top Dead Centre, assemble the ‘LOCKED’ pre-timed fuel injection pump with a new ‘0’ ring, aligning the mark on pump flange to the timing mark on the front cover.
Torque pump retaining bolts to 24Nm (18 lbf ft). Install the pump gear over the pump shaft. Assemble the washer and nut to the shaft, leaving loose at this stage to allow the gear to
rotate freely on the pump shaft. Holding the idler gear, check the backlash between the pump and idler gear with a feeler gauge or dial indicator. If the backlash is outside the specification of 0.01 0-0.015mm (0.004-0.006in), rotate the eccentric until the backlash is correct and tighten the idler gear retaining bolt to a torque value of 242Nm (1801bf.ft.).

NOTE: DO NOT TIGHTEN THE INJECTION PUMP SHAFT NUT AT THIS STAGE. PROCEED TO REASSEMBLE THE FRONT COVER.

Posted on

MAN Trucks & Buses Factory Service & Shop Manual Collection


Pages from 81.99298-4932 – MAN Hypoid Axles HY-1336-B Repair Manual F19

Download Link

INSTANT DOWNLOAD (add to cart)


Complete workshop & service manual with electrical wiring diagrams for MAN Trucks & Buses. It’s the same service manual used by dealers that guaranteed to be fully functional and intact without any missing page.

This service & repair manual collection (including maintenance, overhaul, disassembling & assembling, adjustment, tune-up, operation, inspecting, diagnostic & troubleshooting…) is divided into different sections. Each section covers a specific component or system with detailed illustrations. A table of contents is placed at the beginning of each section. Pages are easily found by category, and each page is expandable for great detail. The printer-ready PDF documents work like a charm on all kinds of devices.

FILELIST: (about 2G PDFs)
├── 1290 751 105a – ZF-ECONLiTE 6 S 850, 6 S 890 Shop Manual.pdf
├── 1304 751 103a – ZF-ECONMid 16 S 109 Service Manual.pdf
├── 1307 763 102c – ZF-Ecolite Special Features.pdf
├── 1315 751 101d – ZF-ECONSPLiT 16 S 151, 8 S 151 Shop Manual.pdf
├── 1315 751 102a – ZF-ECONSPLiT NMV 221, i-0.98, i-1.55 Service Manual.pdf
├── 1315 751 110a – ZF-ECONSPLiT Shift system with PSU (Pneumatic Servo Unit) Repair Manual.pdf
├── 1316 751 101c – ZF-ECONSPLiT 16 S 221, 16 S 181, 8 S 181 Service Manual.pdf
├── 1316 751 102 – ZF-ECONSPLiT 16 S 251 Service Manual.pdf
├── 1327 751 101 – ZF-AS TRONic 10 AS 2301, 12 AS 2301, 16 AS 2601 (Repair stages 1-2) Repair Manual.pdf
├── 1327 751 102 – ZF-AS TRONic 10 AS 2301, 12 AS 2301, 16 AS 2601 (Repair level 3) Repair Manual.pdf
├── 25 1818 95 14 86 – Hydronic 16_24_30_35 Heater Troubleshooting and Repair Manual.pdf
├── 4130 751 103a – ZF-TRANSMATiC WSK 400 for 16 S 151, 16 S 221, WSK 440 for 16 S 251 Service Manual.pdf
├── 51.99493-8414 – MAN D2840 LE_LXE 401_402_407, D2842 LE_LYE_LZE 401_402_403_406_408_411_412_413, D2848 LE_LXE 401_403_405 Marine Diesel Engine Repair Manual.pdf
├── 51.99493-8428 – MAN Marine Diesel Engines D2866LE 401-402-403-405 & D2876LE 301-403.pdf
├── 51.99493-8504 – MAN D2840 LE2…, D2842 LE2…, D2848 LE2… Industrial Diesel Engine Repair Manual.pdf
├── 51.99598-8021 – MAN M(S) 5 – D 28 V-Marine Engines Electrical Diesel Control EDC Repair Manual.pdf
├── 51.99598-8038 – MAN D2848 LE 602_604_606_607 Industrial Diesel Engine Repair Manual.pdf
├── 51.99598-8049 – MAN Electrical Diesel Control EDC M(S) 5 – D 2842 LE6.. Repair Manual.pdf
├── 81.99198-5912 – MAN Hypoid Axles HY-1175, HDY-1175 Repair Manual F18.pdf
├── 81.99198-5972 – MAN Trucknology Generation A (TG-A) Electrical System Wiring Diagrams.pdf
├── 81.99198-6762 – MAN Driven Front Axle VP-09 Repair Manual G5.pdf
├── 81.99198-6892 – MAN Driven Front Axle VPD-09 Repair Manual G6.pdf
├── 81.99198-6922 – MAN Planetary Axle HP-1333 F38 Repair Manual.pdf
├── 81.99198-6952 – MAN Non-driven Front Axles VOK-05-01~06 Repair Manual H10.pdf
├── 81.99198-7132 – MAN Live Hypoid Rear Axle HY-0925 F22.pdf
├── 81.99198-7852 – MAN Live Hypoid Rear Axle HY-0512 Repair Manual F20.pdf
├── 81.99198-7882 – MAN Live Hypoid Rear Axle HY-0718 Repair Manual F21.pdf
├── 81.99198-7912 – MAN Non-driven Front Axles VOK-03-01, VOK-03-02 Repair Manual H11.pdf
├── 81.99198.4222 – MAN Forward-control Trucks Heavy Range F2000 & Medium Range M2000-M Electrical System Repair Manual T32.pdf
├── 81.99298-4932 – MAN Hypoid Axles HY-1336-B Repair Manual F19.pdf
├── 81.99298-6842 – MAN Electrical System Common-Rail Injection System EDC7 System Description T18.pdf
├── 81.99298.4002 – MAN FRH Coach, Lion’s Star Electrical System Repair Manual T20.pdf
├── 81.99298.4322 – MAN Driven Rear Axles (AP Axles for Buses) Repair Manual F 4-B.pdf
├── 81.99298.4322 – MAN Driven Rear Axles (AP Axles for Buses) Repair Manual F4-B.pdf
├── 81.99589-5062 – MAN Maintenance Recommendations & Recommended Service Products – Commercial Vehicles, OEM Components & Rail Vehicles.pdf
├── 81.99593-4092 – MAN In-line Engines D 28.. – 4-valve Cylinder Head Repair Manual 2nd Supplement A11.pdf
├── 81.99593-4242 – MAN In-line Engines D 02- & D 08- Series Repair Manual 2nd Supplement A 13 (3.).pdf
├── 81.99598-4022 – MAN Electrical System Electronic Diesel Control (EDC) MS5, M(S) 5 System Description T17-A.pdf
├── 81.99598-43 – MAN In-line Engines D 02- & D 08- Series Repair Manual A13.pdf
├── 81.99598-4462 – MAN D 25.. – D 28.. – 2-valve & 4-valve cylinder head In-line Engines Repair Manual incl. 1st supplement A11.pdf
├── 81.99598-4572 – MAN Non-Driven, Steering Front-, Leading, Trailing Axles (V7-_V9-.. L,SL_HN7-_.. SL) Repair Manual H6.pdf
├── 81.99598-4632 – MAN Hypoid Axles HY 0855, 0955, 1175, 13110, HOY 0955, 1175 Repair Manual F10.pdf
├── 81.99598-4752 – MAN Driven Rear Hypoid Axle HY-1350 Repair Manual F13.pdf
├── 81.99598-4842 – MAN Driven Hypoid Rear Axle HY-0720 Repair Manual F16.pdf
├── 81.99598-5442 – MAN Front Leading & Trailing Axles Repair Manual H8.pdf
├── 81.99598-6132 – MAN Disc Brake SN 5000 Repair Manual P109.pdf
├── 81.99598.4662 – MAN Electronically Controlled Diesel Injection EDC MS 6.4 Repair Manual T17-A2.pdf
├── 81.99598.58 – MAN Common Rail System EDC System Description T18 2nd Edition.pdf
├── 81.99598.5892 – MAN Common Rail System EDC 7 System Description T18.pdf
├── 83.99297-XXXX – MAN EMI-Low-Floor Regular-service Buses EL 223_283, NL-HD 223_283 Maintenance Manual WA 78 (2nd).pdf
├── EDC MS5 – MAN Training Documentation EDC MS5 Step 3 EURO II, Step 5 EURO III.pdf
├── EDC_MS64 – Training document EDC MS 6.4.pdf
├── Fundamentals of Commercial Vehicle Technology – Basic Infomation on Trucks & Buses
│…
├── MAN D-0834_36 Engine EURO2-3 Training Course.pdf
├── MAN D2066 LF.. with EDC 7 Common Rail Engine Training Course.pdf
├── MAN Engine D 2866_76 Euro 2-3 Training Documentation.pdf
├── MAN Engine Training D 2876 LF 12_13 Common Rail AT-01c.pdf
├── MAN L2000 M2000 F2000 Construction Period 1992-2005 (according to model) Service Manual.pdf
├── MAN Lehrgangsunterlage ZF Getriebe 16 S 151_181_221_251 Ecosplit (DE).pdf
├── MAN Service Akademie EDC 7 Common Rail Training.pdf
├── MAN Trucknology Generation A (TGA) Shop Manual.pdf
├── MAN Trucknology Generation S and X (TGS_TGX) Shop Manual.pdf
├── Trucknology Generation L and M (TGL_TGM) Shop Manual.pdf
└── bonus_material
├── 81.99198-476 – MAN Trucknolgy Generation A (TG-A) Instalatia Electrica Scheme de Conexiuni K90 (RO).pdf
├── 81.99198-4876 – MAN Trucknology Generation A (TG-A) Sistemul electronic de franare (EBS) Instalatia Electrica Descrierea sistemului T61 (RO).pdf
├── 81.99198-490 – MAN Trucknology Generation A (TG-A) Instrumentatie Instalatia Electrica Descrierea sistemului T62 (RO).pdf
├── 81.99198-5026 – MAN Trucknology Generation A (TG-A) Intarder EST 48 Instalatia Electrica Descrierea sistemului T67 (RO).pdf
├── 81.99198-5086 – MAN Trucknology Generation A (TG-A) Instalatia de climatizare Instalatia Electrica Descrierea sistemului T69 (RO).pdf
├── 81.99198-53 – MAN Trucknology Generation A (TG-A) Modulul Portierei Instalatia Electrica Descrierea sistemului T77 (RO).pdf
├── 81.99198-5356 – MAN Trucknology Generation A (TG-A) Airbag Instalatia Electrica Descrierea sistemului T78 (RO).pdf
├── 81.99198-541 – MAN Trucknology Generation A (TG-A) Instalatia electrica centrala Descrierea sistemului T80 (RO).pdf
├── 81.99198-544 – MAN Trucknology Generation A (CAN_ZBR_FFR) – CAN-Controller Area Network (Descrierea sistemului T51-A1) – Instalatia Electrica (RO).pdf
├── 81.99598-470 – MAN Trucknology Generation A (TG-A) Instalatia electrica Injeclia de motorina cu reglaj electronic (EDC) MS 6.1 Descrierea sistemului T17-A3 (RO).pdf
├── 81.99598-497 – MAN Instalatia electrica – Legenda, numere de cod numere de cabluri, simboluri… Lista aparatelor T60 (RO).pdf
├── 81.99598-54 – MAN Modulul de comanda amplasat in USA Instalatia Electrica Descrierea sistemului T77 (RO).pdf
├── Coupling devices TG Service Manual.pdf
├── MAN Error Codes.pdf
├── MAN Interfaces TG Service Manual.pdf
├── MAN-Schite electrice
│   …
├── Power Take-Offs At Eaton-Gearbox.pdf
├── Power Take-Offs Service Manual.pdf
├── Power Take-Offs at ZF-Gearbox.pdf
├── Pump Installation Service Information_1st supplement to 37500 en.pdf
├── ZDR (Intermediate Engine Speed Control) Interface with Customer Specific Control Module (KSM) for External Engine Speed Control & Fleet Management(FMS) Interface On TGA.pdf
├── ZDR Interface with Customer-Specific Control Module (Step 1) for External Engine Speed Control & Fleet Management Interface on TG.pdf
├── ZDR Interface with Vehicle Management Computers for External Speed Controls with the Trucknology Generation.pdf

EXCERPT:
Functional description
The hypoid rear axle for buses is described in this repair manual.
The axle is designed for an exceptionally long, maintenance-free service life. The axle is a live, non-steering rigid axle with a single reduction ratio. There is a choice of reduction ratios available for the axle drives. This axle is installed as a single axle.
The power flows from the gearbox to the rear axle input flange via the propshaft.
The power flows from the input flange to the rear axle via the countershaft gears, drive pinion/crown wheel, differential and axle shafts. From here, the power is transmitted to the wheel hub and the driven wheels.
The axle drive consists of the drive pinion/crown wheel assembly and the differential. The differential function is provided by a differential spider. The input flange has cross serrations.
The axle housing is made from fine-grained steel and is oil-tight. The two steel axle journals are welded to the axle housing. The flange for locating the sliding calliper carrier is welded onto the axle housing.
The brake is a compressed air-operated sliding-calliper disc brake with automatic adjustment and a continuous wear indicator. It is a single unit comprising service brake, auxiliary brake and parking brake. It is operated mechanically by means of a combination brake cylinder directly on the sliding calliper. The automatic adjustment feature takes effect depending on the degree of wear and operates with a fixed clearance.
The internally ventilated brake discs are bolted onto the wheel hubs.
The ABS consists of a ring with built-in speed sensor, which is shrunk onto the axle housing (axle tube). The ABS pulse generator for the ABS speed sensor is part of the hub-unit wheel bearing unit and is pressed into the wheel hub.
The hub-unit wheel bearing unit is a “constructed” encapsulated wheel hub bearing unit and constitutes a single component.
The wheel hub, bearing, rotary shaft seals and ABS pulse wheel (rotor) are assembled into an encapsulated unit.
These wheel bearings are not adjustable and have a lifetime grease filling for lubrication. No measurable clearance is permitted on the hub-unit wheel bearings.
The brake pads are asbestos free. A checking device informs the driver when the wear limit is reached.
The parking brake is applied via the brake cylinder spring actuators.

Posted on

Atlet Forklift Trucks 2008-2011 Workshop Repair & Service Manual


Atlet 2008-2011

MATL0811OPES.zip
Price: $29.99 USD

Complete digital official shop manual contains service, maintenance, and troubleshooting information for the Atlet Forklift Trucks 2008-2011. Diagnostic and repair procedures are covered in great detail to repair, maintain, rebuild, refurbish or restore your vehicle like a professional mechanic in local service/repair workshop. This cost-effective quality manual is 100% complete and intact as should be without any missing pages. It is the same factory shop manual used by dealers that guaranteed to be fully functional to save your precious time.

This manual for Atlet Forklift Trucks 2008-2011 is divided into different sections. Each section covers a specific component or system and, in addition to the standard service procedures, includes disassembling, inspecting, and assembling instructions. A table of contents is placed at the beginning of each section. Pages are easily found by category, and each page is expandable for great detail. It is in the cross-platform PDF document format so that it works like a charm on all kinds of devices. You do not need to be skilled with a computer to use the manual.

MAKE: Atlet
MODEL: T / A / X / U / O / P Chassis
FORMAT: PDF
SIZE: 435 MB
LANGUAGE: English / German / French / Swedish

MAKE: Atlet
MODEL: T / A / X / U / O / P Chassis
FORMAT: PDF
SIZE: 484 MB
LANGUAGE: English / German / French / Swedish

Atlet Forklift Trucks Spare Parts Catalog, Service Manual, and Electrical Diagrams

├── T Chassis
│   ├── TLL / TLP
│   ├── TP
│   ├── TS
├── A Chassis
│   ├── A
│   ├── A-Ergo
├── X Chassis
│   ├── X-90
│   ├── X-Ergo
├── U Chassis
│   ├── UNN
│   ├── URF AC (Powder Plus)
│   ├── U*S AC (Powder Plus)
│   ├── U-TERGO
├── O Chassis
├── P Chassis
│   ├── PLL
│   ├── PLP
│   ├── PP
│   ├── PS

BONUS.MATERIAL:
Warehouse 2008B (PDF, 49 MB)
A-Ergo
OP
PLL-PSD-PSL-PLE
PLP
PP
PS
T
U
X-Ergo

Atlet (Eden Farm) (PDF, 12 MB)
Electrical Diagrams
U Tergo
UNS_UHS

EXCERPT:
7.2.2.4 Operation test of steering servo system – fly by wire
1. Log on the truck and check that the operation of the end stops in both directions is correct.
2. Turn the mini wheel clockwise to the maximum. Connect the red/black cable with the pink/black cable coming from X18’s connection closest to the servo box. Turn the steering to the centre position. After approx. 10 mm of movement on the gearbox the servo contactor should open. Check that the brakes are properly applied and that it is not possible to drive the machine. If
the brakes are not on and the machine can be driven then the circuit must be checked. The drive controller E1 is supplied from the servo contact E4 pin 8.
Check that pin 8 is not live, if it is – replace the servo box. Reset using the off-on buttons on the keyboard.
3. Brown/white cable. Perform the equivalent procedure with the switch by connecting together the red/black cable with the brown/white cable.
4. Pull apart the connector P14 (tied to the return hose on UNS). The servo contactor should open and it should be impossible to release the brake; it should also be impossible to drive the truck. Connect P14 again.
5. Pull out the motor fuse for the servo motor (F4). The servo motor should
open and it should be impossible to release the brake; it should also be impossible to drive the truck. Fit the fuse again.
6. If it is possible to release the brake after points 2, 3, 4 or 5 have been implemented, or it is possible to drive the truck, the truck must be checked carefully and not used until the fault has been rectified.
7. Finally check that the drive unit does not hit the mechanical stop in the end
positions.

7.2.2.5 Mechanical adjustment to the steering sensors – EPS 2001/ EPS AC0
With the gear box on the seat side of the truck, turn the drive wheel anticlockwise a little over +90 degrees (Circa +100 degrees) ensuring that the cam on the drive unit is located under both threaded holes for the sensors.
Screw in the sensor (follow with the cable to avoid twisting) until it reaches the bottom on the cam. Then unscrew the sensor a 3/4 turn and lock the sensor with the nut.
Important!
The nut is to be locked using thread locking solution. However, make sure that the thread locking solution is not applied in the threaded hole.

7.2.2.6 Operation test of the steering sensors – EPS 2001/EPS AC0
1. With the gear box on the seat side of the truck, turn the drive wheel anticlockwise a little over +90 degrees (Circa +100 degrees) ensuring that the cam on the drive unit is located under both threaded holes for the sensors.
2. Switch off the truck.
3. Disconnect the cable to the steering sensor.
4. Unscrew the steering sensor (follow with the cable to avoid twisting).
5. Reconnect the cable.
6. Start the truck and log on.
7. Hold the sensor top against some metal (iron, steel, etc).
8. Make sure that the sensor has the correct status by checking the menu “Logged on service”:
9. The steering sensor must be active when metal comes within about 2 mm of the sensor top.
10. Reinstall the sensor as described in section 7.2.2.5.

Posted on

Alexander Dennis Enviro 400 Busses Factory Service & Shop Manual


INSTANT DOWNLOAD


Complete workshop & service manual with electrical wiring diagrams for Alexander Dennis Enviro 400 Busses. It’s the same service manual used by dealers that guaranteed to be fully functional and intact without any missing page.

This Alexander Dennis Enviro 400 Busses (EURO3/EURO4/EURO4+) service & repair manual (including maintenance, overhaul, disassembling & assembling, adjustment, tune-up, operation, inspecting, diagnostic & troubleshooting…) is divided into different sections. Each section covers a specific component or system with detailed illustrations. A table of contents is placed at the beginning of each section. Pages are easily found by category, and each page is expandable for great detail. The printer-ready PDF documents work like a charm on all kinds of devices.

MAKE: Alexander Dennis
MODEL: Enviro 400 (EURO3/EURO4&4+)
FORMAT: PDF

2291.pdf:
Enviro 400 (EURO 4&4+) 4 & 6 cylinder Service Manual
Date: July 2006 (03/08); 474 pages

2292.pdf:
Enviro 400 (EURO 3) Service Manual
Date: December 2005 (03/06); 450 pages

2297.pdf:
Enviro 400 (EURO 4&4+) Service Manual
Date: March 2006 (10/07); 466 pages

EXCERPT:
Air Suspension System Amended
“Description”
“The vehicle is fitted with air suspension, a function of this is the facility to kneel the vehicle at the front, or when fitted, an option to lower the suspension all round.”
“The air suspension is supplied from an auxiliary tank, sited on the right hand side of the chassis and forward of the battery carrier. Output supply passes through the system line filter, which filters the air before it enters the solenoid valve block and the levelling valves. Foreign matter in these items may cause them to malfunction.”
“Levelling valves are fitted to the front and rear axles of the vehicle. The levelling valves have a neutral or zero setting and at this position the vehicle ride height is set. Should the vehicle experience an increase in load, the chassis will move nearer to the ground resulting in the connection linkage pushing up and the valve spindle turning clockwise. This results in the valve allowing more air to be pumped into the air bags until the original ride height is achieved, although at a greater pressure. For a decrease in load the reverse happens, with the supply pressure shut off and the air bag pressure exhausting, the correct ride height is obtained.”
“For the kneeling system this function is controlled by a solenoid valve block and electrical relays via “”Raise”” and “”Kneel”” buttons in the drivers cab.”
“A proximity switch is fitted on the vehicle. The switch senses movement past a fixed indicator on the front axle. The indicator is sited at approximately half distance of its full travel. When the switch senses this indicator, the level warning light (yellow) will come on and the vehicle can be stopped at any point while the light is on. If the button is released before the light comes on the vehicle will return to a normal ride height.”
“Kneeling”
“When the kneel button is pressed valves 42 and 43 are energised. Valve 42 will be put in the open position and simultaneously valve 43 will close. The closing of valve 43 isolates the front levelling system and stops the levelling valve exhausting or inflating the air bags. Opening valve 42 allows the front air bags to exhaust, allowing the vehicle to kneel.”


INSTANT DOWNLOAD