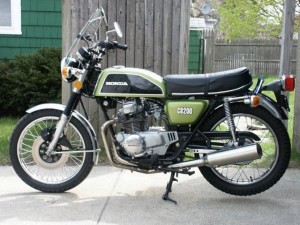
1968-1977 Honda 200-250-350-360 Motorcycle Repair & Service Manual (209 MB Searchable & Printable PDF)
Complete digital official shop manual contains service, maintenance, and troubleshooting information for the 1968-1977 Honda 200-250-350-360 Motorcycle. Diagnostic and repair procedures are covered in great detail to repair, maintain, rebuild, refurbish or restore your vehicle like a professional mechanic in local service/repair workshop. This cost-effective quality manual is 100% complete and intact as should be without any missing pages. It is the same factory shop manual used by dealers that guaranteed to be fully functional to save your precious time.
This manual for 1968-1977 Honda 200-250-350-360 Motorcycle is divided into different sections. Each section covers a specific component or system and, in addition to the standard service procedures, includes disassembling, inspecting, and assembling instructions. A table of contents is placed at the beginning of each section. Pages are easily found by category, and each page is expandable for great detail. It is in the cross-platform PDF document format so that it works like a charm on all kinds of devices. You do not need to be skilled with a computer to use the manual.
Buy the best manual on the Internet from responsible merchant and get instant download without surprise.
MAKE: Honda
YEAR: 1968 1969 1970 1971 1972 1973 1974 1975 1976 1977
MODEL:
“’68-’73 250-350.pdf”
250-350 Model Shop Manual (CB250, CL250, CB350, CL350, SL350)
219 pages
“’68-’76 CB250, CB350, CL250, CL350, SL350.pdf”
250-350 Model Shop Manual (CB250, CL250, CB350, CL350, SL350)
359 pages
6228604; A3900908
“’73-’76 CB200, CL200.pdf”
CB200, CL200 Shop Manual
98 pages
“’74-’77 CB250-360, CL360_K1, CJ250T_360T.pdf”
CB250, CB360, CL360, CL360K1, CJ250T, CJ360T Shop Manual
173 pages
INSTANT Delivery: A download link will be sent to you instantly after payment. Simply click on the link and save it to your computer. You can use this Manual as long as you wish with no restrictions.
PRINTABLE with Diagrams: Just print the manual out and start to work. You can also use the manual with your laptop in your garage.
Customer SATISFACTION: If there is any problem, just drop a quick email. Within hours the issue shall be taken care of.
REFUND Policy: We sell high quality products only. In case there is any problem with your purchase, a replacement link will be sent to you. If we are at fault, you get 100% refund.
EXCERPT:
l. CAMSHAFT AND VALVE MECHANISM
Cylinder head
The cylinder head is so designed that the rocker arm shafts and rocker arms are incorporated into the cylinder head cover.
It can be removed or installed with the engine mounted on the frame to enable the cylinder and pistons to be replaced easily.
Valve guides
Each valve guide is securely supported by the spring seats as shown at right. It is also provided with the stem seals to prevent oil from leaking into the combustion chamber.
When disassembling the valve guide, take care not to compress the valve compressor (Tool No. 07957-3290000) more than necessary; otherwise the stem seals may be damaged.
Cylinder
The cylinder is an aluminum die casting which is light-weight and has great cooling efficiency. Two special cast iron sleeves are pressed into the cylinder.
Eight stud bolt holes are provided in the cylinder and the two holes at the rear outside act as oil passages to the cylinder head.
Pistons
The pistons are made of aluminum alloy. They are three-stage tapered as shown to provide for unequal expansion that occurs at operating temperature.
Piston pins
Each piston pin is full floating in both the connecting rod and piston with snap rings in both piston bosses. It is 1 mm offset (0.039 in.) to the intake side with respect to the center of the piston. The reason for this is that since the pressure on the piston on the explosion stroke rises to the maximum after the top dead center position, the side thrust on the piston is moved before the top dead center position to avoid rapid movement of the side thrust on the explosion stroke, preventing the piston from slapping the cylinder sleeve. The head of each piston is marked to make it easier to install it correctly.
2. CAM CHAIN TENSIONER MECHANISM
1. The cam chain tensioner is made of spring steel on which heat-resistant rubber is lined by paking and then heat-resistant teflon having less frictional resistance is coated, minimizing chain noise and improving durability.
2. The chain tension can be easily adjusted by loosening the adjusting bolt and then retightening it.
Cam chain slipper
1. The cam chain slipper installed to the cylinder block prevents chain vibrations often developed due to temporarily disturbed engine speed during deceleration.
2. The cam chain slipper is so constructed that the synthetic rubber is attached to the steel plate and it has great durability.