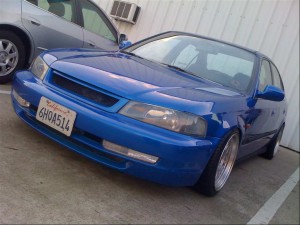
1997 Acura 1.6EL Workshop Repair & Service Manual (1,041 Pages, Searchable, Printable, Bookmarked, iPad-ready PDF)
Complete digital workshop service and repair manual written for the 1997 Acura 1.6EL. All styles covered (all models, and engines). It is in the cross-platform PDF document format so that it works like a charm on all kinds of devices.
This QUALITY manual is 100% COMPLETE and INTACT, no MISSING/CORRUPT pages/sections to freak you out! Buy from responsible seller and get INSTANT DOWNLOAD now without wasting your hard-owned money on uncertainty or surprise; this manual is exactly as described.
PRODUCT DETAILS:
Total Pages: more than 1,041 pages
File Format: PDF (Windows & Mac & Linux)
Language: English
Delivery: instant download link displayed on checkout page & emailed to you after payment
Protection: DRM-free; without any restriction
Printable: Yes
This COMPLETE official full workshop service repair manual includes:
* Detailed sub-steps expand on repair procedure information
* Notes, cautions and warnings throughout each chapter pinpoint critical information.
* Numbered instructions guide you through every repair procedure step by step.
* Bold figure number help you quickly match illustrations with instructions.
* Detailed illustrations, drawings and photos guide you through every procedure.
* Enlarged inset helps you identify and examine parts in detail.
* Numbered table of contents easy to use so that you can find the information you need fast.
* This manual also makes it easy to diagnose and repair problems with your machines electrical system.
* Troubleshooting and electrical service procedures are combined with detailed wiring diagrams for ease of use.
* COMPLETE, Absolutely No Missing Pages!
* Official Service INFORMATION You Can Count On!
* Customer Satisfaction GUARANTEED!
EXCERPT (1997 Acura 1.6EL Service/Repair Manual):
Engine Electrical
Special Tools …………………………………. 4-2
Starting System
Component Location Index ………… 4-3
Circuit Diagram ………………………….. 4-4
Starter Test ……………………………….. 4-5
Starter Solenoid Test …………………. 4-6
Starter Replacement ………………….. 4-7
Starter Overhaul ………………………… 4-8
Armature Inspection and Test ……..
Brush Inspection …………………………
Overrunning Clutch Inspection ……
Brush Holder Test ……………………….
Starter Reassembly …………………….
Performance Test ………………………..
Ignition System
Component Location Index ………… 4-14
Circuit Diagram ………………………….. 4-15
Ignition Timing Inspection and
Setting …………………………………… 4-16
Distributor Replacement …………….. 4-17
Distributor Overhaul …………………… 4-18
Ignition Control Module (ICM) Input
Test ……………………………………….. 4-19
Ignition Coil Test ………………………… 4-20
Ignition Wire Inspection and
Test ……………………………………….. 4-20
Spark Plug Inspection ………………… 4-21
Charging System
Component Location Index ………… 4-22
Circuit Diagram ………………………….. 4-23
Troubleshooting ………………………… 4-24
Alternator Replacement ……………… 4-28
Alternator Overhaul ……………………. 4-29
Rectifier Removal ……………………….. 4-30
Rectifier Test ……………………………… 4-31
Rotor Slip Ring Test …………………… 4-32
Alternator Brush Inspection ……….. 4-32
Rear Bearing Replacement …………. 4-33
Alternator Reassembly ……………….. 4-33
Alternator Belt Inspection and
Adjustment …………………………….. 4-34
Cruise Control
Component Location Index ………… 4-35
Circuit Diagram ………………………….. 4-36
Control Unit Input Test ………………. 4-37
Main Switch Test/Replacement ….. 4-39
Set/Resume Switch Test/
Replacement ………………………….. 4-39
Actuator Test …………………………….. 4-41
Actuator Replacement ……………….. 4-42
Actuator Cable Adjustment ………… 4-42
Actuator Solenoid Test ………………. 4-43
Actuator Disassembly ………………… 4-44
0. Insert a 24″ long, 3/8″ drive extension and the special tool into the cylinder from the gearbox side.
NOTE: Make sure that the special tool is securely positioned on the backup ring edges.
CAUTION: Be careful not damage to inner surface of the cylinder with the special tool.
21. Set the gearbox housing in a press, then press out the cylinder end seal and backup ring from the gearbox housing.
CAUTION:
• Keep the tool straight to avoid damaging the cylinder wall. Check the tool angle, and correct it if necessary, when removing the cylinder end seal.
• Use a press to remove the cylinder end seal. Do not try to remove the seal by striking the tool. It will break the backup ring, and the cylinder end seal will remain in the gearbox housing.