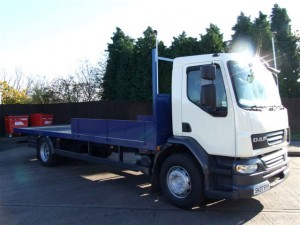
DAF LF45, LF55 2001-2015 Workshop Repair & Service Manual (COMPLETE & INFORMATIVE for DIY REPAIR) ☆ ☆ ☆ ☆ ☆
* COMPLETE, Absolutely No Missing Pages!
* Official Service INFORMATION You Can Count On!
* Customer Satisfaction GUARANTEED!
This high QUALITY official manual for DAF LF45, LF55 2001-2015 is 100 percents COMPLETE and INTACT, no MISSING, CORRUPT pages, sections to freak you out! This manual is exactly as described. It is in the cross-platform PDF document format so that it works like a charm on all kinds of devices.
FORMAT: PDF
LANGUAGE: English
SIZE/PAGE: 185 MB
OS: Windows/Mac OS X/Linux/Android/iOS
MAKE: DAF
MODEL: LF45, LF55 Series
YEAR: 2001 2002 2003 2004 2005 2006 2007 2008 2009 2010 2011 2012 2013 2014 2015
DAF 2001 2002 2003 2004 2005 2006 2007 2008 2009 2010 2011 2012 2013 2014 2015 LF45-55, LF55 SERIES TRUCK
INSTANT DELIVERY: A download link will be sent to you instantly after payment. Simply click on the link and save it to your computer. You can use this Manual as long as you wish with no restrictions.
CUSTOMER SATISFACTION: If there is ANY kind of problem with the item you purchased, just drop a quick email. Within HOURS the issue shall be taken care of.
PRINTABLE MANUAL WITH DIAGRAMS: Just print the manual out and start to work. You can also use the manual with your Tablet/Laptop in your garage.
REFUND/EXCHANGE POLICY: We sell high QUALITY products only. However if you encounter any problems with the item you purchased, another replacement link will be sent to you. If we’re at fault, you will get 100 percents refund.
Buy ☆THE BEST MANUAL ON THE INTERNET☆ from responsible seller and get instant download now without uncertainty or surprise.
This highly detailed workshop service repair manual for download contains virtually everything you will ever need to repair, maintain, rebuild, refurbish or restore DAF LF45-55 2001-2015. All diagnostic and repair procedures and gives you access to the same information that professional technicians and mechanics have. You can view and print out the complete repair procedures with this workshop service repair manual Download – you do not need to be skilled with a computer.
DAF LF45, LF55 2001-2015 Workshop Repair & Service Manual (COMPLETE & INFORMATIVE for DIY REPAIR) ☆ ☆ ☆ ☆ ☆
EXCERPTS:
3. THREADED CONNECTIONS
3.1 DIPPED THREADED CONNECTIONS
The components may have threaded connections that have been treated with lubricant (dipped threaded connection). Galvanized bolts and nuts are wax dipped in the factory. Black annealed and phosphatised bolts and nuts are oil dipped.
The advantage of using a lubricant is that friction during tightening of the threaded connection is reduced, so that the specified pre-tension can be obtained accurately and more easily. The tightening torque can be reduced while the pretension force remains the same.
To achieve a small spread in the pre-tension force, the dipped threaded connection must be tightened accurately. Therefore, always use a reliable torque wrench that provides a high degree of accuracy.
Note:
Have torque wrenches regularly inspected and calibrated.
To achieve the correct pre-tension when re-using nuts and bolts, it is important to clean the thread thoroughly. After cleaning, apply one drop of lubricant to the first turn of the screw thread and one drop to the contact surface of the nut or bolt.
If bolts and nuts are to be re-used, do not lubricate them with anything other than engine oil.
Lubricants other than engine oil or factory-applied lubricant must not be used under any
circumstances because of the difference in friction coefficient.
When locking compounds are used for dipped threaded connections, the instructions given here
apply, except for applying lubricant to the first turn of the screw thread.
The reason for this is that the friction coefficients of other lubricants vary too much and are not the same as those of the above-mentioned lubricants.
The use of locking compounds in combination with dipped bolts and nuts creates no problems.
4.1 DISASSEMBLY AND ASSEMBLY, AIR COMPRESSOR DRIVE GEAR
Disassembly, air compressor drive gear
1. Remove the air compressor.
2. Position a filter belt with a textile or leather band (usually used for removing screwed filters) around the drive gear.
3. Loosen the central attachment nut, using the filter pliers to prevent the air compressor shaft from turning along.
4. Remove the central attachment nut.
5. Use a puller to remove the drive gear.
Assembly, air compressor drive gear
1. Thoroughly clean the parts to be assembled.
The contact surfaces of the gear attachment and the air compressor shaft should be absolutely free from grease.
2. Inspect the parts to be assembled for damage and deformation. Replace the parts if necessary.
3. Fit the drive gear to the air compressor shaft.
4. Fit the central attachment nut to the air compressor shaft. Hold the air compressor gear in place using the filter belt. For the specified torque, see ‘Technical data’.
5. Fit the air compressor.