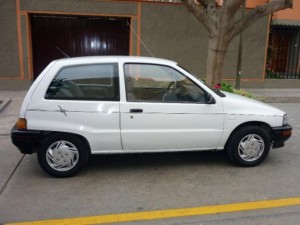
Daihatsu Charade 1987-1993 Workshop Repair & Service Manual (COMPLETE & INFORMATIVE for DIY REPAIR) ☆ ☆ ☆ ☆ ☆
* COMPLETE, Absolutely No Missing Pages!
* Official Service INFORMATION You Can Count On!
* Customer Satisfaction GUARANTEED!
This high QUALITY official manual for Daihatsu Charade 1987-1993 is 100 percents COMPLETE and INTACT, no MISSING, CORRUPT pages, sections to freak you out! This manual is exactly as described. It is in the cross-platform PDF document format so that it works like a charm on all kinds of devices.
FORMAT: PDF
LANGUAGE: English
SIZE/PAGE: 989 Pages
OS: Windows/Mac OS X/Linux/Android/iOS
’87-’93 Charade (G100, G102 Series)
Daihatsu Type CB Engine (CB-23, CB-61 & CB-80)
INSTANT DELIVERY: A download link will be sent to you instantly after payment. Simply click on the link and save it to your computer. You can use this Manual as long as you wish with no restrictions.
CUSTOMER SATISFACTION: If there is ANY kind of problem with the item you purchased, just drop a quick email. Within HOURS the issue shall be taken care of.
PRINTABLE MANUAL WITH DIAGRAMS: Just print the manual out and start to work. You can also use the manual with your Tablet/Laptop in your garage.
REFUND/EXCHANGE POLICY: We sell high QUALITY products only. However if you encounter any problems with the item you purchased, another replacement link will be sent to you. If we’re at fault, you will get 100 percents refund.
Buy ☆THE BEST MANUAL ON THE INTERNET☆ from responsible seller and get instant download now without uncertainty or surprise.
This highly detailed workshop service repair manual for download contains virtually everything you will ever need to repair, maintain, rebuild, refurbish or restore Daihatsu Charade 1987-1993. All diagnostic and repair procedures and gives you access to the same information that professional technicians and mechanics have. You can view and print out the complete repair procedures with this workshop service repair manual Download – you do not need to be skilled with a computer.
Daihatsu Charade 1987-1993 Workshop Repair & Service Manual (COMPLETE & INFORMATIVE for DIY REPAIR) ☆ ☆ ☆ ☆ ☆
EXCERPTS:
FRONT AXLE & SUSPENSION
1. Disc brake cover replacement
(1) Separate the disc brake cover from the knuckle, using a common screwdriver or the like.
NOTE:
Do not remove the disc brake cover unless its replacement is required.
(2) Press the disc brake cover until it comes into close contact with the knuckle, using the following SSTs. SST: 09506-87302-000 09718-87701-000
INSTALLATION
1. Front axle bearing installation
(1) Press the bearing into position, using the following
SSTs. SST: 09506-87302-000 09550-10012-000 (09554-10010-000, part of the proceeding tool)
(2) Install a new snap ring, using snap ring pliers.
(3) Press the front axle hub into position, using the following SST. SST: 09550-10012-000 (09554-10010-000, part of the proceeding tool)
2. Steering knuckle installation
(1) Insert the steering knuckle into the drive shaft.
NOTE:
• Be careful not to allow the drive shaft to come into contact with the oil seal at the knuckle side.
• Pay utmost attention not to damage the ball joint dust
cover.
(2) Mount the steering knuckle on the lower ball joint.
(3) Mount the steering knuckle on the shock absorber lower bracket. Tighten the bolts and nuts.
Tightening Torque: 9.0 – 13.0 kg-m (65 – 94 ft-lb)
NOTE:
With the knuckle pushed against the lower side, tighten the bolts and nuts.
(4) Install the lower ball joint. Tighten the bolt and nut. Tightening Torque: 8.0 – 10.5 kg-m (58 – 76 ft-lb)
(5) Install the washer. Install the nut temporarily.
NOTE: Be sure to install the washer in the correct direction.
3. Install the disc rotor.
NOTE:
Care must be exercised to ensure that no foreign matter lodge between the hub and the disc rotor.
4. Disc brake caliper installation
(1) Install the pad guide plate to the steering knuckle.
(2) Tighten the attaching bolts of the disc brake caliper. Tightening Torque: 3.2 – 4.2 kg-m (23 – 30 ft-lb).