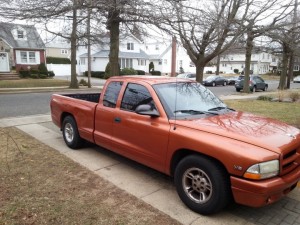
Dodge Dakota 1997-2007 Workshop Repair & Service Manual (COMPLETE & INFORMATIVE for DIY REPAIR) ☆ ☆ ☆ ☆ ☆
* COMPLETE, Absolutely No Missing Pages!
* Official Service INFORMATION You Can Count On!
* Customer Satisfaction GUARANTEED!
This high QUALITY official manual for Dodge Dakota 1997-2007 is 100 percents COMPLETE and INTACT, no MISSING, CORRUPT pages, sections to freak you out! This manual is exactly as described. It is in the cross-platform PDF document format so that it works like a charm on all kinds of devices.
FORMAT: PDF
LANGUAGE: English
SIZE/PAGE: 627 MB
OS: Windows/Mac OS X/Linux/Android/iOS
INSTANT DELIVERY: A download link will be sent to you instantly after payment. Simply click on the link and save it to your computer. You can use this Manual as long as you wish with no restrictions.
CUSTOMER SATISFACTION: If there is ANY kind of problem with the item you purchased, just drop a quick email. Within HOURS the issue shall be taken care of.
PRINTABLE MANUAL WITH DIAGRAMS: Just print the manual out and start to work. You can also use the manual with your Tablet/Laptop in your garage.
REFUND/EXCHANGE POLICY: We sell high QUALITY products only. However if you encounter any problems with the item you purchased, another replacement link will be sent to you. If we’re at fault, you will get 100 percents refund.
Buy ☆THE BEST MANUAL ON THE INTERNET☆ from responsible seller and get instant download now without uncertainty or surprise.
This highly detailed workshop service repair manual for download contains virtually everything you will ever need to repair, maintain, rebuild, refurbish or restore Dodge Dakota 1997-2007. All diagnostic and repair procedures and gives you access to the same information that professional technicians and mechanics have. You can view and print out the complete repair procedures with this workshop service repair manual Download – you do not need to be skilled with a computer.
EXCERTS:
GROUP TAB LOCATOR
Introduction
0 Lubrication & Maintenance
2 Suspension
3 Differential & Driveline
5 Brakes
6 Clutch
7 Cooling
8A Audio/Video
8B Chime/Buzzer
8E Electronic Control Modules
8F Engine Systems
8G Heated Systems
8H Horn
8I Ignition Control
8J Instrument Cluster
8L Lamps
8M Message Systems
8N Power Systems
😯 Restraints
8P Speed Control
8Q Vehicle Theft Security
8R Wipers/Washers
8T Navigation/Telecommunication
8W Wiring
9 Engine
11 Exhaust System
13 Frame & Bumpers
14 Fuel System
19 Steering
21 Transmission and Transfer Case
22 Tires/Wheels
23 Body
24 Heating & Air Conditioning
25 Emissions Control
Component and System Index
DTC Index
BACKLITE
REMOVAL
CAUTION: It is difficult to salvage the backlite during the removal operation. The backlite is part of the structural support for the roof. The urethane bonding used to secure the glass to the fence is difficult to cut or clean from any surface. Since the molding is set in urethane, it is unlikely it would be salvaged. Before removing the backlite, check the availability from the parts supplier.
NOTE: The backlite is attached to the window frame with urethane adhesive. The urethane adhesive is applied cold and seals the surface area between the window opening and the glass. The primer adheres the urethane adhesive to the backlite.
1. Roll down door glass.
2. Remove headliner (9) (Refer to 23 – BODY/INTERIOR/ HEADLINER – REMOVAL).
3. On club cab models remove the upper c-pillar trim (2). (Refer to 23 – BODY/INTERIOR/PANEL-C PILLAR UPPER TRIM – REMOVAL)
4. On quad cab models remove the upper c-pillar trim (2). (Refer to 23 – BODY/INTERIOR/PANEL-C PILLAR UPPER TRIM – REMOVAL)
5. Disconnect the rear window defogger electrical connector (1), if equipped.
6. Bend backlite retaining tabs (2) inward against glass.
7. Using a suitable pneumatic knife from inside the vehicle, cut urethane holding backlite frame to opening fence.
8. Separate glass (1) from vehicle.
SENSOR-CRANKSHAFT POSITION
DESCRIPTION
3.7L V-6
The Crankshaft Position (CKP) sensor (2) is mounted into the right rear side of the cylinder block. It is positioned and bolted into a machined hole.
4.7L V-8
The Crankshaft Position (CKP) sensor (1) is mounted into the right rear side of the cylinder block. It is positioned and bolted into a machined hole.
OPERATION
3.7L V-6
Engine speed and crankshaft position are provided through the CKP (Crankshaft Position) sensor. The sensor generates pulses that are the input sent to the Powertrain Control Module (PCM). The PCM interprets the sensor input to determine the crankshaft position.
The PCM then uses this position, along with other inputs, to determine injector sequence and ignition timing.
The sensor (3) is a hall effect device combined with an internal magnet. It is also sensitive to steel within a certain distance from it. A tonewheel (targetwheel) is bolted to the engine
crankshaft (1). This tonewheel has sets of notches (2) at its outer edge. The notches cause a pulse to be generated when they pass under the sensor. The pulses are the input to the
PCM.
Dodge Dakota 1997-2007 Workshop Repair & Service Manual (COMPLETE & INFORMATIVE for DIY REPAIR) ☆ ☆ ☆ ☆ ☆