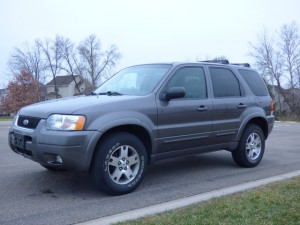
Ford Escape (Hybrid), Mercury Mariner (Hybrid) 2003 Workshop Repair & Service Manual (COMPLETE & INFORMATIVE for DIY REPAIR)
* COMPLETE, Absolutely No Missing Pages!
* Official Service INFORMATION You Can Count On!
* Customer Satisfaction GUARANTEED!
This high QUALITY official manual for 2003 Ford Escape, Escape Hybrid, 2003 Mercury Mariner, Mariner Hybrid is 100 percents COMPLETE and INTACT, no MISSING, CORRUPT pages, sections to freak you out! This manual is exactly as described. It is in the cross-platform PDF document format so that it works like a charm on all kinds of devices.
FORMAT: PDF
LANGUAGE: English
SIZE/PAGE: 3,015 pages
OS: Windows/Mac OS X/Linux/Android/iOS
INSTANT DELIVERY: A download link will be sent to you instantly after payment. Simply click on the link and save it to your computer. You can use this Manual as long as you wish with no restrictions.
CUSTOMER SATISFACTION: If there is ANY kind of problem with the item you purchased, just drop a quick email. Within HOURS the issue shall be taken care of.
PRINTABLE MANUAL WITH DIAGRAMS: Just print the manual out and start to work. You can also use the manual with your Tablet/Laptop in your garage.
REFUND/EXCHANGE POLICY: We sell high QUALITY products only. However if you encounter any problems with the item you purchased, another replacement link will be sent to you. If we’re at fault, you will get 100 percents refund.
Buy ☆THE BEST MANUAL ON THE INTERNET☆ from responsible seller and get instant download now without uncertainty or surprise.
This highly detailed workshop service repair manual for download contains virtually everything you will ever need to repair, maintain, rebuild, refurbish or restore 2003 Ford Escape, Escape Hybrid), 2003 Mercury Mariner, Mariner Hybrid. All diagnostic and repair procedures and gives you access to the same information that professional technicians and mechanics have. You can view and print out the complete repair procedures with this workshop service repair manual Download – you do not need to be skilled with a computer.
2003 Escape
Workshop Manual
Alphabetical Index
A B C D E F
G H I J K L
M N O P Q R
S T U V W
Table of Contents
1: General Information
00: Service Information
2: Chassis
04: Suspension
05: Driveline
06: Brake System
11: Steering System
3: Powertrain
03: Engine
07: Automatic Transmission
08: Manual Transmission, Clutch and Transfer Case
09: Exhaust System
10: Fuel System
4: Electrical
12: Climate Control System
13: Instrumentation and Warning Systems
14: Battery and Charging System
15: Audio Systems
17: Lighting
18: Electrical Distribution
19: Electronic Feature Group
5: Body and Paint
01: Body
02: Frame and Mounting
GROUP 03: Engine
SECTION 303-00: Engine System General Information
SECTION 303-01A: Engine 2.0L Zetec
SECTION 303-01B: Engine 3.0L (4V)
SECTION 303-03: Engine Cooling
SECTION 303-04A: Fuel Charging and Controls 2.0L Zetec
SECTION 303-04B: Fuel Charging and Controls 3.0L (4V)
SECTION 303-05: Accessory Drive
SECTION 303-06: Starting System
SECTION 303-07A: Engine Ignition 2.0L Zetec
SECTION 303-07B: Engine Ignition 3.0L (4V)
SECTION 303-08: Engine Emission Control
SECTION 303-12: Intake Air Distribution and Filtering
SECTION 303-13: Evaporative Emissions
SECTION 303-14: Electronic Engine Controls
Rocker Arm Cleaning and Inspection
CAUTION: Do not attempt to true surfaces by grinding. Check the rocker arm pad, side rails, and seat for excessive wear, cracks, nicks, or burrs. Check the rocker arm seat bolt for stripped or broken threads. Install new components as necessary or possible damage can occur.
1. Clean all parts thoroughly. Make sure all oil passages are open.
2. Make sure oil passage in the push rod/valve tappet end of the rocker arm is open.
Inspect the rocker arm push rod bore for nicks, scratches, scores or scuffs. Install new components as necessary. Refer to the appropriate section in Group 303 for the procedure.
3.
Inspect the pad at the end of the rocker arm for indications of scuffing or abnormal wear. If the pad is grooved, install a new rocker arm. Refer to the appropriate section in Group 303 for the procedure.
Cylinder Leakage Detection
When a cylinder produces a low reading, use of the Engine Cylinder Leak Detection/Air Pressurization Kit will be helpful in pinpointing the exact cause.
The leakage detector is inserted in the spark plug hole, the piston is brought up to dead center on the compression stroke, and compressed air is admitted.
Once the combustion chamber is pressurized, a special gauge included in the kit will read the percentage of leakage. Leakage exceeding 20 percent is excessive.
While the air pressure is retained in the cylinder, listen for the hiss of escaping air. A leak at the intake valve (6507) will be heard in the throttle body (9E926). A leak at the exhaust valve (6505) can be heard at the tail pipe. Leakage past the piston rings will be audible at the positive crankcase ventilation (PCV) connection. If air is passing through a blown head gasket to an adjacent cylinder, the noise will be evident at the spark plug hole of the cylinder into which the air is leaking. Cracks in the cylinder block or gasket leakage into the cooling system may be detected by a stream of bubbles in the radiator (8005).