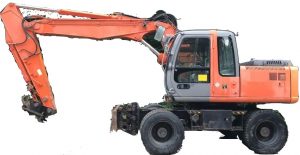
Pages from WCBBE00 – Hitachi ZAXIS 160W Wheeled Excavator Workshop Manual
Hitachi ZAXIS 160W Wheeled Excavator Factory Service & Shop Manual
Complete workshop & service manual with electrical wiring diagrams for Hitachi ZAXIS 160W Wheeled Excavator. It’s the same service manual used by dealers that guaranteed to be fully functional and intact without any missing page.
This Hitachi ZAXIS 160W Wheeled Excavator service & repair manual (including maintenance, overhaul, disassembling & assembling, adjustment, tune-up, operation, inspecting, diagnostic & troubleshooting…) is divided into different sections. Each section covers a specific component or system with detailed illustrations. A table of contents is placed at the beginning of each section. Pages are easily found by category, and each page is expandable for great detail. The printer-ready PDF documents work like a charm on all kinds of devices.
FILELIST:
TTCBBE00 – Hitachi ZAXIS 160W Wheeled Excavator Technical Manual (Troubleshooting).pdf
WCBBE00 – Hitachi ZAXIS 160W Wheeled Excavator Workshop Manual.pdf
PCBB11 – Hitachi ZAXIS 160W Wheeled Excavator Parts Catalog.pdf
PCBBE12 – Hitachi ZAXIS 160W Wheeled Excavator Parts Catalog.pdf
EXCERPT:
SECTION 1 GENERAL INFORMATION
Group 1 Precautions for disassembling and Assembling
Group 2 Tightening Torque
Group 3 Painting
Group 4 Bleeding Air from Hydraulic Oil Tank
SECTION 2 UPPERSTRUCTURE
Group 1 Cab
Group 2 Counterweight
Group 3 Main Frame
Group 4 Pump Device
Group 5 Control Valve
Group 6 Swing Device
Group 7 Pilot Valve
Group 8 Pilot Shut-Off Valve
Group 9 Signal Control Valve
Group 10 Travel Shockless Valve
Group 11 Solenoid Valve
Group 12 Pilot Relief Valve
Group 13 Steering Valve
Group 14 Brake Valve
Group 15 Accumulator Charging Valve
Group 16 Transmission Control Valve
SECTION 3 UNDERCARRIAGE
Group 1 Swing Bearing
Group 2 Travel Motor
Group 3 Center Joint
Group 4 Transmission
Group 5 Axle
Group 6 Axle Lock Cylinder
Group 7 Operate-Check Valve
SECTION 4 FRONT ATTACHMENT
Group 1 Front Attachment
Group 2 Cylinder
Group 3 Hose-Rupture Safety Valve
Group 4 Operate-Check Valve
SECTION 5 ENGINE
…
UNDERCARRIAGE / Operate-Check Valve
REMOVE AND INSTALL OPERATE-CHECK VALVE (FOR AXLE LOCK CYLINDER)
CAUTION: Be sure to bleed air from hydraulic oil tank before starting the work.
(Refer to “Bleeding Air from Hydraulic Oil Tank” on page W1-4-1.)
Removal
1. Disconnect pipes (2) (2 used) from operate-check valve (1). Cap the open ends. : 19 mm
2. Remove socket bolts (3) (4 used) to remove operate-check valve (1) from the axle lock cylinder.
Cap the open ends of the axle lock cylinder. : 6 mm
Installation
1. Install operate-check valve (1) to the axle lock cylinder with socket bolts (3) (4 used). : 6 mm
: 20 N⋅m (2.0 kgf⋅m, 14.5 lbf⋅ft)
2. Connect pipes (2) (2 used). : 19 mm
: 29.5 N⋅m (3.0 kgf⋅m, 21.5 lbf⋅ft)
…