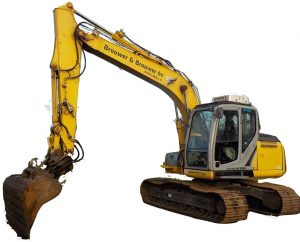
Complete workshop & service manual with electrical wiring diagrams for New Holland Kobelco E135B Crawler Excavator. It’s the same service manual used by dealers that guaranteed to be fully functional and intact without any missing page.
This New Holland Kobelco E135B Crawler Excavator service & repair manual (including maintenance, overhaul, disassembling & assembling, adjustment, tune-up, operation, inspecting, diagnostic & troubleshooting…) is divided into different sections. Each section covers a specific component or system with detailed illustrations. A table of contents is placed at the beginning of each section. Pages are easily found by category, and each page is expandable for great detail. The printer-ready PDF documents work like a charm on all kinds of devices.
“84136002.pdf”
New Holland Kobelco E135B Crawler Excavator Worksop Manual
1,023 pages
Print No.84136002
Edition – November 2008
…
— — — — — — — — — — — — — — — — — — — — —
EXCERPT:
SWIVEL JOINT
Disassembly
The part numbers used in this disassembly procedure correspond to those of a construction drawing in the figure on page W3-3-4.
1. Mark cover (4) and body (1) with matching marks for convenient reassembly.
2. Place a ‘V’ (A) block on a work bench, place a swivel joint set on the side, fix it and loosen socket bolt (9) by means of a pipe and wrench. Alternately, the swivel joint may be fixed by holding stem (2) in a vise.
: 6 mm
3. Remove cover (4) from body (1) and draw out O-Ring (7) from cover (4).
4. Loosen socket bolt (8) fastening thrust plate (3), in the same manner as the removing of the above-mentioned cover (4).
– When removing thrust plate (3) by fixing body (1), support stem (2) so it may not fall down.
: 6 mm
5. Place body (1) on a ‘V’ (A)-block. Put a wooden block against stem (2) via the body so about half of the stem is covered by the wooden block (B) and knock it out using a mallet. By hitting out the stem over about 1/2 from the body, it can be easily pulled out by hand.
6. Remove the O-rings (13).
NOTE: Make sure the body (1) is not scored from the tip of the spatula (E).
7. Remove the seal rings (6) by means of a spatula (E).
…
