INSTANT DOWNLOAD (add to cart)
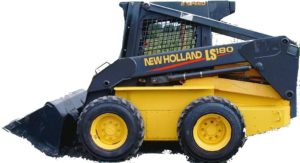
Complete workshop & service manual with electrical wiring diagrams for New Holland LS180.B, S185.B, S190.B Skid Steer Loader. It’s the same service manual used by dealers that guaranteed to be fully functional and intact without any missing page.
This New Holland LS180.B, S185.B, S190.B Skid Steer Loader service & repair manual (including maintenance, overhaul, disassembling & assembling, adjustment, tune-up, operation, inspecting, diagnostic & troubleshooting…) is divided into different sections. Each section covers a specific component or system with detailed illustrations. A table of contents is placed at the beginning of each section. Pages are easily found by category, and each page is expandable for great detail. The printer-ready PDF documents work like a charm on all kinds of devices.
837 pages, bookmarked, Searchable, Printable, high quality PDF
New Holland LS180.B, S185.B, S190.B Skid Steer Loader Repair Manual
Print No. 604.13.552.01 English
CONTENTS
INTRODUCTION
DISTRIBUTION SYSTEMS
PRIMARY HYDRAULIC POWER SYSTEM SECONDARY HYDRAULIC POWER SYSTEM HIGH-FLOW HYDRAULIC POWER SYSTEM ELECTRICAL POWER SYSTEM
LIGHTING SYSTEM
POWER PRODUCTION ENGINE
FUEL AND INJECTION SYSTEM AIR INTAKE SYSTEM
ENGINE COOLANT SYSTEM LUBRICATION SYSTEM STARTING SYSTEM
POWER TRAIN
POWER COUPLING Fixed coupling
TRANSMISSION Hydrostatic
TRAVELLING
FRONT AXLE
REAR AXLE
STEERING Steering clutch
PARKING BRAKE Hydraulic
WHEELS AND TRACKS Wheels Final drive
BODY AND STRUCTURE
USER CONTROLS AND SEAT
USER PLATFORM
ENVIRONMENT CONTROL Heating system
ENVIRONMENT CONTROL Air-conditioning system SAFETY SECURITY ACCESSORIES Safety
WORKING ARM
BOOM Lift
SINGLE ARM Lift
SINGLE ARM TOOL ATTACHMENT Tilt
TOOLS AND COUPLERS CARRYING Unarticulated tools COUPLING Hydraulic coupling
COUPLING Mechanical coupling
…
EXCERPT:
Alternator – Replace (A.30.A.82 – F.10.A.30)
1. Use a suitable support between the front bearing and the bearing retainer on the rotor shaft. Press the rotor shaft out of the front bearing and the spacer.
2. Remove the bearing retainer.
3. Use a suitable support between the rear bearing and the slip ring on the other end of the rotor shaft. Press the rotor shaft out of the rear bearing.
4. Install the bearing retainer on the rotor shaft.
5. Press the new front bearing onto the rotor shaft until the front bearing stops moving.
6. Press the spacer onto the rotor shaft until the spacer stops moving.
7. Press the new rear bearing onto the other end of the rotor shaft.
…

