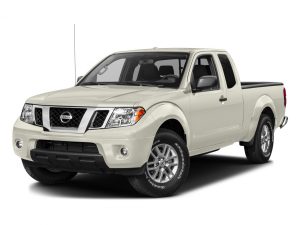
PREVIEW: Nissan Frontier (D22-40) 1998-2016
This quality manual for Nissan Frontier (D22-D40 Series) 1998-2016 is 100% complete and intact, no missing/corrupt pages/sections to freak you out! Buy from responsible seller and get instant download now without surprise; this manual is exactly as described. It is in the cross-platform PDF document format so that it works like a charm on all kinds of devices.
This is the same type of official service manual your local dealer will use when doing a repair. This manual for Nissan Frontier (D22-D40 Series) 1998-2016 has detailed illustrations as well as step by step instructions. All pages are printable, so run off what you need and take it with you into the garage or workshop. These manuals are your number one source for repair and service information. They are specifically written for the do-it-yourself-er as well as the experienced mechanic. Using this repair manual is an inexpensive way to keep your vehicle working properly. Each manual provides step-by-step instructions based on the complete dis-assembly of the machine. It is this level of detail, along with photos and illustrations, that guide the reader through each service and repair procedure.
├── D22
│ ├── ’00
│ │ ├── SM0E-1D22U7 (2.4L KA) (4-cyl)
│ │ └── SM0E-1D22U8 (3.3L VG) (6-cyl)
│ ├── ‘00.5
│ ├── ’01
│ ├── ’02
│ ├── ’03
│ ├── ’04
│ │ ├── SM4E-1D22U0
│ │ └── SM4E-1D22U1
│ ├── ’98
│ └── ’99
│ ├── 2.4L KA (4-cyl)
│ └── 3.3L VG (6-cyl)
└── D40
├── ’05
├── ’06
├── ’07
├── ’08
├── ’09
├── ’10
├── ’11
├── ’12
├── ’13
├── ’14
└── ’16
27 directories, 907 files; 2.18 GB PDF
Buy the best manual on the Internet from responsible merchant and get instant download without surprise.
INSTANT Delivery: A download link will be sent to you instantly after payment. Simply click on the link and save it to your computer. You can use this Manual as long as you wish with no restrictions.
PRINTABLE with Diagrams: Just print the manual out and start to work. You can also use the manual with your laptop in your garage.
Customer SATISFACTION: If there is any problem, just drop a quick email. Within hours the issue shall be taken care of.
REFUND Policy: We sell high quality products only. In case there is any problem with your purchase, a replacement link will be sent to you. If we are at fault, you get 100% refund.
EXCERPTS:
ACTUATOR AND ELECTRIC UNIT (ASSEMBLY)
Removal and Installation
CAUTION:
• To remove the brake tubes, use a flare nut wrench to prevent the flare nuts and brake tubes from being damaged.
• Be careful not to splash brake fluid on painted areas; it may cause paint damage. If brake fluid is splashed on painted areas, wash it away with water immediately.
• Do not remove actuator by holding harness.
NOTE:
When removing components such as hoses, tubes/lines, etc., cap or plug openings to prevent fluid from spilling.
1. Disconnect negative battery terminal. Refer to PG-90, “Exploded View”.
2. Remove air cleaner case assembly. Refer to EM-25, “Exploded View” (QR25DE) or EM-142, “Exploded View” (QV40DE).
3. Disconnect harness connector from ABS actuator and electric unit (control unit).
4. Separate brake tubes from ABS actuator and electric unit (control unit).
5. Remove bolts and ABS actuator and electric unit (control unit) with the bracket from the vehicle.
6. Remove bolt and bracket from the ABS actuator and electric unit (control unit).
…