Posted on

Case 410, 420 Skid Steers Factory Service & Shop Manual


Download Link

INSTANT DOWNLOAD (add to cart)


Complete workshop & service manual with electrical wiring diagrams for Case 410, 420 Skid Steers. It’s the same service manual used by dealers that guaranteed to be fully functional and intact without any missing page.

Case 410, 420 Skid Steers service & repair manual (including maintenance, overhaul, disassembling & assembling, adjustment, tune-up, operation, inspecting, diagnostic & troubleshooting…) is divided into different sections. Each section covers a specific component or system with detailed illustrations. A table of contents is placed at the beginning of each section. Pages are easily found by category, and each page is expandable for great detail. The printer-ready PDF documents work like a charm on all kinds of devices.

468 pages, bookmarked, Searchable, Printable, high quality PDF

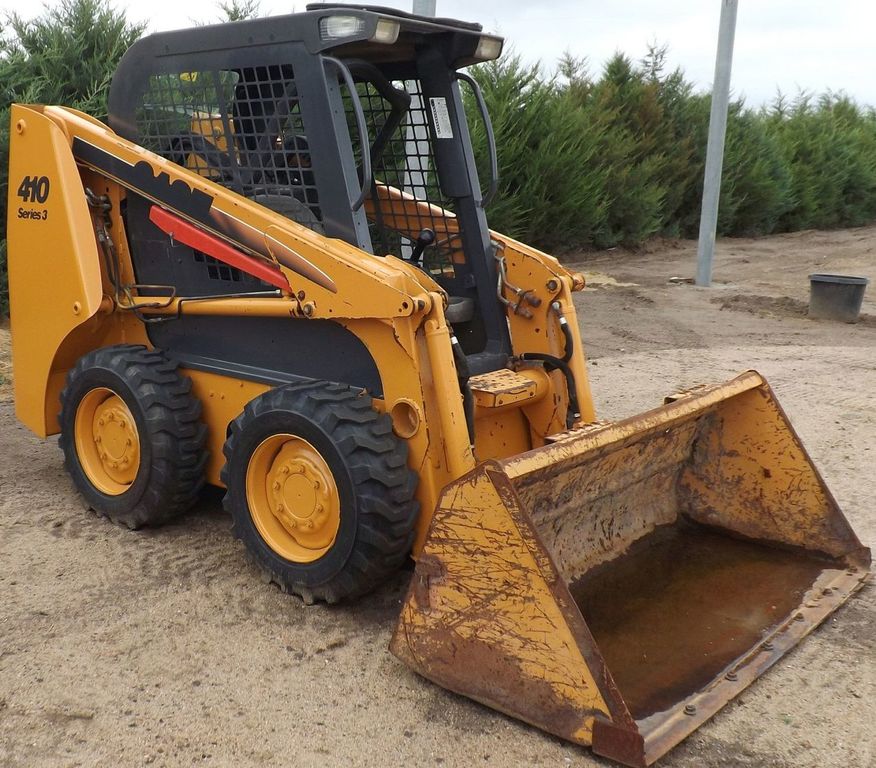
6-78950 – Case 410, 420 SKID STEER Service Manual

EXCERPT:
STARTER SOLENOID TEST
This test will check the condition of the pull-in winding and the hold-in winding in the starter solenoid.
The jumper cable connected to the starter mounting flange and the motor terminal must have a common connection at the negative battery post.
Starter Solenoid Test Procedure
1. Remove the rubber boot from the motor terminal. Remove the nut and lock washer from the motor terminal. Then remove the wire from the motor terminal.
2. Connect a jumper cable to the positive battery post of a fully charged 12 volt battery. Connect the other end of the jumper cable to the battery terminal in the starter solenoid housing.
3. Connect a jumper wire to the battery terminal and the switch terminal in the starter solenoid housing. The jumper wire must be made from No. 10 or larger wire.
4. Connect the jumper cable with the common connection to the starter mounting flange and the motor terminal in the starter solenoid housing.
NOTE: Steps 5 and 7 must be done in a maximum of 15 seconds to prevent damage to the pull-in winding and the hold-in winding.
5. Connect the jumper cable with the common connection to the negative battery post. The pinion gear on the starter drive must come all the way out rapidly and with force.
6. If the pinion gear did not come out rapidly and with force, the pull-in winding is damaged. The complete starter solenoid housing assembly must be replaced.
7. Disconnect the jumper cable from the motor terminal in the starter solenoid housing. The pinion gear on the starter drive must not move toward the starter drive housing.
8. If the pinion gear started to move toward the starter drive housing, the hold-in winding is damaged. The complete starter solenoid housing assembly must be replaced.

Posted on

Case 327B, 330B Articulated Dump Trucks Factory Service & Shop Manual


Download Link

INSTANT DOWNLOAD (add to cart)


Case 327B, 330B Articulated Dump Trucks Factory Service & Shop Manual
Complete workshop & service manual with electrical wiring diagrams for Case 327B, 330B Articulated Dump Trucks . It’s the same service manual used by dealers that guaranteed to be fully functional and intact without any missing page.

This Case 327B, 330B Articulated Dump Trucks service & repair manual (including maintenance, overhaul, disassembling & assembling, adjustment, tune-up, operation, inspecting, diagnostic & troubleshooting…) is divided into different sections. Each section covers a specific component or system with detailed illustrations. A table of contents is placed at the beginning of each section. Pages are easily found by category, and each page is expandable for great detail. The printer-ready PDF documents work like a charm on all kinds of devices.

3,800+ pages, bookmarked, Searchable, Printable, high quality PDF

“87573455 NA.pdf”
Case 327B, 330B Articulated Dump Trucks Service Manual; 1214 pages
Issued 11-2006

“84187913.pdf”
Case 327B, 330B Articulated Dump Trucks Service Manual; 1278 pages
Print No. 84187913
First Edition English 09/09 From serial no. ZCNAD30TP8P457003

“84150684 NA.pdf”
Case 327B, 330B Tier 3 Simplemux Articulated Truck Service Manual; 1397 pages
ASN HHD03(27)(30)BN_PG56092~ HHD03(27)(30)BN_PG56076~ 84150684 NA
Issued 01June 08

EXCERPT:
327B-330B
SECTION 5 AUTOMATIC TRANSMISSION
CLEANING, INSPECTING AND CHECKING
Cleaning components
All components must be clean to allow an effective inspection. During assembly, do not let dust and foreign bodies inside the trans- mission. Even the smallest particles can damage accurately mated components. Use petroleum based solvents for cleaning only, with the exception of benzene and derivatives. Solvents such as trichlorethylene, benzol, acetone and all aromatic products may damage polyacrylic rubber seals.

Accurately clean all removed parts. Follow the precautions below:
* Accurately clean the guards, inside and out, to allow checking and to prevent dirt from penetrating inside;
* use only solvent to clean the clutch plates. Clean all other metal transmission components perfectly with solvent or steam. Do not use caustic soda based solutions for steam cleaning;
* dry all components with compressed air, except for the bearings. Apply grease to steam cleaned components immediately after drying;
* clean oil pipes by passing a piece of soft wire in both direction and washing with solvent. Dry the pipes with compressed air;

Posted on

Case 85XT/90XT/95XT Skid Steers Workshop Repair & Service Manual


Download Link

INSTANT DOWNLOAD (add to cart)


Complete digital official shop manual contains service, maintenance, and troubleshooting information for the Case 85XT, 90XT, 95XT Skid Steers. Diagnostic and repair procedures are covered in great detail to repair, maintain, rebuild, refurbish or restore your Skid Steers like a professional mechanic in local service/repair workshop. This cost-effective quality manual is 100% complete and intact as should be without any missing pages. It is the same factory shop manual used by dealers that guaranteed to be fully functional to save your precious time.

This manual for Case 85XT, 90XT, 95XT Skid Steers is divided into different sections. Each section covers a specific component or system and, in addition to the standard service procedures, includes disassembling, inspecting, and assembling instructions. A table of contents is placed at the beginning of each section. Pages are easily found by category, and each page is expandable for great detail. It is in the cross-platform PDF document format so that it works like a charm on all kinds of devices. You do not need to be skilled with a computer to use the manual.

1,436 pages, bookmarked, Searchable, Printable, high quality PDF
7-52254 – 85XT, 90XT, 95XT Skid Steers Service Manual.pdf;

EXCERPT:
HYDRAULIC COMPONENTS
Components Defined
Reservoir – Located in the left rear of chassis.
Pressurized to 34.5 kpa (5 psi), with a -3.5 kpa (- 0.5 psi) vacuum breaker. A 100 mesh suction screen is located near the bottom of the reservoir to supply filtered oil to the hydraulic gear pump.
Hydraulic gear pump – Supplies flow to charge the hydrostatic tandem pump assembly and operate the hydraulic system.
Constant pressure priority valve – Integrated with the hydraulic gear pump to provide priority oil
flow to charge the hydrostatic tandem pump assembly, with remaining flow supplying the hydraulic system.
Loader control valve – Is a three spool valve controlling the loader, bucket and auxiliary circuits.
The main relief valve is also par t of the valve assembly.
Bucket cylinders – Used to control the movement of the bucket with cushioning employed at the rod end of the cylinder.
Loader lift cylinders – Used to raise and lower the loader frame with cushioning employed at the base end of the cylinder.
Auxiliary disconnects -Located on the left loader frame for the purpose of auxiliary hydraulic power to attachments.
Return filter – Provides 2 Micron filtration for return oil from the hydraulic system.
Charge filter – Filters charge oil prior to entering the hydrostatic tandem pump assembly. Provides 2 Micron filtration.
Oil cooler – Cools hydraulic system return oil and hydrostatic drains.
Self Leveling Valve – Used to maintain a level bucket position as the loader frame is raised.
Reservoir
The hydraulic system begins at the reservoir located in the left rear frame. The reservoir has a capacity of 66.2 litres (17.5 U.S. gallons) and is pressurized to 34.5 kPa (5 psi) . Pressure is controlled by the relief in the reservoir cap. A vacuum breaker is also employed in the cap to open at -3.5 kPa, (-0.5 psi) allowing air to enter the reservoir. A 100 mesh strainer is located in the outlet port of the reservoir to assure that contamination larger than 150 Microns does not enter the inlet of the hydraulic gear pump. The strainer can be removed for cleaning.
Hydraulic Pump/Priority Valve
A Sauer/Sundstrand gear pump, supplies oil for the hydraulic and hydrostatic systems. Pump flow enters an integral priority flow divider, sending priority flow 18.0 litres/min. (4.8 gpm) to the charge port, supplying charge oil to the closed-loop of the hydrostatic system. Remaining pump flow is diverted to the equipment port for use in the hydraulic system, for loader, bucket, auxiliary and power beyond circuits. Return oil from the hydraulic system passes through the filter and cooler before returning to the reservoir.
The hydraulic pump is mounted to and driven by hydrostatic tandem pump. The hydrostatic tandem pump is directly coupled to the engine and driven from the flywheel end.

Posted on

Case 60XT, 70XT Skid Steer Factory Service & Shop Manual


INSTANT DOWNLOAD (add to cart)


Case 60XT, 70XT Skid Steer Factory Service & Shop Manual
Complete workshop & service manual with electrical wiring diagrams for Case 60XT, 70XT Skid Steer. It’s the same service manual used by dealers that guaranteed to be fully functional and intact without any missing page.

This Case 60XT, 70XT Skid Steer service & repair manual (including maintenance, overhaul, disassembling & assembling, adjustment, tune-up, operation, inspecting, diagnostic & troubleshooting…) is divided into different sections. Each section covers a specific component or system with detailed illustrations. A table of contents is placed at the beginning of each section. Pages are easily found by category, and each page is expandable for great detail. The printer-ready PDF documents work like a charm on all kinds of devices.

653 + 237 pages, bookmarked, Searchable, Printable, high quality PDF

Case 60XT, 70XT Skid Steer Service Manual
Bur 6-45720, 653 pages

Case 60XT, 70XT Skid Steer Operator’s Manual
Bur 6-29451NA, 237 pages

EXCERPT:
Brake System Overview
(Spring Applied-Cable Release Park Brakes)
The 40XT, 60XT, and 70XT all use two spring applied, cable release, pin lock, parking brakes. The brakes are mounted to the chain tanks on the chassis in front of the right side hydraulic drive motor and behind the left side hydraulic drive motor.
The park brakes are activated when the seat restraint bar is raised from the operating position. The brake pins engage the slots in the brake disks and prevents it from turning and the 40, 60 and 70XT Skid Steer from moving. Also, when the seat restraint bar is lowered, the transmission control moves to neutral and prevents activation of the drive motors. The park brakes are released when the restraint bar is lowered to the operating position and the cable retracts the pins from the brake disk slots.
In the event of loss of power to the machine, the brakes may be released by lowering the restraint bar to the operating position.
1. RESTRAINT BAR IN LOCKOUT POSITION
2. RESTRAINT BAR IN OPERATING POSITION

Posted on

Case 21D, 121D, 221D, 321D Loaders Factory Technical Service & Shop Manual


Download Link

INSTANT DOWNLOAD (add to cart)


Complete workshop & service manual with electrical wiring diagrams for Case 21D, 121D, 221D, 321D. It’s the same service manual used by dealers that guaranteed to be fully functional and intact without any missing page.

Case Loaders 21D, 121D, 221D, 321D service & repair manual (including maintenance, overhaul, disassembling & assembling, adjustment, tune-up, operation, inspecting, diagnostic & troubleshooting…) is divided into different sections. Each section covers a specific component or system with detailed illustrations. A table of contents is placed at the beginning of each section. Pages are easily found by category, and each page is expandable for great detail. The printer-ready PDF documents work like a charm on all kinds of devices.

2,532 pages, bookmarked, Searchable, Printable, high quality PDF

FILE LIST:
9-93140 – Case 21D, 121D, 221D, 321D Manuel Technique (FR).pdf
9-93150- Case 21D, 121D, 221D, 321D Technic Handbook (EN).pdf
9-93160 – Case 21D, 121D, 221D, 321D Technisches Handbuch (DE).pdf

EXCERPT:
CHAPTER 01 – GENERAL
FOREWORD
This Technical Handbook (THB) has been written with the servicing mechanic in mind and contains important information required to carry out repair and servicing procedures.
Servicing and repair
Servicing and repair work should be carried out as soon as possible. This keeps overall servicing & repair costs to a minimum and increases the availabilily of the Wheel Loader.
Read through the Technical Handbook, but also the Operating Instructions for the Wheel Loader before commencing any servicing or repair work. The Technical Handbook, as well as the Operating Instructions and Spare Parts List should be used as a source of reference and assistance – even when the user is well acquainted with the range of the Wheel Loaders.
During servicing and repair work, always follow the instructions contained in the Technical Handbook and Operating instructions.
The After Sales Service is always available for assistance and advice.
Using the Technical Handbook allows the experienced mechanic to carry out repair work in a correct manner.
Using the Technical Handbook
The Technical Handbook is divided into main and sub-groups that deal with the machine as actually delivered. Any auxiliary attachments or optional upgrading introduced later are not described.
The main table of contents allows to find the required information quickly.
For the sake of clarity, the illustrations have been simplified and can therefore differ slightly from the actual appearance of the machine.