Posted on

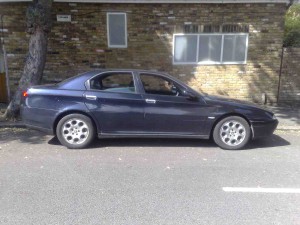
1998-2007 Alfa Romeo 166 Workshop Repair & Service Manual (680MB CD, Searchable, Printable)

Alfa Romeo 166 1998-2007


MAR1669807OMMK
Price: $12.99 USD

1998-2007 Alfa Romeo 166 Workshop Repair & Service Manual (680MB CD, Searchable, Printable)

Complete digital workshop service and repair manual written for the Alfa Romeo 166; Production model years: 1998 1999 2000 2001 2002 2003 2004 2005 2006 2007. All styles covered (all models, and engines). This QUALITY manual is 100% COMPLETE and INTACT, no MISSING/CORRUPT pages/sections to freak you out! Buy from responsible seller and get INSTANT DOWNLOAD now without wasting your hard-owned money on uncertainty or surprise; this manual is exactly as described.

PRODUCT DETAILS:
Total Size: 680MB
File Format: ISO
Delivery: instant download link displayed on checkout page & emailed to you after payment
Protection: DRM-free; without any restriction
Printable: Yes

MAKE: Alfa Romeo
MODEL: 166 (2.0 TS, 2.0 TB, 2.5 V6, 3.0 V6, 2.4 JTD 10V, 3.2 V6, 2.4 JTD 20V)
YAER: 1998 1999 2000 2001 2002 2003 2004 2005 2006 2007
LANGUAGE: EN/DE/ES/FR/IT/NL/PT/PL

This COMPLETE official full workshop service repair manual includes:
* Detailed sub-steps expand on repair procedure information
* Notes, cautions and warnings throughout each chapter pinpoint critical information.
* Numbered instructions guide you through every repair procedure step by step.
* Bold figure number help you quickly match illustrations with instructions.
* Detailed illustrations, drawings and photos guide you through every procedure.
* Enlarged inset helps you identify and examine parts in detail.
* Numbered table of contents easy to use so that you can find the information you need fast.
* This manual also makes it easy to diagnose and repair problems with your machines electrical system.
* Troubleshooting and electrical service procedures are combined with detailed wiring diagrams for ease of use.

* COMPLETE, Absolutely No Missing Pages!
* Official Service INFORMATION You Can Count On!
* Customer Satisfaction GUARANTEED!

EXCERPT (1998-2007 Alfa Romeo 166 Service/Repair Manual):
1. Undo the bolts (1a) and remove the flanges on the differential (1b), complete with seals.
2. Remove the adjustment shim.
1. Undo the bolts (1a) and remove the support for the differential internal housing (1b).
2. Remove the differential.
3. Remove the differential bearing outer races.
4. Remove the magnet.
1. Remove the bolt for the Reverse gear shaft.
2. Undo the bolts (2a) and remove the gearbox casing (2b).
The gearbox casing is sealed to the bell housing: release the two parts using a wooden or resin hammer.
1. Unscrew bolts (1a) and (1b).
2. Remove the 5 th speed control rod (2a) from the Reverse gear selector fork (2b) and the 5 th speed selector (2c).
3. Remove the 5 th speed selector fork from the control rod.
1. At the same time, remove the main shaft, layshaft, reverse shaft and 1 st , 2 nd , 3 rd and 4 th speed selector fork assemblies.
Keep the units assembled until they are placed on the workbench.
Separate the selector forks from the rods.
1. Remove the clutch release bearing fork.
2. Remove the outer non-slip bush.
1. Undo the nut fixing the rear power unit rigid support to the flexible mounting.
2. Undo the bolts fixing the power unit rear flexible mounting to the front suspension frame.
3. Undo the bolts (3a) and remove the bracket (3b) connecting the power unit rigid rear support to the crankcase sump.
1. Undo the bolts (1a) and remove the power unit rigid rear support (1b) removing it through the wheel arch.
1820B08 Clutch release HYDRAULIC SYSTEM – Bleeding air and restoring level
1820B13 hose from clutch fluid reservoir to rigid intermediate pipe for master cylinder -r r with pedal unit removed for right hand drive versions
1820B15 hose from rigid intermediate pipe to master cylinder (pump) – r r with pedal unit removed for right hand drive versions
1820B17 pipe from inlet and outlet from master cylinder (pump) and hydraulic damper – r r with pedal unit removed for right hand drive versions
1820B20 (Pump) – MASTER CYLINDER R.R.
1820B21 (Pump) – MASTER CYLINER R.R. for right hand drive versions
1820B30 OPERATING CYLINDER/CLUTCH HYDRAULIC ACTUATOR – R.R.
1820B40 FLEXIBLE PIPE from clutch reservoir to (pump) – master cylinder R.R.
1820B46 RIGID supply PIPE from (pump) – master cylinder R.R .
1820B48 FLEXIBLE supply PIPE to operating cylinder -R.R.
1820B56 rigid pipe from vibration damper to slave cylinder – r r
1820B58 clutch hydraulic circuit vibration damper – r+r
1. Remove the two plastic buttons (1a) and remove soundproof protection (1b).
1. Disconnect the flexible hose from the clutch fluid reservoir to the intermediate rigid pipe for the master cylinder, rigid pipe side.
1. Working from the engine bay, disconnect the flexible hose from the clutch fluid reservoir to the intermediate rigid pipe for the master cylinder, reservoir side, and remove.
Remove the flexible hose from the clutch fluid reservoir to the intermediate rigid pipe for the master cylinder, taking it out of the engine compartment.
Refitting ( Removing )
Place the flexible hose from the clutch fluid reservoir to the intermediate rigid pipe for the master cylinder back in its housing and connect it.
Place the soundproof cover back in its housing and secure it using the plastic pins.
MAR1669807OMMK
Price: $12.99 USD

Posted on

1997-2007 Alfa Romeo 159 Workshop Repair & Service Manual (626M CD, Searchable, Printable)


MAR1590511OMMK
Price: $12.99 USD

1997-2007 Alfa Romeo 159 Workshop Repair & Service Manual (626M CD, Searchable, Printable)

Complete digital workshop service and repair manual written for the Alfa Romeo 159; Production model years: 1997 1998 1999 2000 2001 2002 2003 2004 2005 2006 2007. All styles covered (all models, and engines). This QUALITY manual is 100% COMPLETE and INTACT, no MISSING/CORRUPT pages/sections to freak you out! Buy from responsible seller and get INSTANT DOWNLOAD now without wasting your hard-owned money on uncertainty or surprise; this manual is exactly as described.

PRODUCT DETAILS:
Total Size: 626M
File Format: ISO
Delivery: instant download link displayed on checkout page & emailed to you after payment
Protection: DRM-free; without any restriction
Printable: Yes

MAKE: Alfa Romeo
MODEL: 159 (1.8, 1.9 JTS, 2.2 JTS, 3.2 JTS, 1.9 JTD 8V, 1.9 JTD 16V, 2.4 JTD 20V)
YAER: 2005 2006 2007 2008 2009 2010 2011
LANGUAGE: EN/DE/ES/FR/IT/NL/PT

This COMPLETE official full workshop service repair manual includes:
* Detailed sub-steps expand on repair procedure information
* Notes, cautions and warnings throughout each chapter pinpoint critical information.
* Numbered instructions guide you through every repair procedure step by step.
* Bold figure number help you quickly match illustrations with instructions.
* Detailed illustrations, drawings and photos guide you through every procedure.
* Enlarged inset helps you identify and examine parts in detail.
* Numbered table of contents easy to use so that you can find the information you need fast.
* This manual also makes it easy to diagnose and repair problems with your machines electrical system.
* Troubleshooting and electrical service procedures are combined with detailed wiring diagrams for ease of use.

* COMPLETE, Absolutely No Missing Pages!
* Official Service INFORMATION You Can Count On!
* Customer Satisfaction GUARANTEED!

EXCERPT (1997-2007 Alfa Romeo 159 Service/Repair Manual):
Removing ( Refitting )
– Position the vehicle on a lift.
– Make sure that the ignition key is in the OFF position, then disconnect the battery terminal (-).
– Battery
See A001 BATTERY
Op. 0010T84 COOLANT FOR AIR CONDITIONING SYSTEM – DEHYDRATE AND REPRESSURIZE.
Op. 7210A18 R.R FRONT CROSSMEMBER
– Using a suitable syringe, draw off the power assisted steering fluid from the reservoir.
Op. 4130B40 SUPPLY PIPE FROM PUMP TO POWER STEERING BOX – R.R.
1. Loosen the band and disconnect the supply pipe from the power assisted steering fluid reservoir to the pump, power assisted steering pump side.
2. Disconnect the rapid connector for the return pipe from the heat exchanger pipe to the power assisted steering fluid reservoir, heat exchanger side.
3. Undo the bolts (3a) and remove the power assisted steering fluid reservoir (3b) complete with pipes (3c).
4. Loosen the band and disconnect the coolant return pipe, cylinder head side.
1. Disconnect the rapid connector for the power assisted steering system heat exchanger inlet pipe, heat exchanger side.
2. Remove the heat exchanger pipe (2a) after having released it from the securing band (2b).
1. Undo the bolt (1a) and disconnect the inlet/outlet pipes from the air conditioning compressor (1b).
Seal the connectors that have been disconnected using suitable plugs to prevent dampness and impurities from entering the system.
2. Undo the nut (2a) and disconnect the air conditioning pipes intermediate flange (2b).
Seal the connectors that have been disconnected using suitable plugs to prevent dampness and impurities from entering the system.
3. Remove the air conditioning system pipes.
Op. 5530B10 BATTERY – R+R
1. Disconnect the electrical connections from the injection/ignition system control unit.
1. Engine management control unit
See M010 ENGINE MANAGEMENT ECU
2. Undo the bolts (2a) and remove the battery drip tray (2b) complete with injection/ignition system control unit (2c).
1. Open the junction unit cover, rotate the junction unit and disconnect the electrical connection (connector A).
Front/engine coupling
See D004 FRONT/ENGINE COUPLING
1. Loosen the band and disconnect the brake servo vacuum intake pipe, air chamber side.
1. Disconnect the rapid connector for the fuel vapour pipe intermediate coupling.
2. Disconnect the rapid connector for the fuel supply pipe, multiple connector side.
– Discharge the fuel supply system pressure.
1. Disconnect the electrical connection for the left upper Lambda sensor.
Lambda sensor on pre-catalyzer
See K015 LAMBDA SENSOR ON PRE-CATALYZER
2. Disconnect the electrical connection for the right upper Lambda sensor.
Lambda sensor on pre-catalyzer -2
See K016 LAMBDA SENSOR ON PRE-CATALYZER -2
3. Disconnect the electrical connection for the left rear Lambda sensor to the catalytic converter.
Lambda sensor on catalyser
See K017 LAMBDA SENSOR ON CATALYSER
4. Disconnect the electrical connection for the right rear Lambda sensor to the catalytic converter.
Lambda sensor on catalyser 2
See K018 LAMBDA SENSOR ON CATALYSER – 2
Mark the electrical connections for disconnect them so that they can be correctly refitted.
1. Disconnect the rapid connectors for the air conditioning system heater coolant inlet and outlet pipes.
1. Loosen the collar and disconnect the supply pipe from the engine coolant reservoir.
– Replace the brake-clutch fluid reservoir plug using the tool
Brake-clutch fluid reservoir cap
1. Release the retaining clip (1a) and disconnect the pipe (1b) between the damper and the clutch operating cylinder (1b), operating cylinder side.
2. Undo the bolt (2a) and disconnect the earth lead (2b) (connector B) from the gearbox.
Battery earth on engine
See C002 BATTERY EARTH ON ENGINE
1. Disconnect the electrical connection from the reversing light switch
Reversing lights switch
See I020 REVERSING LIGHTS SWITCH
1. Disconnect the gear selector cable.
2. Disconnect the gear engagement cable.
1. Unscrew the bolts (1a) and move aside the bracket (1b) complete with gear selection and engagement cables (1c).
Op. 4450B12 FRONT WHEELS (TWO) – R+R
Op. 1076B72 INTERMEDIATE EXHAUST PIPE WITH HOSE SECTION – R+R
1. Undo the bolts (1a) and move the brake calliper assemblies (1b) to the side and secure them appropriately.
1. Undo the nuts fixing the steering rods to the front steering knuckles.
2. Disconnect the steering rods (2a) from the front steering knuckle using the tool (2b).
Extracting steering rod from steering knuckle
1. Undo the nuts (1a) and disconnect the front suspension upper track control arms (1b) from the steering knuckles (1c).


MAR1590511OMMK
Price: $12.99 USD

Posted on

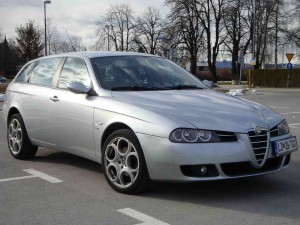
1997-2007 Alfa Romeo 156 Workshop Repair Service Manual BEST DOWNLOAD

1997-2007 Alfa Romeo 156 Workshop Repair Service Manual BEST DOWNLOAD

MAR1569707OMMK
Price: $12.99 USD

1997-2007 Alfa Romeo 156 Workshop Repair Service Manual BEST DOWNLOAD

This highly detailed Manual for your 1997-2007 Alfa Romeo 156 contains everything you will ever need to repair, maintain, rebuild, refurbish or restore your vehicle. All diagnostic and repair procedures are covered in great detail.

This QUALITY manual is 100 percents COMPLETE and INTACT, no MISSING/CORRUPT pages/sections to freak you out! Buy from responsible seller and get INSTANT DOWNLOAD now without wasting your hard-owned money on uncertainty or surprise; this manual is exactly as described. This Digital Workshop Repair Manual for 1997-2007 Alfa Romeo 156 covers the same information that Professional Technicians and Mechanics have. You can view and print out the complete repair procedures with this easy to use this Digital Workshop Repair Manual for 1997-2007 Alfa Romeo 156 – you do not need to be skilled with a computer! Once you have found your information, just print it out and start work. No more messy manuals that you have to keep replacing or cant use any more due to wear and tear.

All Repair Procedures Covered From A-Z
High Quality Photos, Illustrations And Diagrams
Buy From A Trusted Seller, Selling Genuine Items

MAKE: Alfa Romeo
MODEL: 156 (2.4 JTD 20V, 2.4 JTD 10V, 2.0 JTS, 1.9 JTD 16V, 1.9 JTD 8V, 3.2 V6, 2.5 V6, 2.0 JTS, 1.8 TS, 1.6 TS, 2.0 TS)
YAER: 1997 1998 1999 2000 2001 2002 2003 2004 2005 2006 2007
LANGUAGE: EN/DE/ES/FR/IT/NL/PL/GK/PT/CZ/TR

SERVICE MANUAL DETAILS:
1. Downloadable: YES
2. Requirements: Windows
3. FileTYPE: ISO
4. Compatibility: All Versions of Windows

1997-2007 Alfa Romeo 156

TABLE OF CONTENT (example)

GENERAL INFORMATION *

ENGINE *
engine mechanical
engine lubrication system
engine cooling system
engine control system
fuel system
exhaust system

TRANSMISSION/TRANSAXLE *
clutch
manual transaxle
automatic transaxle

DRIVELINE/AXLE *
front axle
rear axle

SUSPENSION *
front suspension
rear suspension
road wheels & tyres

BRAKES *
brake system
parking brake system
brake control system

STEERING *
power steering system
steering system

RESTRAINTS *
seat belts
supplemental restraint system (srs)

BODY *
body, lock & security system
glasses, window system & mirrors
roof
exterior & Interior
Instrumental panel
seat

AIR CONDITIONER *
air conditioner system

ELECTRICAL *
wiring diagrams
starting & charging system
lighting system
driver information system
wiper, washer & horn
body control system
lan system
audio visual, navigation & telephone system
auto cruise control system
power supply, ground & circuit elements

MAINTENANCE *
maintenance

INDEX *
alphabetical Index


MAR1569707OMMK
Price: $12.99 USD

Posted on

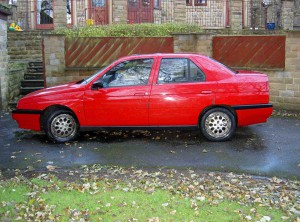
1992-1998 Alfa Romeo 155 Workshop Repair & Service Manual (1,871 Pages Printable iPad-ready PDF)

1992-1998 Alfa Romeo 155 Workshop Repair & Service Manual (1,871 Pages Printable iPad-ready PDF)

MAR1559298OPEK
Price: $12.99 USD

1992-1998 Alfa Romeo 155 Workshop Repair & Service Manual (1,871 Pages Printable iPad-ready PDF)

Complete digital workshop service and repair manual written for the Alfa Romeo 155 (Type 167); Production model years: 1992 1993 1994 1995 1996 1997 1998. All styles covered (all models, and engines). It is in the cross-platform PDF document format so that it works like a charm on all kinds of devices.

This QUALITY manual is 100% COMPLETE and INTACT, no MISSING/CORRUPT pages/sections to freak you out! Buy from responsible seller and get INSTANT DOWNLOAD now without wasting your hard-owned money on uncertainty or surprise; this manual is exactly as described.

PRODUCT DETAILS:
Total Pages: 1,871 pages
File Format: PDF (Windows & Mac & Linux)
Language: English
Delivery: instant download link displayed on checkout page & emailed to you after payment
Protection: DRM-free; without any restriction
Printable: Yes

This COMPLETE official full workshop service repair manual includes:
* Detailed sub-steps expand on repair procedure information
* Notes, cautions and warnings throughout each chapter pinpoint critical information.
* Numbered instructions guide you through every repair procedure step by step.
* Bold figure number help you quickly match illustrations with instructions.
* Detailed illustrations, drawings and photos guide you through every procedure.
* Enlarged inset helps you identify and examine parts in detail.
* Numbered table of contents easy to use so that you can find the information you need fast.
* This manual also makes it easy to diagnose and repair problems with your machines electrical system.
* Troubleshooting and electrical service procedures are combined with detailed wiring diagrams for ease of use.

* COMPLETE, Absolutely No Missing Pages!
* Official Service INFORMATION You Can Count On!
* Customer Satisfaction GUARANTEED!

EXCERPT (1992-1998 Alfa Romeo 155 (Type 167) Service/Repair Manual):
MAIN BEARINGS
Fit the main bearings addressing them according to the indications given on the bearings.
1. Fasten the nuts to the prescribed torque in oil. Check whether the main journal diameter falls within prescribed values.
– The piston pins and the piston coupling holes are subdivided into two classes according to the manufacturing tolerances. These classes are differentiated by marks in BLACK or WHITE painted on the piston pin inner surface and the outer surface of the piston hub
1. Check that the piston pin outer diameter ranges within the specified values
2. Check that the coupling hole diameter with the piston ranges within the specified values.
WEIGHT DIFFERENCE CHECK OF PISTON AND CONNECTING ROD PAIRS
1. Match piston pins and pistons according to the relevant dimension class (BLACK or WHITE). Insert the piston pins in the pistons and block them by means of spring rings; install the piston rings and the oil scraper ring. Check that the weight difference between pistons ranges within the speciValve tightness check.
Fit the spark plugs in their seats.
1. Pour some petrol in the combustion chamber so to just cover the valve caps.
2. Let low pressure air into the intake manifolds and into the exhaust manifolds. Check there are no air bubbles in the petrol. If there are bubbles, check correct position and if required machine the valve seats (see specific paragraph). fied values.
Rocker arm journal
1. Fit the washers, the rocker arms and the springs. Turn the shaft so that the notches “A” correspond to holes “B” to let the cylinder head fastening studs through.
2. Use pin “C” (diameter 12 mm) to make sure it is so.

Posted on

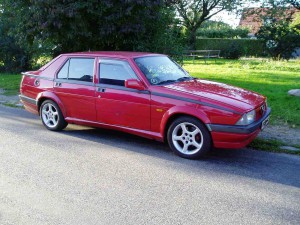
1985-1989 Alfa Romeo 75 (aka Milano) Workshop Repair & Service Manual (1,249 Pages, Printable, Bookmarked iPad-ready PDF)

1985-1989 Alfa Romeo 75 (aka Milano) Workshop Repair & Service Manual (1,249 Pages, Printable, Bookmarked iPad-ready PDF)

MAR758589OPEK.zip
Price: $9.99 USD

1985-1989 Alfa Romeo 75 (aka Milano) Workshop Repair & Service Manual (1,249 Pages, Printable, Bookmarked iPad-ready PDF)

Complete digital workshop service and repair manual written for the 1985-1989 Alfa Romeo 75 (aka Milano); Production model years: 1985 1986 1987 1988 1989. All styles covered (all models, and engines). It is in the cross-platform PDF document format so that it works like a charm on all kinds of devices.

This QUALITY manual is 100% COMPLETE and INTACT, no MISSING/CORRUPT pages/sections to freak you out! Buy from responsible seller and get INSTANT DOWNLOAD now without wasting your hard-owned money on uncertainty or surprise; this manual is exactly as described.

PRODUCT DETAILS:
Total Pages: 1,249 pages
File Format: PDF (Windows & Mac & Linux)
Language: English
Delivery: instant download link displayed on checkout page & emailed to you after payment
Protection: DRM-free; without any restriction
Printable: Yes

This COMPLETE official full workshop service repair manual includes:
* Detailed sub-steps expand on repair procedure information
* Notes, cautions and warnings throughout each chapter pinpoint critical information.
* Numbered instructions guide you through every repair procedure step by step.
* Bold figure number help you quickly match illustrations with instructions.
* Detailed illustrations, drawings and photos guide you through every procedure.
* Enlarged inset helps you identify and examine parts in detail.
* Numbered table of contents easy to use so that you can find the information you need fast.
* This manual also makes it easy to diagnose and repair problems with your machines electrical system.
* Troubleshooting and electrical service procedures are combined with detailed wiring diagrams for ease of use.

* COMPLETE, Absolutely No Missing Pages!
* Official Service INFORMATION You Can Count On!
* Customer Satisfaction GUARANTEED!

EXCERPT (1985-1989 Alfa Romeo 75 (aka Milano) Service/Repair Manual):
This chapter lists and describes the pre-delivery operations required for the Alfa 75 vehicles. The operation description does not refer to each version, but gives general information concerning the parts for which inspection is required.
As regards the technical specifications related to each operation, and the lubricant products (and similar), refer to the “Technical Data and Specifications” present in each section.
CAUTION:
Pre-delivery inspection of a new vehicle, prior to customer delivery, consists in carrying out all checking operations and tests hereafter described in order to detect and thus eliminate any damage or malfunction. It goes without saying, however, that when Dealer personnel picks up the vehicle, should perform a visual check in order to:
a. make sure that vehicle Is in normal driving condition, especially as regards level of fluids and controls in general
b. detect any dents or scratches on body or other damage to the vehicle Interior (upholstery).
c. make sure nothing is missing, especially factory supplied accessories, spare tire and any parts that are to be fitted on vehicle as
pre-delivery completion.
Exterior moldings and fittings
— Visually check all vehicle’s outside parts: bumpers, moldings, grills, headlight rims, letters and emblems making sure they are securely fitted, and have no spots or dents.
Doors and hoods
— Visually check all weatherstrips for tight fit and make sure they are not damaged, out of shape or dirty.
— See if doors and bonnets are aligned and centered with relevant openings.
Factory issued accessory equipment
— Check if following items are in their proper place in the vehicle: tool kit, spare tire, jack.
Instruction Book and Service Book.
Locks, hinges, windows
— Check proper working condition of all door locks (close, lock, open from inside and outside). Check in the same manner also locks on bonnet and boot.
— Check door and bonnet hinges for smooth noiseless operation.
— Check if windows can be opened and closed all the way without sticking and noiselessly.
Interior finishings


MAR758589OPEK.zip
Price: $9.99 USD