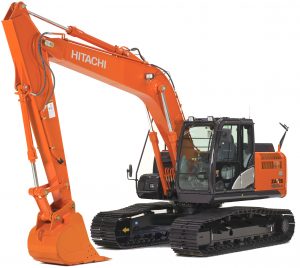
Pages from W1F1E01 – Hitachi ZAXIS 160LC, 180LC, 180LCN Excavator Workshop Manual
Complete workshop & service manual with electrical wiring diagrams for Hitachi ZAXIS 160LC, 180LC, 180LCN Excavator. It’s the same service manual used by dealers that guaranteed to be fully functional and intact without any missing page.
This Hitachi ZX160LC, ZX180LC, ZX180LCN Excavator service & repair manual (including maintenance, overhaul, disassembling & assembling, adjustment, tune-up, operation, inspecting, diagnostic & troubleshooting…) is divided into different sections. Each section covers a specific component or system with detailed illustrations. A table of contents is placed at the beginning of each section. Pages are easily found by category, and each page is expandable for great detail. The printer-ready PDF documents work like a charm on all kinds of devices.
FILELIST:
TO1F1E02 – Hitachi ZAXIS 160LC-3, 180LC-3, 180LCN-3 Excavator Technical Manual (Operationel Principle).pdf
TO1T1E00 – Hitachi ZAXIS 160LC-3, 180LC-3, 180LCN-3 Hydraulic Excavator Technical Manual (Operationel Principle).pdf
TT1F1E02 – Hitachi ZAXIS 160LC, 180LC, 180LCN Excavator Technical Manual (Troubleshooting).pdf
TT1T1E00 – Hitachi ZAXIS 160LC-3, 180LC-3, 180LCN-3 Hydraulic Excavator Technical Manual (Troubleshooting).pdf
TT1T1E00 (attach to) – Hitchai ZAXIS 160-3 Class, 180-3 Class Electrical Diagram.pdf
W1F1E00 – Hitachi ZX160LC, 180LC, 180LCN Excavator Workshop Manual.pdf
W1F1E01 – Hitachi ZAXIS 160LC, 180LC, 180LCN Excavator Workshop Manual.pdf
EM1G641 – Hitachi ZAXIS 110-120-130-160-180-200-210-225-230-240-270-330-350 Class Excavator Operator’s Manual.pdf
EM1U123 – Hitachi ZAXIS 160-180-200-210-240-250-270-330-350 Class Hydraulic Excavator Operator’s Manual.pdf
EXCERPT:
SECTION 1 GENERAL
Group 1 Precautions for disassembling and Assembling
Group 2 Tightening Torque
Group 3 Painting
Group 4 Bleeding Air from Hydraulic Oil Tank
SECTION 2 UPPERSTRUCTURE
Group 1 Cab
Group 2 Counterweight
Group 3 Main Frame
Group 4 Pump Device
Group 5 Control Valve
Group 6 Swing Device
Group 7 Pilot Valve
Group 8 Pilot Shut-Off Valve
Group 9 Signal Control Valve
Group 10 Solenoid Valve
SECTION 3 UNDERCARRIAGE
Group 1 Swing Bearing
Group 2 Travel Device
Group 3 Center Joint
Group 4 Track Adjuster
Group 5 Front Idler
Group 6 Upper and Lower Roller
Group 7 Track
SECTION 4 FRONT ATTACHMENT
Group 1 Front Attachment
Group 2 Cylinder
SECTION 5 ENGINE AND ACCESSORY
…
UPPERSTRUCTURE / Control Valve
REMOVE AND INSTALL CONTROL VALVE
CAUTION: Escaping fluid under pressure may penetrate the skin, causing serious injury.
Avoid this hazard by relieving pressure before disconnecting hydraulic or other lines. Hydraulic oil may be hot just after operation and may spurt, possibly causing severe burns. Be sure to wait for oil to cool before starting any repair work.
The hydraulic oil tank cap may fly off if removed without releasing accumulated pressure first. Push the air release valve on top of the hydraulic oil tank to release any remaining pressure.
Preparation
1. Place the machine on a firm, level surface.
2. Stop the engine. Push the air release valve on top of the hydraulic oil tank to release any remaining pressure. Refer to “bleed pressure from hydraulic circuit” on page W4-2-13.
3. Remove hydraulic oil tank cap. Connect a vacuum pump to maintain negative pressure in the hydraulic oil tank.
NOTE: Be sure to run the vacuum pump continuously while working on the hydraulic system.
…