Posted on

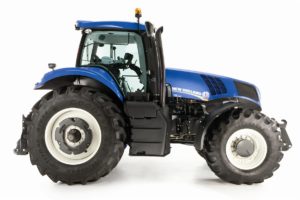
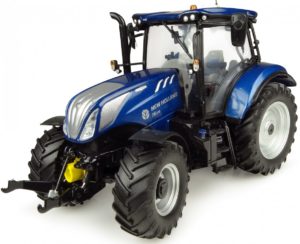
New Holland T9.390, T9.450, T9.505, T9.560, T9.615, T9.670 Tractor Factory Service & Shop Manual


Download Link

INSTANT DOWNLOAD (add to cart)
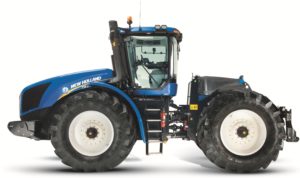


Complete workshop & service manual with electrical wiring diagrams for New Holland T9.390, T9.450, T9.505, T9.560, T9.615, T9.670 Tractor. It’s the same service manual used by dealers that guaranteed to be fully functional and intact without any missing page.

This service & repair manual (including maintenance, overhaul, disassembling & assembling, adjustment, tune-up, operation, inspecting, diagnostic & troubleshooting…) is divided into different sections. Each section covers a specific component or system with detailed illustrations. A table of contents is placed at the beginning of each section. Pages are easily found by category, and each page is expandable for great detail. The printer-ready PDF documents work like a charm on all kinds of devices.

4,015 pages, bookmarked, Searchable, Printable, high quality PDF
New Holland T9.390, T9.450, T9.505, T9.560, T9.615, T9.670 Tractor Service Manual
Part number 47488219 English
March 2013
PIN ZCF200001 and above
PIN ZDF200001 and above
T9.390 [ZCF200001 – ] , T9.390 [ZDF200001 – ] , T9.450 [ZCF200001 – ] , T9.450 [ZDF200001 – ] , T9.505 [ZCF200001 – ] , T9.505 [ZDF200001 – ] , T9.560 [ZCF200001 – ] , T9.560 [ZDF200001 – ] , T9.615 [ZCF200001 – ] , T9.615 [ZDF200001 – ] , T9.670 [ZCF200001 – ] , T9.670 [ZDF200001 – ]

EXCERPT:
Front axle system – Front bevel gear set and differential
Differential – Disassemble – 500 Series axles
T9.615, T9.670
Prior operation:
Final drive – Remove – 500 Series axles (25.310)
Pinion carrier removal
1. The differential housing must be rotated several times during the disassembly and assembly procedures. If available, the housing should be mounted in a revolver repair stand.
2. Remove the lube hose from the port block and pinion carrier.
3. Remove the long tube line from the port block to the differential housing.
4. Remove the tube line from the port block to the park brake supply port.
5. Remove the tee fittings from the service brake pressure port. If repairing the rear axle, remove the tee fitting.
6. If equipped, remove the differential lock solenoid from the port block.
7. Remove the plug (1) and tee fitting (2) from the port block.
8. Remove the jumper tube from the lube port. Discard the O-rings.

Posted on

New Holland T8.275, T8.300, T8.330, T8.360, T8.390, T8.420 (CVT) Tractor Factory Service & Shop Manual


Download Link

INSTANT DOWNLOAD (add to cart)


Complete workshop & service manual with electrical wiring diagrams for New Holland T8.275, T8.300, T8.330, T8.360, T8.390, T8.420 (CVT) Tractor. It’s the same service manual used by dealers that guaranteed to be fully functional and intact without any missing page.

This New Holland T8.275, T8.300, T8.330, T8.360, T8.390, T8.420 (CVT) Tractor service & repair manual (including maintenance, overhaul, disassembling & assembling, adjustment, tune-up, operation, inspecting, diagnostic & troubleshooting…) is divided into different sections. Each section covers a specific component or system with detailed illustrations. A table of contents is placed at the beginning of each section. Pages are easily found by category, and each page is expandable for great detail. The printer-ready PDF documents work like a charm on all kinds of devices.

4,263 + 4,800 pages, bookmarked, Searchable, Printable, high quality PDF
New Holland T8.275, T8.300, T8.330, T8.360, T8.390 Tractor Service Manual
PIN ZBRC07000 and after
4,263 pages, 340 MB
Part number 47386189; English
October 2012

New Holland T8.275, T8.300, T8.330, T8.360, T8.390, T8.420 (CVT) Tractor Service Manual
4,800 pages, 387 MB
PIN ZCRC02586 and above
Part number 47533595, 47533595S1 English
May 2013, December 2013
T8.275 [ZCRC02586 – ] , T8.300 [ZCRC02586 – ] , T8.330 [ZCRC02586 – ] , T8.360 [ZCRC02586 – ] , T8.390 [ZCRC02586 – ] , T8.420 [ZCRC02586 – ]

EXCERPT:
Transmission – Continuously Variable Transmission (CVT)
Cover Top cover with hydrostatic unit – Install
T8.275 [ZCRC02586 – ] WE, T8.300 [ZCRC02586 – ] WE, T8.330 [ZCRC02586 – ] WE, T8.360 [ZCRC02586 – ] WE, T8.390 [ZCRC02586 – ] WE
Prior operation:
Cover Top cover with hydrostatic unit – Assemble (21.504)
NOTE: Apply a bead of LOCTITE® 515 over the entire mounting surfaces and around all bolt holes and dowel holes.
1. Using proper lifting equipment, slowly lower the hydrostatic unit into place.
2. Install the eighteen cover mounting bolts and torque to 265 N·m (195.5 lb ft). Remove the lifting eyes.
3. Reinstall the oil cooler bypass valve mounting bracket (1) and secure with the bolts previously removed. Reconnect the hydrostatic motor lube line (2), making sure the brass washers are in place.
4. Reconnect the parking brake linkage.
5. Reinstall the steering lines and secure with the tube clamps (1) previously removed. Reconnect any other lines that may have been disconnected.
6. Lay the wire harness back into place on the harness bracket (1). Connect the connectors that were dis- connected and install wire ties (2) to secure the wire harness.
7. Reconnect the directional solenoid connectors.
8. Reconnect the connectors to the clutch solenoids (1) and the quad valve (2).
Next operation:
Cab – Install – Cab install (90.150)

Posted on

New Holland T7.170, T7.185, T7.200, T7.210 Auto Command/Range Command/Power Command Tractors Factory Service & Shop Manual


Download Link

INSTANT DOWNLOAD (add to cart)

Complete workshop & service manual with electrical wiring diagrams for New Holland T7.170 Auto Command, T7.185 Auto Command, T7.200 Auto Command, T7.210 Auto Command, T7.170 Range Command, T7.185 Range Command, T7.200 Range Command, T7.210 Range Command, T7.170 Power Command, T7.185 Power Command, T7.200 Power Command, T7.210 Power Command Tractor. It’s the same service manual used by dealers that guaranteed to be fully functional and intact without any missing page.

This New Holland T7.170 Auto Command, T7.185 Auto Command, T7.200 Auto Command, T7.210 Auto Command, T7.170 Range Command, T7.185 Range Command, T7.200 Range Command, T7.210 Range Command, T7.170 Power Command, T7.185 Power Command, T7.200 Power Command, T7.210 Power Command Tractor service & repair manual (including maintenance, overhaul, disassembling & assembling, adjustment, tune-up, operation, inspecting, diagnostic & troubleshooting…) is divided into different sections. Each section covers a specific component or system with detailed illustrations. A table of contents is placed at the beginning of each section. Pages are easily found by category, and each page is expandable for great detail. The printer-ready PDF documents work like a charm on all kinds of devices.

3,129 pages, bookmarked, Searchable, Printable, high quality PDF
New Holland T7.170 Auto Command, T7.185 Auto Command, T7.200 Auto Command, T7.210 Auto Command, T7.170 Range Command, T7.185 Range Command, T7.200 Range Command, T7.210 Range Command, T7.170 Power Command, T7.185 Power Command, T7.200 Power Command, T7.210 Power Command Tractor Service Manual
3,129 pages PDF
Part number 84477609A English; 27/09/201 1

EXCERPT:
ENGINE AND PTO IN – AIR INTAKE SYSTEM
Air cleaner – Remove
1. Fully raise the engine hood.
2. Release the retaining clips (1) and remove the air cleaner end cover.
3. Remove the outer air cleaner element (1).
4. Remove the inner air cleaner element (1).
NOTICE: Do not remove inner air cleaner element unless it is to be renewed.
Next operation:
Air cleaner – Cleaning (B.30.A)
Air cleaner – Cleaning
Prior operation:
Air cleaner – Remove (B.30.A)
1. Clean and examine the outer casing and repair or seal any damaged seams.
2. Remove the outer filter from housing. Do not let dirt fall on the inner filter.
NOTICE: Do not remove inner element unless it is to be replaced.
3. To clean the element, hold the top and tap it against the palm of the other hand to remove the dust. Never tap it on a hard surface or you can damage the filter.
4. When tapping does not remove the dirt, direct compressed air through the element, from the inside towards the outside.
NOTE: Never blow compressed air from the outside to the inside of the filter because particles can become embedded or lodged in the filter and later be released into the engine
causing damage.
5. To prevent damage to the element when cleaning with compressed air, take the following precautions:
1) Maximum air pressure should not exceed 2 bar (29.00 psi)2) Move the nozzle up and down when rotating the element. 3) Keep the nozzle at least 25 mm (0.98 in) from the pleated paper.
NOTE: To keep the interval acceptable it is highly recommended to clean the element with compressed air.
6. Every time the element is cleaned, it should be examined for holes and cracks by holding an electric light bulb inside the element and looking through it.
If any damage is noted, discard the element and fit a new one.
7. Replace the element after 3 cleanings or once a year, whichever comes first.
8. When fitting, make sure the element is seated properly and the sealing is in good condition.
9. Inner Element
The inner element should not be disturbed unless damaged, or contaminated by dirt through failure of the outer element. The element should therefore only be replaced and not cleaned when contaminated.
10. If the inner element is okay leave assembled in the cleaner body, and change only annually, or every 1200 hours whichever occurs first.

Posted on

New Holland T7.220, T7.235, T7.250, T7.260, T7.270 AutoCommand/Power Command Tractor Factory Service & Shop Manual


Download Link

INSTANT DOWNLOAD (add to cart)

Complete workshop & service manual with electrical wiring diagrams for New Holland T7.220 Auto Command, T7.235 Auto Command, T7.250 Auto Command, T7.260 Auto Command, T7.270 Auto Command, T7.220 Power Command, T7.235 Power Command, T7.250 Power Command, T7.260 Power Command Tractor. It’s the same service manual used by dealers that guaranteed to be fully functional and intact without any missing page.

This New Holland T7.220 Auto Command, T7.235 Auto Command, T7.250 Auto Command, T7.260 Auto Command, T7.270 Auto Command, T7.220 Power Command, T7.235 Power Command, T7.250 Power Command, T7.260 Power Command Tractor service & repair manual (including maintenance, overhaul, disassembling & assembling, adjustment, tune-up, operation, inspecting, diagnostic & troubleshooting…) is divided into different sections. Each section covers a specific component or system with detailed illustrations. A table of contents is placed at the beginning of each section. Pages are easily found by category, and each page is expandable for great detail. The printer-ready PDF documents work like a charm on all kinds of devices.

4,019 + 6,238 pages, bookmarked, Searchable, Printable, high quality PDF
New Holland T7.220 Auto Command, T7.235 Auto Command, T7.250 Auto Command, T7.260 Auto Command, T7.270 Auto Command, T7.220 Power Command, T7.235 Power Command, T7.250 Power Command, T7.260 Power Command Tractor Service Manual
Part number 47524331 English
May 2013
T7.220 AutoCommand, T7.220 Power Command, T7.235 AutoCommand, T7.235 Power Command, T7.250 AutoCommand, T7.250 Power Command, T7.260 AutoCommand, T7.260 Power Command, T7.270 AutoCommand

New Holland T7.220 Auto Command, T7.235 Auto Command, T7.250 Auto Command, T7.260 Auto Command, T7.270 Auto Command, T7.220 Power Command, T7.235 Power Command, T7.250 Power Command, T7.260 Power Command Tractor Service Manual
Part number 47524342 English June 2013 Replaces part number 84476222A

T7.220 Power Command North America F4DFE613L*A
T7.235 Power Command North America F4DFE613K*A
T7.250 Power Command North America F4DFE613J*A
T7.260 Power Command North America F4DFE613H*A
T7.235 AutoCommand North America F4DFE613K*A
T7.250 AutoCommand North America F4DFE613J*A
T7.260 AutoCommand North America F4DFE613H*A
T7.270 AutoCommand North America F4DFE613G*A

EXCERPT:
Hitches, drawbars, and implement couplings – Front hitch
Front hitch – Remove
DANGER
Lift and handle all heavy components using lifting equipment of appropriate lifting capacity. Make sure that units or parts are supported by suitable slings or hooks. Make sure that no-one is in the vicinity of the load to be lifted. Failure to comply could result in serious injury or death.
WARNING
Handle all parts carefully. Do not put your hands or fingers between parts. Wear suitable safety clothing safety goggles, gloves and shoes.
1. Fully lower the front hitch.
2. Disconnect the battery ground cable, for further information refer to Battery – Disconnect (55.302).
3. Remove the lower lift link pin retaining nuts.
4. Remove the lower lift link retaining pins and remove lower lift links.
5. Remove the retaining pin and remove the top link.
6. Release the condensor retaining clips (1) and remove the condensor hinge bolt (2). Detach the condensor and carefully position it on top of the engine.
7. Remove the oil cooler rear retaining bolts.
8. Detach the cooling assembly brackets from the oil cooler.
9. Detach the oil cooler.
10. Carefully secure the oil cooler to one side.
11. Disconnect the front hitch electrical connectors.

Posted on

New Holland T6.120, T6.140, T6.150, T6.155, T6.160, T6.165, T6.175 Tractors Factory Service & Shop Manual


Download Link

INSTANT DOWNLOAD (add to cart)


Complete workshop & service manual with electrical wiring diagrams for New Holland T6.120, T6.140, T6.140 AutoCommand, T6.150, T6.150 AutoCommand, T6.155, T6.160, T6.160 AutoCommand, T6.165, T6.175 Tractors. It’s the same service manual used by dealers that guaranteed to be fully functional and intact without any missing page.

This New Holland T6.120, T6.140, T6.140 AutoCommand, T6.150, T6.150 AutoCommand, T6.155, T6.160, T6.160 AutoCommand, T6.165, T6.175 Tractor service & repair manual (including maintenance, overhaul, disassembling & assembling, adjustment, tune-up, operation, inspecting, diagnostic & troubleshooting…) is divided into different sections. Each section covers a specific component or system with detailed illustrations. A table of contents is placed at the beginning of each section. Pages are easily found by category, and each page is expandable for great detail. The printer-ready PDF documents work like a charm on all kinds of devices.

3,823 pages, bookmarked, Searchable, Printable, high quality PDF

New Holland T6.120, T6.140, T6.140 AutoCommand, T6.150, T6.150 AutoCommand, T6.155, T6.160, T6.160 AutoCommand, T6.165, T6.175 Tractor Service Manual
3,823 pages PDF
Part number 47665859 English February 2014
T6.120, T6.140 AutoCommand, T6.140, T6.150 AutoCommand, T6.150, T6.155, T6.160 AutoCommand, T6.160, T6.165, T6.175

EXCERPT:
Hydraulic systems – Reservoir, cooler, and filters
1. Remove the filter guard bracket by unscrewing the three retaining bolts.
2. Before changing the main filter cartridge in housing (3) Figure 2 , release the air bleed valve (2) by unscrewing fully. This will allow air into the filter so that most of the oil can drain back to the reservoir. Wait a few moments and then remove the 19 mm plug (5) from the filter casing and allow the oil to drain out into a suitable container.
3. Using as 41 mm socket or ring spanner, remove the filter support plate by turning approximately 45 ° to the left. Remove filter and plate.
4. Ensure support plate is clean before installing the new cartridge. Lightly oil the sealing ring and refit the assembly to the filter housing, making sure that plate locks into place and the lug (4) aligns correctly with the arrow on the filter casing.
NOTE: When replacing the main filter cartridge the bottom cover sealing ring must also be replaced.
5. Unscrew the charge filter (1) and discard in an appropriate container.
6. Clean the inlet channel and the face of the filter mounting.
Smear clean oil around the rubber seal of the new filter and install into the filter housing. Screw up until the faces just meet, then tighten a further 3/4 of a turn.
Do not over-tighten.
Oil filters – Remove Filter Assembly
1. Remove the hydraulic oil filter vent cap.
NOTE: Leave for one minute to allow oil in the filters to drain into the sump.
2. Remove the filter housing guard bolts (1) and remove the guard.
3. Remove the filter housing drain plug and drain the oil.
NOTE: Place a suitable container under the oil filter housing to collect the hydraulic oil.