Posted on

New Holland/Kobelco E265B, E265BLC, E305B Hydraulic Excavator Factory Service & Shop Manual


New Holland E265B, E305B

MNHE265305BOPES.zip
Price: $29.99 USD

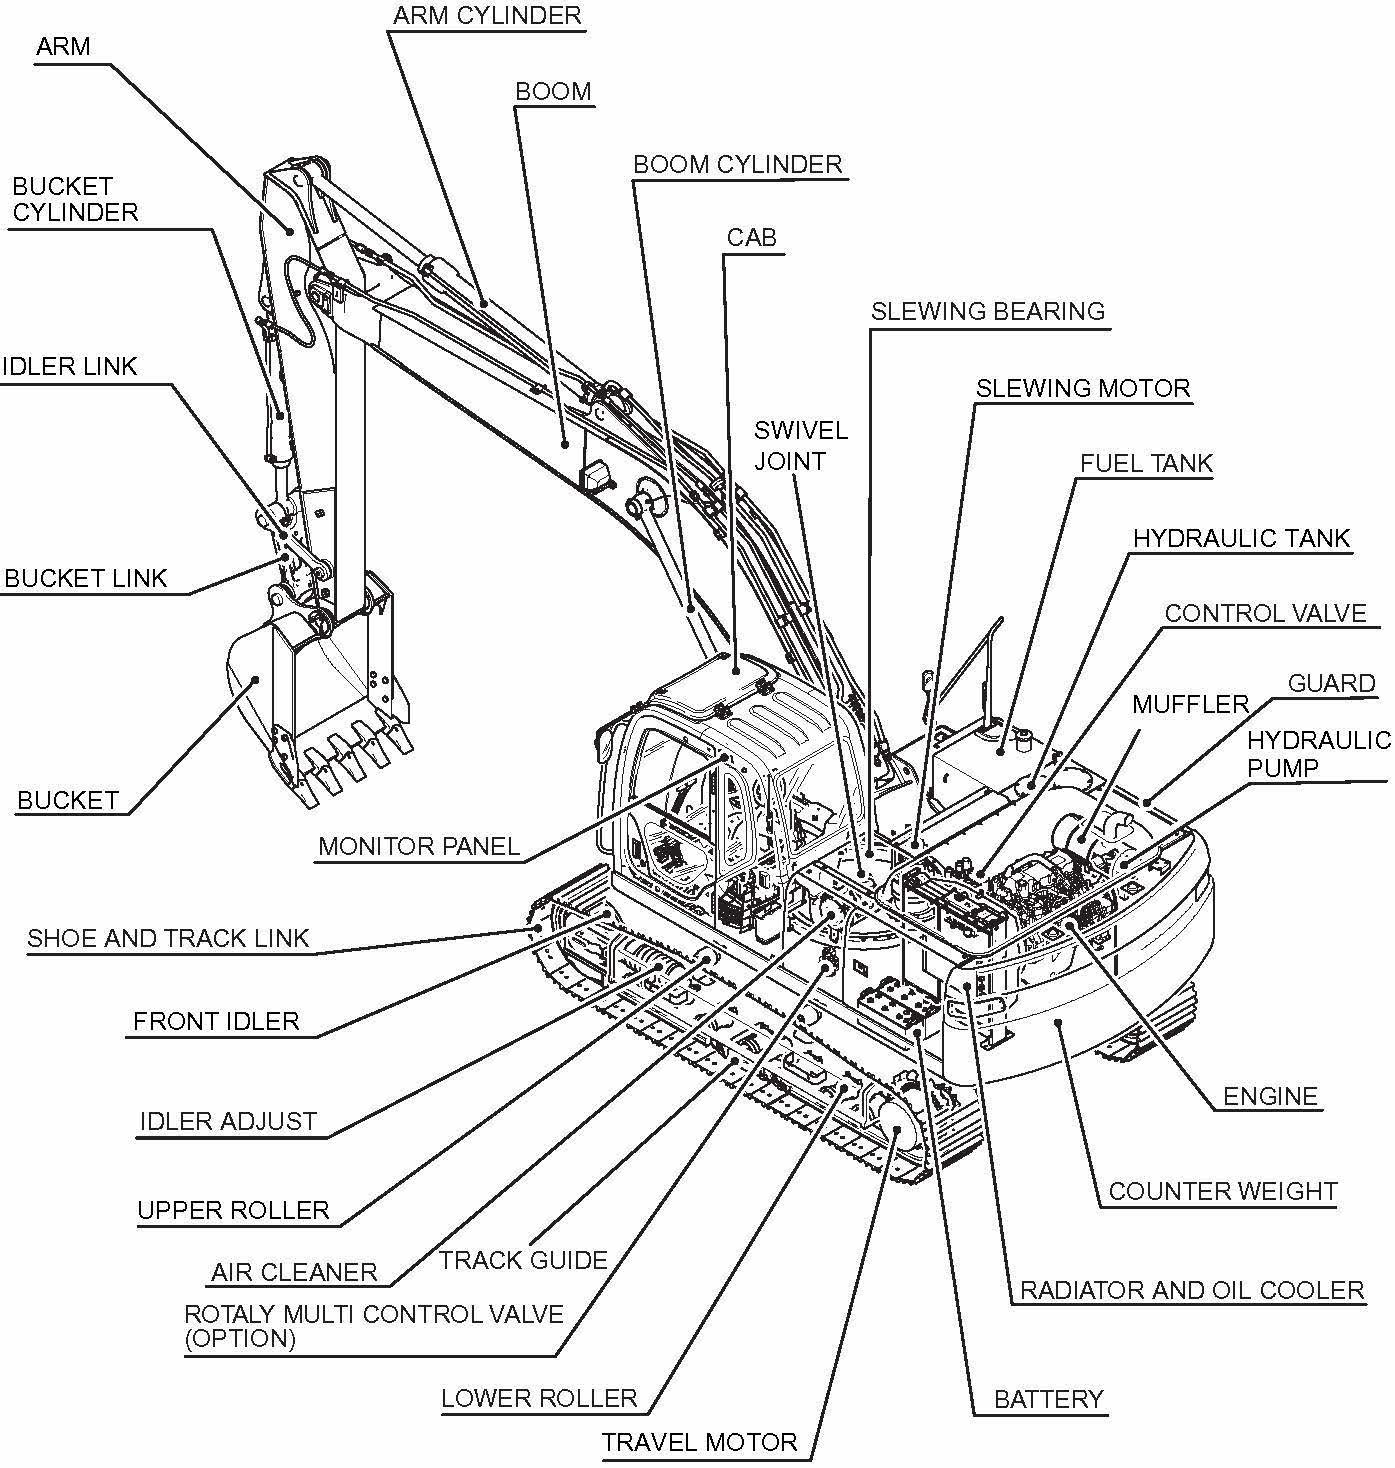
Complete workshop & service manual with electrical wiring diagrams for New Holland/Kobelco E265B, E265BLC, E305B. It’s the same service manual used by dealers that guaranteed to be fully functional and intact without any missing page.

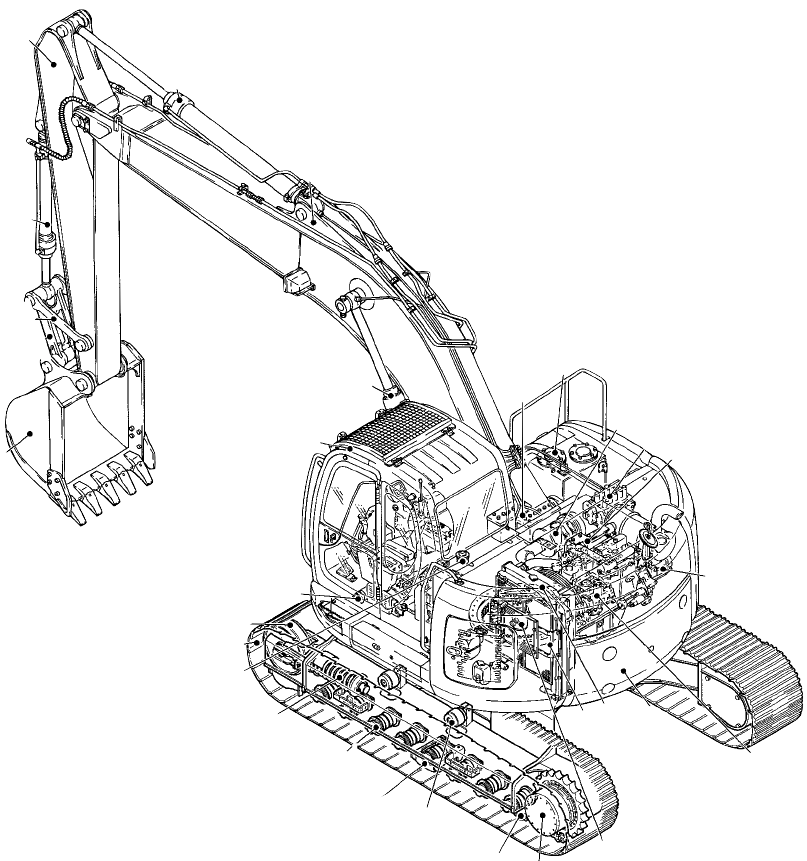
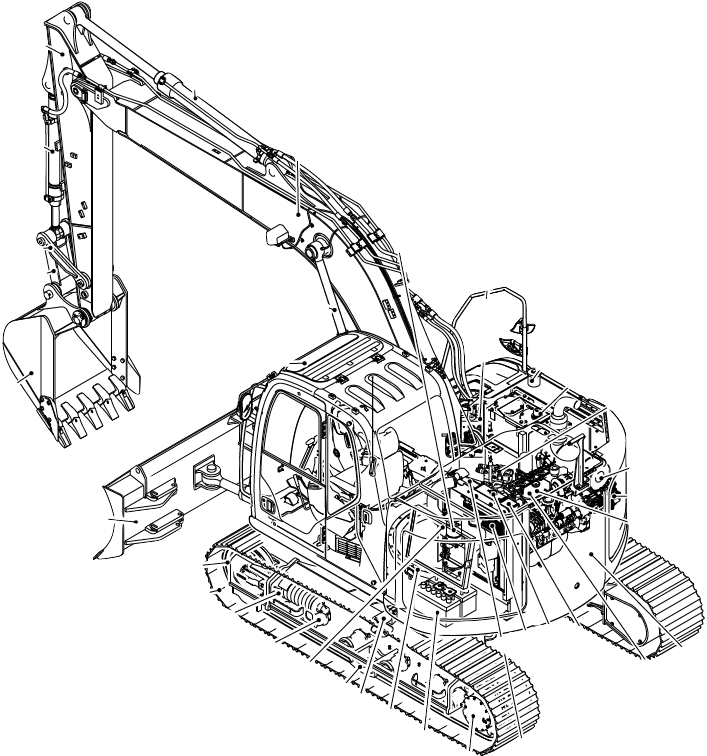
This New Holland/Kobelco E265B, E265BLC, E305B Hydraulic Excavator service & repair manual (including maintenance, overhaul, disassembling & assembling, adjustment, tune-up, operation, inspecting, diagnostic & troubleshooting…) is divided into different sections. Each section covers a specific component or system with detailed illustrations. A table of contents is placed at the beginning of each section. Pages are easily found by category, and each page is expandable for great detail. The printer-ready PDF documents work like a charm on all kinds of devices.

FILELIST:
604.13.673 – New Holland_Kobelco E265B, E305B Tier 3 Hydraulic Excavator Worksop Manual.pdf
87495895A – E265B Crawler Excavators Service Repair Manual.pdf
87731199 – E265B, E265BLC Hydraulic Excavators Shop Manual.pdf
87731200 – E265B, E265BLC (HS Engine) Hydraulic Excavators Shop Manual.pdf
87731201 – E265B, E265BLC Hydraulic Excavators Shop Manual.pdf
87731202 – E265B, E265BLC (HS Engine) Hydraulic Excavators Shop Manual.pdf
87746510A – New Holland Kobelco E265B, E305B Hydraulic Excavator Worksop Manual.pdf
87746510A – New Holland_Kobelco E265B, E305B Hydraulic Excavator Worksop Manual.pdf
Section 3 Undercarriage E265-E305 Tier 3 Shop Manual.pdf

EXCERPT:

AIR CONDITIONER SYSTEM

DISASSEMBLY AND ASSEMBLY OF UNIT

1. Removing inner air filter
Slide the inner air filter (1) leftward and remove it from the unit (2).

2. Removing selector box
Remove 6 plus screws (3), remove connector (4) connected to the mode actuator (5) on mode selector box (6), and separate the mode selector box from the unit (2).

3. Removing main harness
Pull out 3 harness clamps (7) from the unit (2), and disconnect all connected connectors and remove harness (8) on the body from the unit (2).

4. Removing upper unit case
1) Remove air MIX rod (9) and air MIX rod sub (10) from air MIX lever (11).
2) Remove 12 plus screws (12) which are used to install the upper and lower unit casings (2a).

Pull out the upper unit casing (2b) upward giving attention to the thermistor harness so as not to be caught by the casing.

5. Replacing blower controller
1) Remove 2 plus screws (14) and remove the blower controller (15) from the upper unit casing (2b).
2) Install new blower controller by the reverse procedure of removal.
* Do not disassemble the blower controller.

6. Removing heater core

Posted on

New Holland E215B, E215BJ, E215BLC, E245B Crawler Excavator Factory Service & Shop Manual


New Holland E215B, E215BJ, E215BLC, E245B

MNHE215245BOPES.zip
Price: $29.99 USD

Complete workshop & service manual with electrical wiring diagrams for New Holland E215B, E215BJ, E215BLC, E245B Crawler Excavator. It’s the same service manual used by dealers that guaranteed to be fully functional and intact without any missing page.

This New Holland E215B, E215BJ, E215BLC, E245B Crawler Excavator service & repair manual (including maintenance, overhaul, disassembling & assembling, adjustment, tune-up, operation, inspecting, diagnostic & troubleshooting…) is divided into different sections. Each section covers a specific component or system with detailed illustrations. A table of contents is placed at the beginning of each section. Pages are easily found by category, and each page is expandable for great detail. The printer-ready PDF documents work like a charm on all kinds of devices.

“87677762A.pdf”
New Holland Kobelco E215B, E245B Crawler Excavator Worksop Manual
821 pages
Print No. 87677762A English – Edition – June 2007

— — — — — — — — — — — — — — — — — — — — —

“84163741.pdf”
New Holland Kobelco E215BJ Hydraulic Excavator (Hino Engine) Worksop Manual
795 pages
Book Code No. 84163741 English

— — — — — — — — — — — — — — — — — — — — —

“87731203.pdf”
New Holland Kobelco E215B, E215BLC (HS Engine) Hydraulic Excavator Worksop Manual
1,064 pages
Book Code No. 87731203 English

— — — — — — — — — — — — — — — — — — — — —

“87731205.pdf”
New Holland Kobelco E215B, E215BLC Hydraulic Excavator Worksop Manual
1,084 pages
Book Code No. 87731205 English

— — — — — — — — — — — — — — — — — — — — —

“87495894A – Crawler Excavators E215B Service Repair Manual.pdf”

— — — — — — — — — — — — — — — — — — — — —

“87739547 – Hydraulic Excavators E215B, E215BLC Shop Manual.pdf”

EXCERPT:

SWING DEVICE

Assembly

1. Sufficiently clean every part with wash oil and dry it with compressed air.

2. Check on every part for failure.

3. Attach oil seal (30) to sleeve (21) by means of special tool (xxxxxxxxx).

4. Insert sleeve (21) and oils seal (30) assy in pinion shaft (1).

5. Apply gear oil to the perimeter of axis of pinion shaft (1) lightly to prevent seizure.

6. Seal sufficient grease in spherical bearing (lower) (11) and force it in pinion shaft (1) by means of special tool (xxxxxxxxx).
Press force: 4~5 t
NOTE: since the bearing is formed with a partition at the center section, seal grease in it from both sides.

7. Apply sufficient grease to the pinion shaft assy. Grease: lithium extreme-pressure grease
(SHELL Albania EP2 or equivalent)

8. Place housing (13) on level bench and attach eye bolt to screw (M10) at the axis end of pinion shaft assy, and perpendicularly hang up pinion shaft assy and place it in the housing.
NOTE: horizontally orient the outer race of spherical bearing and insert it in by striking lightly. If the outer race is tilted, it is hard to insert even if striking.
Then do not force to insert it in, but take it away once and horizontally orient the outer race twice and insert it in again.

9. Set housing assy so that the pinion directs downward and fit oil seal (12) in housing (13) by means of special tool (xxxxxxxxx).
NOTE: apply Loctite #515 to the perimeter of oil seal. Fill one third (1/3) of the space of the grooveshaped section provided on the oil seal (12)
lip with grease. Insert it horizontally giving attention to the lip of oil seal so as not be damaged.

Posted on

New Holland/Kobelco E200SR/E225BSR/E235SR/E235BSR Excavators Factory Service & Shop Manual


Pages from 604.13.436 – E235SR Workshop Manual

MNHE200E235OPES.zip
Price: $29.99 USD

Complete workshop & service manual with electrical wiring diagrams for New Holland/Kobelco E200SR/E225BSR/E235SR/E235BSR Excavators. It’s the same service manual used by dealers that guaranteed to be fully functional and intact without any missing page.

This New Holland/Kobelco E200SR/E225BSR/E235SR/E235BSR Excavators service & repair manual (including maintenance, overhaul, disassembling & assembling, adjustment, tune-up, operation, inspecting, diagnostic & troubleshooting…) is divided into different sections. Each section covers a specific component or system with detailed illustrations. A table of contents is placed at the beginning of each section. Pages are easily found by category, and each page is expandable for great detail. The printer-ready PDF documents work like a charm on all kinds of devices.

FILELIST:
604.13.431 – E200SR Excavators Workshop Manual.pdf
604.13.436 – E235SR Workshop Manual.pdf
87677758A – New Holland_Kobelco E235BSR Workshop Manual.pdf
87709239A – New Holland_Kobelco E225BSR Workshop Manual.pdf

EXCERPT:
INDEX
SPECIFICATIONS
Section 1 – Outline
Section 2 – Specification
Section 3 – Attachment dimension
MAINTENANCE
Section 11 – Tools
Section 12 – Standard maintenance time schedule
Section 13 – Maintenance standard and test procedure
SYSTEM
Section 21 – Mechatro control system
Section 22 – Hydraulic system
Section 23 – Electric system
Section 24 – Components system
Section 25 – Air-conditioner system
DISASSEMBLING
Section 31 – Disassembling and assembling
Section 32 – Attachment
Section 33 – Upper structure
Section 34 – Travel system
TROUBLESHOOTING
Section 41 – Troubleshooting (mechatro control)
Section 42 – Troubleshooting (Hydraulic)
Section 43 – Troubleshooting (Electric)
Section 44 – Troubleshooting (Engine)
ENGINE
Section 51 – Engine
OPT
Section 63 – Mounting the breaker and nibbler & breaker

This section describes the following operations.
1) Pressure drain (releasing) pilot circuit
2) Pressure drain (releasing) main circuit
11.1 PRESSURE RELEASE PILOT CIRCUIT
Purpose :
To release the main circuit pressure for piping repair work.
Mechatronics :
When press screen change switch of gauge cluster and buzzer stop switch at the same time for more than 5 seconds, mechatro controller recognizes this is pressure release control and out puts the following command.
1) Puts out the minimum tilting command value to the pump proportional valve (PSV-P1, PSV-P2).
2) Puts out a pressure release control revolution command value to the governor motor. (Electric system).
3) Travel straight solenoid proportional valve (PSV-C) is input the command value to change the pressure release position.
4) Puts out a standby command value to the P1, P2 bypass cut proportional valves. (A command that does not put out the secondary pressure of the P1, P2 bypass proportional valves).
Hydraulics :
1) The pump proportional valve minimizes the delivery rates of the P1, P2 pumps.
2) The secondary pilot pressure for the travel straight valve pressure release position selection comes out of the travel straight proportional valve (PSV-C), flows into the PTb port of C/V (2) and switches the travel straight valve to its pressure release position.
11.2 PRESSURE RELEASE MAIN CIRCUIT
Operation:
When the operating lever is shifted to neutral during engine running, if the pressure is drained (released) as mentioned left, “DRAINING HYD. PRESS” is displayed on the gauge cluster and intermittent buzzer sound continuously. If the operating lever for the circuit required releasing pressure is operated four to five times, pressure draining may be completed. After draining pressure is completed, turn off the starter key, and buzzer stops. If the pump pressure is determined to be more than 9.8kgf/cm2 (140 psi) by the output value of the high-pressure sensor or the high-pressure sensors (SE-22, 23) are broken, “FAIL DRAIN HYD. PRESS” is displayed on the gauge cluster and the buzzer sounds continuously. In that case, also the buzzer is not stopped unless the engine key is turned to off. Repeat the pressure releasing procedure once again.
Operation:
If the travel straight valve is turned to the pressure release position, the oil delivered by each pump is unloaded to the tank passage. If the spools are switched by pilot operation, the remaining pressure from the actuators may be relieved to the tank circuit, i.e. the main circuit pressure may be released.
11. PRESSURE DRAINING (RELEASING) CIRCUIT

Posted on

New Holland Kobelco E175B, E195B Crawler Excavator Factory Service & Shop Manual


New Holland E175B, E195B

MNHE175195BOPES.zip
Price: $29.99 USD

Complete workshop & service manual with electrical wiring diagrams for New Holland Kobelco E175B, E195B Crawler Excavator. It’s the same service manual used by dealers that guaranteed to be fully functional and intact without any missing page.

This New Holland Kobelco E175B, E195B Crawler Excavator service & repair manual (including maintenance, overhaul, disassembling & assembling, adjustment, tune-up, operation, inspecting, diagnostic & troubleshooting…) is divided into different sections. Each section covers a specific component or system with detailed illustrations. A table of contents is placed at the beginning of each section. Pages are easily found by category, and each page is expandable for great detail. The printer-ready PDF documents work like a charm on all kinds of devices.

“87690582A.pdf”
New Holland Kobelco E175B, E195B Crawler Excavator Worksop Manual
837 pages
Print No. 87690582A English – Printed in Italy

“87495893A – Crawler Excavators E175B Service Repair Manual.pdf”

EXCERPT:
E175B-E195B TEST PROCEDURES
rain rate of travel motor
PURPOSE
To measure the drain rate of the travel motor and to confirm the performances of the travel motor.
CONDITIONS
Hydraulic oil temperature: 45~55°C (113~131°F)
Engine revolution: Hi idle
PREPARATION
1. Place a stopper under the RH and LH travel sprockets.
2. Stop the engine and release pressure from the hydraulic circuit.
3. Connect a hose with the drain port of the travel motor and take drain in a container.
MEASUREMENT AT TRAVEL LOCK
WARNING
Unless you observe the rotary force direction at travel lock, rib “A” may be broken by stopper “B” in some cases.
1. Start the engine and relieve pressure at the full stroke of the travel lever.
2. Measure the drain rate for 30 seconds of relieving.
Drain rate of travel motor
E175B
Drain rate of travel motor

Posted on

New Holland E150BSR Blade Runner Factory Service & Shop Manual


Pages from 87493625A – Hydraulic Excavactor E150BSR Blade Runner Repair Manual

MNHE150OPES.zip
Price: $29.99 USD

Complete workshop & service manual with electrical wiring diagrams for New Holland E150BSR Blade Runner. It’s the same service manual used by dealers that guaranteed to be fully functional and intact without any missing page.

This New Holland E150BSR Blade Runner service & repair manual (including maintenance, overhaul, disassembling & assembling, adjustment, tune-up, operation, inspecting, diagnostic & troubleshooting…) is divided into different sections. Each section covers a specific component or system with detailed illustrations. A table of contents is placed at the beginning of each section. Pages are easily found by category, and each page is expandable for great detail. The printer-ready PDF documents work like a charm on all kinds of devices.

87493625A – Hydraulic Excavator E150BSR Blade Runner Repair Manual.pdf

EXCERPT:
32.1.3.2 ATTACHING ARM
(8) Slinging arm assy
Sling arm with nylon sling and remove it.
STD Arm weight : 367 kg (809 lbs)
Long Arm weight : 472 kg (1,041 lbs)
Fig. 32-15 Slinging arm assy
Instal the arm in the reverse order of removing, paying attention to the following :
1) When aligning the pin holes, do not put your finger in the pin holes, but align them visually.
2) Check the seals for damage and replace as necessary.
3) When inserting the pin, coat the shaft with grease.
4) Pin lock nut handling procedure: 22, 24 mm
5) When installing the arm and the cylinder, inspect the clearance in the thrust direction of the pins and decide the thickness of shims by referring to the Maintenance Standard.
6) Tightening torque