Posted on

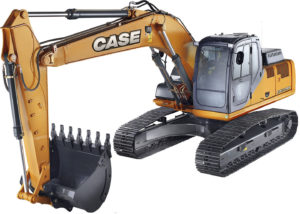
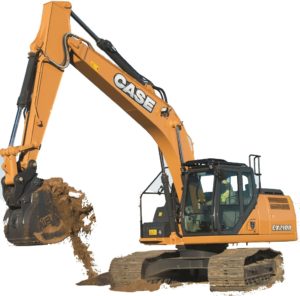
Case CX250C, CX250C LR Crawler Excavators Workshop Repair & Service Manual


Download Link

INSTANT DOWNLOAD (add to cart)


3,000+ total pages, bookmarked, Searchable, Printable, high quality PDF

84402826: CX250C, CX250C LR Tier 4 Service Manual
MAKE: Case
MODEL: CX250C, CX250C LR Tier 4 Crawler Excavators
FORMAT: PDF
PAGES / SIZE: 1,897

“Case CX C Series Excavator Service Training Manual” – 1,441 pages

Complete digital official shop manual contains service, maintenance, and troubleshooting information for the Case CX250C, CX250C LR Crawler Excavators. Diagnostic and repair procedures are covered in great detail to repair, maintain, rebuild, refurbish or restore your Case CX250C, CX250C LR Crawler Excavator like a professional mechanic in local service/repair workshop. This cost-effective quality manual is 100% complete and intact as should be without any missing pages. It is the same factory shop manual used by dealers that guaranteed to be fully functional to save your precious time.

This manual for Case CX250C, CX250C LR Crawler Excavators is divided into different sections. Each section covers a specific component or system and, in addition to the standard service procedures, includes disassembling, inspecting, and assembling instructions. A table of contents is placed at the beginning of each section. Pages are easily found by category, and each page is expandable for great detail. It is in the cross-platform PDF document format so that it works like a charm on all kinds of devices. You do not need to be skilled with a computer to use the manual.

EXCERPT:
Electrical and Engine Basic Functions
Maintenance
Anti-theft
Enabling the anti-theft function
With the key OFF, connect the anti-theft knob terminal.
When the male and female knob terminals are connected on the cab main harness in the rear cover, the anti-theft
function is enabled.
The factory setting is for these knob terminals to be disconnected.
Anti-theft setting knob Connect VG (purple I green) and BG (black I green)
Password
Purpose
Locks the machine if is operated without authorization. (Anti-theft)
Operation explanation
1. When the anti-theft function is ON, turn the key ON.
2. Enter the correct password at the password input screen.
* If an incorrect password is input, “ERROR” is displayed and the buzzer buzzes.
If the correct password is then input, the lock is released.
3. The machine lock is released and the normal screen is displayed.
* If the “ERROR” message is ignored and the engine is started, the machine will lock.
Machine lock conditions
• The engine speed is fixed at low idle.
• The swing brake cannot be released .
• The travel alarm buzzes continuously.
* In addition, if the operator tries to operate the machine in the machine lock state, the engine will be stopped
Machine operation judgment conditions
• The P1 or P2 pressure rises to 5 MPa or higher
• The engine load ratio is 50% or higher for 2 sec. cumulative.
• The upper, travel, P1, or P2 pressure sensor is removed.
Immobilizer Key
Purpose
Prevents starting of the engine with keys other than the designated key. (Anti-theft)
Operation explanation
• When the key is switched ON, the immobilizer computer performs verification of the key.
If the key is verified as the designated key, cranking is performed.
If the key is not verified as the designated key, cranking is not performed.
* At this time, cranking will not be performed even if the key is turned up to ST.
Feed Pump Automatic Stop
Summary
The feed pump power supply is controlled and when the fuel tank is full (Level 8), the fuel feed is automatically stopped.
Configuration
Operation explanation
The fuel pump rocker switch has three positions: Manual, OFF, and Auto .
• Auto mode
The switch is the toggle type \1\/hen it comes ON, the fuel feed starts.
When the fuel tank angle sensor reaches the full level (Level 8), the monitor relay is driven and the feed pump power is switched OFF.
In place of that, the relay buzzes the buzzer to announce that the automatic feed has ended.
To silence the buzzer, the rocker switch must be switched to OFF or Manual.
• Manual mode
The switch is the momentary type The feed pump only drives fuel feed while the switch is pressed.
Coolant Level Drop
Summary
If the engine coolant level drops, the low coolant level warning is issued.
Configuration
Operation
1. The radiator reserve tank level switch is detected and an warning is issued.
• SW ON: 0.33- 0.53 L
Monitor
Buzzer
2. When the monitor receives the level drop signal, it carries out the following operation.
• Message “LOW COOLANT” is displayed.
Even after the coolant level is restored to normal, the “LOW COOLANT” message remains displayed while the key is ON.
• Diagnostic Trouble Code: “7423” is displayed.
Even after the coolant level is restored to normal, the “LOW COOLANT” message remains displayed while the key is ON.
• Monitor buzzer: The buzzer sounds at the same time that the message is displayed and the buzzer automatically stops after 5 sec.
3. When 3 sec. have passed after the coolant level switch was detected going OFF, the low coolant level alarm stops, the “LOW COOLANT” message goes off, and the buzzer stops.

Posted on

Case CX225SR Crawler Excavators Service Manual


Download Link

INSTANT DOWNLOAD (add to cart)


3,000+ pages, bookmarked, Searchable, Printable, high quality PDF

9-40681 – Pelles sur Chenilles CX225SR MANUEL DE SERVICE (FR).pdf
9-40691 – CX225SR Crawler Excavator Repair Manual (EN).pdf
9-40880 – EXCAVADORA SOBRE ORUGAS CX225SR SCHEMATIC SET (ES).pdf
9-40901 – CX225SR Raupenbagger REPARATUR HANDBUCH (DE).pdf
9-93700 – ESCAVATORE CINGOLATO CX225SR MANUALE ISTRUZIONI PER LE RIPARAZIONI (IT).pdf

Complete workshop & service manual with electrical wiring diagrams for Case CX225SR. It’s the same service manual used by dealers that guaranteed to be fully functional and intact without any missing page.

CNH/Case CX225SR Excavators Service Manual (including maintenance, overhaul, disassembling & assembling, adjustment, tune-up, operation, inspecting, diagnostic & troubleshooting…) is divided into different sections. Each section covers a specific component or system with detailed illustrations. A table of contents is placed at the beginning of each section. Pages are easily found by category, and each page is expandable for great detail. The printer-ready PDF documents work like a charm on all kinds of devices.

Posted on

Case Escavadeira Hidráulica CX220B Manual de Servicio


Download Link

INSTANT DOWNLOAD (add to cart)


1,846 total pages, bookmarked, Searchable, Printable, high quality PDF
71114297 – CX220B Manual de Servicio (PT).pdf – 780 pages
Case CX B Series Excavator Service Training Manual (EN)

Complete workshop & service manual with electrical wiring diagrams for Case CX220B Escavadeira Hidráulica in Portuguese. It’s the same service manual used by dealers that guaranteed to be fully functional and intact without any missing page.

This service & repair manual (including maintenance, overhaul, disassembling & assembling, adjustment, tune-up, operation, inspecting, diagnostic & troubleshooting…) is divided into different sections. Each section covers a specific component or system with detailed illustrations. A table of contents is placed at the beginning of each section. Pages are easily found by category, and each page is expandable for great detail. The printer-ready PDF documents work like a charm on all kinds of devices.

EXCERPT:
INDICE MANUAL
NORMAS DE SEGURIDAD
Sección 1 GENERALIDAD … S1
Sección 2 NORMAS DE SEGURIDAD …. S2
Sección 3 ROTULOS DE SEGURIDAD …. S3
PRINCIPIO DE FUNCIONAMIENTO
Sección 1 GENERALIDAD
Grupo 1 Características y datos … T1-1
Sección 2 INSTALACIONES
Grupo 1 Sistema de control Mechatro …T2-1
Grupo 2 Instalación hidráulica ….T2-2
Grupo 3 Instalación eléctrica …T2-3
Sección 3 FUNCIONAMIENTO DE COMPONENTES
Grupo 1 Conjunto de bombas hidráulicas…. T3-1
Grupo 2 Manipuladores … T3-2
Grupo 3 Distribuidor … T3-3
Grupo 4 Dispositivo de rotación … T3-4
Grupo 5 Dispositivo de traslación …. T3-5
Grupo 6 Distribuidor rotante …. T3-6
Grupo 7 Cilindros …. T3-7
Grupo 8 Aire acondicionado … T3-8
PRUEBA DE PRESTACIONES
Sección 4 PRUEBA DE PRESTACIONES
Grupo 1 Introducción ….T4-1
Grupo 2 Prestaciones estándar …T4-2
Grupo 3 Procedimientos de prueba ….T4-3
Grupo 4 Regulación centralita Mechatro ….T4-4
DIAGNOSIS DE AVARIAS
Sección 5 DIAGNOSIS DE AVARIAS
Grupo 1 Mando Mechatro … T5-1
Grupo 2 Instalación hidraulica … T5-2
Grupo 3 Instalación eléctrica …. T5-3
INSTRUCCIONES PARA LAS REPARACIONES
Sección 1 INFORMACIONES GENERALES
Grupo 1 Precauciones para el desarme y el montaje ….W1-1
Grupo 2 Pares de apriete …W1-2
Sección 2 TORRETA
Grupo 1 Cabina ….W2-1
Grupo 2 Conjunto de bombas hidráulicas…W2-2
Grupo 3 Distribuidor ….W2-3
Grupo 4 Dispositivo de rotación ….W2-4
Grupo 5 Unidad electroválvula ….W2-5
Sección 3 SUBCARRO
Grupo 1 Plataforma giratoria …W3-1
Grupo 2 Dispositivo de traslación …W3-2
Grupo 3 Distribuidor rotante ….W3-3
Grupo 4 Tensor de la oruga ….W3-4
Grupo 5 Rueda del tensor de la oruga…W3-5
Grupo 6 Rodillos de soporte y apoyo…W3-6
Grupo 7 Orugas ….W3-7
Sección 4 HERRAMIENTA ANTERIOR
Grupo 1 Herramienta anterior …W4-1

Posted on

Case CX210D Crawler Excavators Factory Service & Shop Manual


Download Link

INSTANT DOWNLOAD (add to cart)


Case CX210D Crawler Excavators Factory Service & Shop Manual

3,500+ total pages, bookmarked, Searchable, Printable, high quality PDF
47843011 – CX210D Crawler Excavators LC version (TIER4 FINAL) – NA Market Service Manual.pdf – 3,362 pages
CX210D-CX350D Crawler Excavator Service Training – 626 pages

Complete workshop & service manual with electrical wiring diagrams for Case CX210D Crawler Excavators. It’s the same service manual used by dealers that guaranteed to be fully functional and intact without any missing page.

This Case CX210D Crawler Excavators service & repair manual (including maintenance, overhaul, disassembling & assembling, adjustment, tune-up, operation, inspecting, diagnostic & troubleshooting…) is divided into different sections. Each section covers a specific component or system with detailed illustrations. A table of contents is placed at the beginning of each section. Pages are easily found by category, and each page is expandable for great detail. The printer-ready PDF documents work like a charm on all kinds of devices.

EXCERPT:
Contents
INTRODUCTION
Engine… 10
[10.001] Engine and crankcase . . 10.1
[10.102] Pan and covers . . 10.2
[10.106] Valve drive and gears . . 10.3
[10.101] Cylinder heads . . 10.4
[10.105] Connecting rods and pistons. . 10.5
[10.103] Crankshaft and flywheel. . 10.6
[10.216] Fuel tanks . . 10.7
[10.206] Fuel filters . . 10.8
[10.218] Fuel injection system. . 10.9
[10.202] Air cleaners and lines . . 10.10
[10.250] Turbocharger and lines. . 10.11
[10.254] Intake and exhaust manifolds and muffler . . 10.12
[10.500] Selective Catalytic Reduction (SCR) exhaust treatment . . 10.13
[10.501] Exhaust Gas Recirculation (EGR) – Diesel Particulate Filter (DPF) exhaust
treatment . . 10.14
[10.400] Engine cooling system . . 10.15
[10.414] Fan and drive . . 10.16
[10.310] Aftercooler. . 10.17
[10.304] Engine lubrication system . . 10.18
[10.408] Oil cooler and lines. . 10.19
Hydraulic systems… 35
[35.000] Hydraulic systems. . 35.1
[35.300] Reservoir, cooler, and filters. . 35.2
[35.106] Variable displacement pump . . 35.3
[35.102] Pump control valves. . 35.4
[35.359] Main control valve . . 35.5
[35.357] Pilot system . . 35.6
[35.355] Hydraulic hand control . . 35.7
[35.356] Hydraulic foot control. . 35.8
[35.352] Hydraulic swing system . . 35.9
[35.353] Hydraulic travel system . . 35.10
[35.354] Hydraulic central joint . . 35.11
[35.736] Boom hydraulic system . . 35.12
[35.737] Dipper hydraulic system. . 35.13
[35.738] Excavator and backhoe bucket hydraulic system . . 35.14
Frames and ballasting … 39
[39.140] Ballasts and supports . . 39.1
Tracks and track suspension …. 48
[48.130] Track frame and driving wheels . . 48.1
[48.100] Tracks . . 48.2
[48.134] Track tension units . . 48.3
[48.138] Track rollers . . 48.4
Cab climate control … 50
[50.100] Heating . . 50.1
[50.200] Air conditioning. . 50.2
Electrical systems … 55
[55.000] Electrical system . . 55.1
[55.100] Harnesses and connectors. . 55.2
[55.525] Cab engine controls . . 55.3
[55.015] Engine control system. . 55.4
[55.201] Engine starting system . . 55.5
[55.301] Alternator. . 55.6
[55.302] Battery. . 55.7
[55.202] Cold start aid . . 55.8
[55.011] Fuel tank system . . 55.9
[55.010] Fuel injection system. . 55.10
[55.014] Engine intake and exhaust system. . 55.11
[55.988] Selective Catalytic Reduction (SCR) electrical system . . 55.12
[55.989] Exhaust Gas Recirculation (EGR) electrical system . . 55.13
[55.012] Engine cooling system . . 55.14
[55.013] Engine oil system . . 55.15
[55.640] Electronic modules . . 55.16
[55.512] Cab controls. . 55.17
[55.036] Hydraulic system control . . 55.18
[55.051] Cab Heating, Ventilation, and Air-Conditioning (HVAC) controls. . 55.19
[55.050] Heating, Ventilation, and Air-Conditioning (HVAC) control system. . 55.20
[55.416] Swing control system . . 55.21
[55.417] Travel control system . . 55.22
[55.530] Camera. . 55.23
[55.518] Wiper and washer system. . 55.24
[55.404] External lighting . . 55.25
[55.514] Cab lighting . . 55.26
[55.408] Warning indicators, alarms, and instruments . . 55.27
[55.992] Anti-theft system . . 55.28
[55.DTC] FAULT CODES. . 55.29
Booms, dippers, and buckets … 84
[84.910] Boom . . 84.1
[84.912] Dipper arm . . 84.2
[84.100] Bucket . . 84.3
Platform, cab, bodywork, and decals … 90
[90.150] Cab. . 90.1
[90.156] Cab glazing . . 90.2
[90.118] Protections and footboards. . 90.3
[90.120] Mechanically-adjusted operator seat. . 90.4
[90.100] Engine hood and panels . . 90.5

Booms, dippers, and buckets – Dipper arm
Dipper – Install
• Tighten bolts being installed to the specified torque.
• When the torque is not specified, check the Torque – Bolt and nut ().
1. Clean each pin and pin hole.
2. Bring the arm (1) top in contact with the ground and use a lift-crane and nylon sling (2) to secure it. At this time, insert the arm cylinder pin (3) and secure with the nylon sling.
3. Align the arm (1) with the boom and use a hammer (3) to push in the pin (2) and then install the arm (1).
• If a pin is hard to insert, there is a load on the pin.
• When inserting the pin, be careful not to damage the installed dust seals.

Posted on

CNH CX210-CX230, CX240 Crawler Excavators Service Manual


Download Link

INSTANT DOWNLOAD (add to cart)


CNH CX210-CX230, CX240 Crawler Excavators Service Manual

2,500+ pages, bookmarked, Searchable, Printable, high quality PDF

9-93611 – CNH/Case CX210-CX230, CX240 Crawler Excavators Service Manual.pdf – 670 pages
9-93360 – Pelles sur Chenilles CX210 – CX230 – CX240 MANUEL DE SERVICE (FR).pdf – 648 pages
9-93590 – EXCAVADORAS SOBRE ORUGAS CX210 – CX230 – CX240 SCHEMATIC SET (ES).pdf
9-93600 – ESCAVATORI CINGOLATI CX210 – CX230 – CX240 SCHEMATIC SET (IT).pdf
9-93610 – CX210 – CX230 – CX240 Crawler Excavators Service Manual (EN).pdf – 648 pages
9-93620 – CX210 – CX230 – CX240 RAUPENBAGGER REPARATUR HANDBUCH (DE).pdf – 648 pages

Complete workshop & service manual with electrical wiring diagrams for CNH CX210-CX230, CX240 Crawler Excavators. It’s the same service manual used by dealers that guaranteed to be fully functional and intact without any missing page.

CNH/Case CX210-CX230, CX240 Crawler Excavators Service Manual (including maintenance, overhaul, disassembling & assembling, adjustment, tune-up, operation, inspecting, diagnostic & troubleshooting…) is divided into different sections. Each section covers a specific component or system with detailed illustrations. A table of contents is placed at the beginning of each section. Pages are easily found by category, and each page is expandable for great detail. The printer-ready PDF documents work like a charm on all kinds of devices.