Posted on

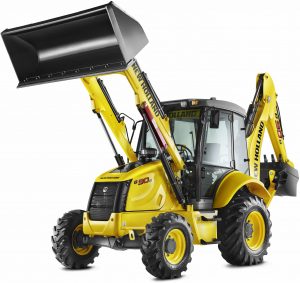
New Holland B100C, B100CLR, B100CTC, B110C, B110CTC, B115C Backhoe Loaders Factory Service & Shop Manual


New Holland B100C, B100CLR, B100CTC, B110C, B110CTC, B115C

MNHB100115COPES.zip
Price: $29.99 USD

Complete workshop & service manual with electrical wiring diagrams for New Holland B100C, B100CLR, B100CTC, B110C, B110CTC, B115C. It’s the same service manual used by dealers that guaranteed to be fully functional and intact without any missing page.

This New Holland B100C, B100CLR, B100CTC, B110C, B110CTC, B115C service & repair manual (including maintenance, overhaul, disassembling & assembling, adjustment, tune-up, operation, inspecting, diagnostic & troubleshooting…) is divided into different sections. Each section covers a specific component or system with detailed illustrations. A table of contents is placed at the beginning of each section. Pages are easily found by category, and each page is expandable for great detail. The printer-ready PDF documents work like a charm on all kinds of devices.

“84568042A.pdf”
New Holland Backhoe Loaders B100C / B100CLR / B100CTC B110C / B110CTC / B115C Service Manual
Print No. 84568042A
1,230 pages

The Service Manual consists of two volumes:
– B100C – B100CLR – B100CTC – B110C – B110CTC – B115C
Service Manual for “Loader backhoe”
– B100C – B100CLR – B100CTC – B110C – B110CTC – B115C
Service Manual for “Engine”

The Service Manuals for “Loader backhoe” and “Engine” contain the necessary technical information to carry out service and repair on machine and on engine, necessary tools to carry out those operations and information on service standard, on procedures for connection, disconnection, dis- assembly and assembly of parts.

The Service Manual which covers the loader backhoe models B100C – B100CLR – B100CTC – B110C – B110CTC – B115C consists of the follow- ing volumes, which can be identified by their print number as stated below:

Service Manual for “Loader backhoe” B100C – B100CLR – B100CTC – B110C – B110CTC – B115C 84568042A
Service Manual – “Engine” B100C – B100CLR – B100CTC – B110C – B110CTC – B115C 84496793

EXCERPT:

SECTION 27 – REAR AXLE
If the measure is not within the requested range, check the assembly of each single component and operate on the ring nuts of the differential support:
– if the total preload is less than the given range, screw on the adjusting ring nuts by the same measure, keeping the pinion-ring gear backlash value (A) unchanged;
– if the total preload is more than the given range, unscrew the adjusting ring nuts by the same measure, keeping the pinion-ring gear backlash value (B) unchanged.
Once all adjustment operations have been performed, assemble the ring nut retainers (9), fastening them with the relevant screws (10).
Tighten the screws (10) to a tightening torque of 13 Nm (9 lbf·ft).
Turn the ring nuts (8) as little as possible to allow their assembly.
Remove the 2 additional screws M16 x 130 (S) from both sides.

NON-SELF-LOCKING DIFFERENTIAL
Disassembly
Lock the differential with a clamp.
Loosen the screws (1) and remove the ring gear (2).
This operation releases also the two half boxes of the differential.

Posted on

New Holland B90B, B90BLR, B100B, B100BLR, B100BTC, B110B, B110BTC, B115B Factory Service & Shop Manual

New Holland B90B, B90BLR, B100B, B100BLR, B100BTC, B110B, B110BTC, B115B

MNHB90115BOPES.zip
Price: $29.99 USD

Complete workshop & service manual with electrical wiring diagrams for New Holland B90B, B90BLR, B100B, B100BLR, B100BTC, B110B, B110BTC, B115B. It’s the same service manual used by dealers that guaranteed to be fully functional and intact without any missing page.

This New Holland B90B, B90BLR, B100B, B100BLR, B100BTC, B110B, B110BTC, B115B service & repair manual (including maintenance, overhaul, disassembling & assembling, adjustment, tune-up, operation, inspecting, diagnostic & troubleshooting…) is divided into different sections. Each section covers a specific component or system with detailed illustrations. A table of contents is placed at the beginning of each section. Pages are easily found by category, and each page is expandable for great detail. The printer-ready PDF documents work like a charm on all kinds of devices.

FILELIST:
84428663A – B90B, B90BLR, B100B, B100BLR, B100BTC, B110B, B110BTC, B115B Backhoe Loaders Service Manual.pdf
84428663A1 – B90B, B90BLR, B100B, B100BLR, B100BTC, B110B, B110BTC, B115B Backhoe Loaders Service Manual.pdf
87643846B – B90B, B90BLR, B100B, B100BLR, B110B, B115B Backhoe Loaders Service Manual.pdf

“84428663A1.pdf”
New Holland Backhoe Loaders B90B, B90BLR, B100B, B100BLR, B100BTC, B110B, B110BTC, B115B Service Manual
Print No. 84428663A1
1,280 pages

SERVICE MANUAL
The Service Manual consists of two volumes:
– B90B – B90BLR – B100B – B100BLR – B100BTC – B110B – B110BTC – B115B Service Manual for “Loader backhoe”
– B90B – B90BLR – B100B – B100BLR – B100BTC – B110B – B110BTC – B115B Service Manual for “Engine”

The Service Manuals for “Loader backhoe” and “Engine” contain the necessary technical information to carry out service and repair on machine and on engine, necessary tools to carry out those operations and information on service standard, on procedures for connection, disconnection, disassembly and assembly of parts.

The Service Manual which covers the loader backhoe models B90B – B90BLR – B100B – B100BLR – B100BTC – B110B – B110BTC – B115B consists of the following volumes, which can be identified by their print number as stated below:
Service Manual for “Loader backhoe” B90B – B90BLR – B100B – B100BLR – B100BTC – B110B – B110BTC – B115B “84428663A1”
Service Manual – “Engine” B90B – B90BLR – B100B – B100BLR – B100BTC – B110B – B110BTC – B115B “87659057A”

— — — — — — — — — — — — — — — — — — — — — — — —

“87643846B.pdf”
New Holland Backhoe Loaders B90B, B90BLR, B100B, B100BLR, B110B, B115B Service Manual
Print No. 87643846B; 1,110 pages

COMPLETE HANDBOOK FOR INSTRUCTIONS AND REPAIRS

The complete Service Manual consists of two volumes:
B90B – B90BLR – B100B – B100BLR – B110B – B115B Service Manual for “Loader backhoe”
B90B – B90BLR – B100B – B100BLR – B110B – B115B Service Manual “Engine”

The Service Manuals for “Loader backhoe” and “Engine” contain the necessary technical information to carry out service and repair on machine and on engine, necessary tools to carry out those operations and information on service standard, on procedures for connection, disconnection, disassembly and assembly of parts.

The complete Service Manual which covers the loader backhoe models B90B – B90BLR – B100B – B100BLR – B110B – B115B consists of the following volumes, which can be identified through their print number as stated below:
Service Manual – “Loader backhoe” B90B – B90BLR – B100B – B100BLR – B110B – B115B “87643846B”
Service Manual – “Engine” B90B – B90BLR – B100B – B100BLR – B110B – B115B “87659057A”

EXCERPT:

SECTION 25 – FRONT AXLES

Loosen and remove the two fastening screws (1) of the planetary carrier cover (3).

Remove the planetary carrier cover (3) from the wheel hub. Remove the O-ring (11).

Position the planetary carrier cover (3) onto a workbench and check its wear conditions.

If necessary, replace the gears as follows:
unscrew the screws (10) on every pin (P);
remove the washers (8) and (9);
extract the gears (6);
collect the bearings (5) and check their conditions; Z collect the washer (4).

NOTE: with the new gears it is advisable to assemble new needles.

Assembly

Position the planetary carrier cover (3) onto a workbench.

Insert the washers (4) and the gears (6) complete with needles (5) in the pins of the planetary gear carrier.

Assemble the washers (8) and fasten them with the pins (7).

Assemble the washers (9) and screw on the screws (10) and tighten them to a torque of 73 Nm (53.84 lbf·ft).

NOTE: with the new gears it is advisable to assemble new needles.

Insert a new O-ring (11).

Assemble the epicyclic reduction gear assy onto the wheel hub.

Screw in the fastening screws (1) and tighten them to the prescribed torque of 25 Nm (18.43 lbf·ft).

Fill in oil into the reduction gear.

Screw in the plug (2) and tighten it to the prescribed torque of 60 Nm (44.25 lbf·ft).

Posted on

Ford New Holland 70(A) Series Tractors (8670, 8670A, 8770, 8770A, 8870, 8870A, 8970, 8970A) Factory Service & Shop Manual


New Holland_Ford 8160, 8260, 8360, 8560

MNH8X70OPEK.zip
Price: $29.99 USD

Complete workshop & service manual with electrical wiring diagrams for Ford New Holland 70(A) Series Tractors (8670, 8670A, 8770, 8770A, 8870, 8870A, 8970, 8970A). It’s the same service manual used by dealers that guaranteed to be fully functional and intact without any missing page.

This Ford New Holland 70(A) Series Tractors (8670, 8670A, 8770, 8770A, 8870, 8870A, 8970, 8970A) service & repair manual (including maintenance, overhaul, disassembling & assembling, adjustment, tune-up, operation, inspecting, diagnostic & troubleshooting…) is divided into different sections. Each section covers a specific component or system with detailed illustrations. A table of contents is placed at the beginning of each section. Pages are easily found by category, and each page is expandable for great detail. The printer-ready PDF documents work like a charm on all kinds of devices.

“87018730.pdf”
Ford New Holland 70(A) Series Tractors (8670, 8670A, 8770, 8770A, 8870, 8870A, 8970, 8970A) Service Manual
2,146 pages PDF
Part number 87018730 English 6/02
Ford New Holland 70, 70A Series Tractors (8670, 8670A, 8770, 8770A, 8870, 8870A, 8970, 8970A) Repair Manual
BOOK 1 – 87018723
BOOK 2 – 87018724
BOOK 3 – 87018725
BOOK 4 – 87018726
BOOK 5 – 87018727
BOOK 6 – 87018728
BOOK 7 – 87018729

— — — — — — — — — — — — — — — — — — — — — — — —

“87018723 – New Holland 70(A) Series Tractors Repair Manual (General Information, Engine, Transmission).pdf”

— — — — — — — — — — — — — — — — — — — — — — — —

“Service Manual.pdf”
Ford New Holland Tractors 8670, 8670A, 8770, 8770A, 8870, 8870A, 8970, 8970A Service Manual
2,105 pages PDF

EXCERPT:
SECTION 27 – REAR DRIVE AXLE – CHAPTER 1
70A SERIES DIFFERENTIAL LOCK CONTROL SYSTEM OPERATION
INTRODUCTION
A self-holding differential lock is installed in the rear axle to lock the rear wheels together in conditions where wheel slip is encountered.
Units equipped with TerraLockt traction management four wheel drive, also come with a fully locking electro-hydraulically engaged front axle differential lock.
ENGAGING AND DISENGAGING DIFFERENTIAL LOCK
To engage the differential lock, the FAST RAISE/ WORK switch must be in the lower position, then depress and release the front part of the switch,1. The switch will return to the center position, but the differential lock will be activated.
The switch indicator light will illuminate to indicate the differential lock is engaged.
NOTE: Diff-lock will disengage if one brake is applied or when the 3-point hitch FAST RAISE/WORK switch is in the fast raise position or if the unit is operated above 16 kph (10 MPH ). Terralock will disengage at 10 kph (6 MPH) or below at turn angles of 20 degrees or higher or between 10-15 kph (6-9 MPH) at turn angles of 10 degrees or higher. In manual operation mode as described above the differential lock or Terralock will not reengage automatically and must be reengaged manually.
To turn off the differential lock, depress then release the rear part of the switch or apply either of the foot brakes.
ENGAGING AND DISENGAGING THE DIFFERENTIAL LOCK IN EITHER THE AUTOMATIC MODE OR TERRALOCK MODE
To engage the differential lock in either the Automatic mode or Terralock mode press and release the front of the lock switch twice within one second.
The amber differential lock lamp in the instrument panel will illuminate to indicate the differential lock is on in either Automatic mode or Terralock mode.
Auto differential lock will disengage when one brake is applied or when the 3-point hitch FAST RAISE/WORK switch is in the fast raise position.

Posted on

Ford / New Holland 8000, 8600, 9000, 9600 Tractors Factory Service & Shop Manual

New Holland_Ford 8000, 9000, 8600, 9600


INSTANT DOWNLOAD


Complete workshop & service manual with electrical wiring diagrams for Ford New Holland 8000, 8600, 9000, 9600 Tractors. It’s the same service manual used by dealers that guaranteed to be fully functional and intact without any missing page.

This Ford New Holland 8000, 8600, 9000, 9600 Tractors service & repair manual (including maintenance, overhaul, disassembling & assembling, adjustment, tune-up, operation, inspecting, diagnostic & troubleshooting…) is divided into different sections. Each section covers a specific component or system with detailed illustrations. A table of contents is placed at the beginning of each section. Pages are easily found by category, and each page is expandable for great detail. The printer-ready PDF documents work like a charm on all kinds of devices.

“40800020.pdf”
Ford New Holland 8000, 8600, 9000, 9600 Tractors Service Manual
452 pages PDF
Part number 40800020 (Ford #SE3095) English

EXCERPT:
Part 5 REAR AXLE, BRAKES AND POWER TAKE-OFF
FORD 8600 AND 9600 TRACTORS
BRAKE AUXiliARY RESERVOIR
On Ford 8600 and 9600 Tractors and on previous 8000 and 9000 tractors oil for the brake system is supplied to the brake master cylinder by an auxiliary reservoir,
1, located under the hood access panel. The reservoir is mounted adjacent to the power steering reservoir and is connected to the master cylinder by a single tube assembly. The previous master cylinder replenishment and overflow tubes have been removed.
CHECKING BRAKE AUXILIARY RESERVOIR OIL LEVEL
The brake auxiliary reservoir must be kept at the proper level. The oil level should be checked daily before operating the tractor. Check the oil level as follows:
1. With the tractor standing level, the engine off, check the oil level by a visual inspection of the oil level full line on the front of the reservoir, Figure 1.
2. The oil level should be level with the full line on the reservoir. If low, add 1 Q-M6C34-A oil to bring the oil level to the full line on the reservoir.
IMPORTANT: Do not use commercially available hydraulic brake fluid in the tractor service brake system. Use only ford Specification 1Q-M6C34-A oil in the brake system. The use of any other oil may result in the formation of gases in the system and loss of braking action. If any other oil has been used, the brake system must be completely flushed out, including the brake pistons and seals, before refilling with the new oil, 1Q-M6C34-A.

Figure 1
Brake Auxiliary Reservoir location

Figure 2
Brake Master Cylinder Assembly and Related Components


INSTANT DOWNLOAD


Posted on

Ford New Holland 40 Series (5640, 6640, 7740, 7840, 8240, 8340) Tractors Factory Service & Shop Manual

New Holland_Ford 5640, 6640, 7740, 7840, 8240, 8340


INSTANT DOWNLOAD


Complete workshop & service manual with electrical wiring diagrams for Ford New Holland 40 Series (5640, 6640, 7740, 7840, 8240, 8340) Tractors. It’s the same service manual used by dealers that guaranteed to be fully functional and intact without any missing page.

This Ford New Holland 40 Series (5640, 6640, 7740, 7840, 8240, 8340) Tractors service & repair manual (including maintenance, overhaul, disassembling & assembling, adjustment, tune-up, operation, inspecting, diagnostic & troubleshooting…) is divided into different sections. Each section covers a specific component or system with detailed illustrations. A table of contents is placed at the beginning of each section. Pages are easily found by category, and each page is expandable for great detail. The printer-ready PDF documents work like a charm on all kinds of devices.

“840564061.pdf”
Ford New Holland 40 Series (5640, 6640, 7740, 7840, 8240, 8340) Tractors Service Manual
1,452 pages PDF
Part number 840564061 English
Ford New Holland 5640, 6640, 7740, 7840, 8240, 8340 Tractors Repair Manual

EXCERPT:
8. HYDRAULIC CIRCUIT DESCRIPTION
The circuits provided with oil by the transmission mounted hydraulic pumps can be separated into the following categories:
Tractors With Closed Centre Load Sensing Variable Displacement Hydraulic Pump:
• High pressure circuit oil up to a maximum pressure of 2800 lbf/in2 (193 bar) for operation of the hydraulic lift assembly, remote control valves and auxiliary hydraulic equipment, where fitted.
• Low pressure circuit oil for operation of the 16 x 16 transmission control circuits, PTO, differential lock, electronic draft control valve pilot pressure and four wheel drive circuits, where fitted.
• Hydrostatic steering system oil up to a maximum pressure of 2500 lbf/in2 (172 bar) which is then regulated to provide low pressure oil for lubrication of the PTO and 16 x 16 transmission.
Tractors With Fixed Displacement Tandem Gear Type Pump:
• High pressure oil up to a maximum pressure of 2650 lbf/in2 (183 bar) for operation of the hydraulic lift assembly, remote control valves and auxiliary hydraulic equipment, where fitted.
• Hydrostatic steering system oil up to a maximum pressure of 2500 lbf/in2 (172 bar) which is then regulated to provide low pressure oil for operation of the PTO, four wheel drive disengagement system, differential lock and lubrication of 12 x 12 transmission synchronizers, bearings, output shaft and PTO.
The basic hydraulic circuits for each type of installation are shown in schematic format in Figure 7, Figure 8 and Figure 9 of this Chapter.
For a detailed description and operation of the high pressure hydraulic lift circuits on Series 40 tractors refer to the following Chapters in this Part of the Repair Manual.
For tractors installed with the variable displacement hydraulic pump and electronic draft control, refer to Chapters 2 and 3.
For tractors installed with the variable displacement hydraulic pump and top link sensing, refer to Chapters 2 and 4.
For tractors installed with fixed displacement gear type hydraulic pumps, refer to Chapter 5.
For the hydraulic operation of the transmission, PTO, differential lock, steering and four wheel drive disengagement systems, refer to the appropriate Part and Chapters of this Repair Manual which describe the operation of the component.


INSTANT DOWNLOAD