Posted on

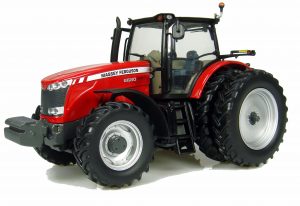
AGCO/Massey-Ferguson Tractor 8600 Series Tractors Factory Service & Shop Manual

Pages from mf8600-wsm-03-en

MMF8600OPES.zip
Price: $29.99 USD

Complete workshop & service manual with electrical wiring diagrams for AGCO/Massey-Ferguson Tractor 8600 Series Tractors (Models 8650, 8660, 8670, 8680, 8690). It’s the same service manual used by dealers that guaranteed to be fully functional and intact without any missing page.

This AGCO/Massey-Ferguson Tractor 8600 Series Tractors service & repair manual (including maintenance, overhaul, disassembling & assembling, adjustment, tune-up, operation, inspecting, diagnostic & troubleshooting…) is divided into different sections. Each section covers a specific component or system with detailed illustrations. A table of contents is placed at the beginning of each section. Pages are easily found by category, and each page is expandable for great detail. The printer-ready PDF documents work like a charm on all kinds of devices.

FILELIST:
AGCO/Massey-Ferguson Tractor 8600 Series Tractors (Models 8650/8660/8670/8680/8690) Workshop Service Manual
4315972M4 – AGCO/Massey-Ferguson 8600 Series Tractors (Models 8650-8660-8670-8680-8690) Operator Instruction Book.pdf

EXCERPT:
A. Calibrations
A.1 Forward speed display.
This calibration allows improved precision of forward speed depending on:
– the different tyre sizes available
– radar (if fitted)
1. Mark out a 100 m (depending on the unit of measurement selected) on a firm surface.
2. Start up the tractor, then press and hold the display selector switch (A) for 15 seconds.
NOTE: The daily hourmeter resets to 0 after 5 seconds.
3. “CAL” should appear on the screen (Fig. 1).
4. Drive the tractor forwards at normal working speed.
5. Press the display selector switch when crossing the starting line of the 100 m course.

Posted on

AGCO/Massey-Ferguson Tractor Series 8400 Factory Service & Shop Manual


Pages from AGCO-Massey-Ferguson Tractor Series 8400 (models 8450-8460-8470-8480) Workshop Service Manual (Section 3-12)


INSTANT DOWNLOAD


Complete workshop & service manual with electrical wiring diagrams for AGCO/Massey-Ferguson Tractor Series 8400 (models 8450, 8460, 8470, 8480). It’s the same service manual used by dealers that guaranteed to be fully functional.

This AGCO/Massey-Ferguson Tractor Series 8400 (models 8450/8460/8470/8480) service & repair manual (including maintenance, overhaul, disassembling & assembling, adjustment, tune-up, operation, inspecting, diagnostic & troubleshooting…) is divided into different sections. Each section covers a specific component or system with detailed illustrations. A table of contents is placed at the beginning of each section. Pages are easily found by category, and each page is expandable for great detail. The printer-ready PDF documents work like a charm on all kinds of devices.

FILELIST:
3378886M1 – AGCO/Massey-Ferguson Tractor Series 8400 (models 8450/8460/8470/8480 Dyna VT) Operator Instruction Book.pdf
AGCO/Massey-Ferguson Tractor Series 8400 (models 8450/8460/8470/8480) Workshop Service Manual (Section 3&5-12).pdf
TABLE OF CONTENTS
03 – Engine
03A01 – Sisu engine – General
03B10 – SISU TIER 3 ENGINE – General
03B11 – SISU TIER 3 ENGINE – Removing and refitting
05 – Gearbox
05A01 – General – Dyna VT Operation
05B01 – DYNA VT hydraulics
05C01 – Replacing the DYNA VT unit
06 – Rear axle
06B01 – Final drive units
06C01 – Braking unit
07 – Power take off
07A01 – Rear PTO
07B01 – Assembling and disassembling the rear PTO
08 – Front axle
08B01 – DANA final drive units
08D01 – DANA bearings and transmission shafts
08E01 – 4-wheel drive clutch
08E02 – Universal joint shaft brake
09 – Hydraulics
09A01 – Description of the circuit
09B01 – Illustrated diagram
09C01 – Hydraulic legends and diagrams
09D01 – Layout of components
09E01 – Trailer braking and ParkLock
09F01 – Auxiliary spool valves
09G01 – Lift control valve
09H01 – Load Sensing hydrostatic steering
09I01 – Main braking circuit
09J01 – Disassembling and reassembling the pumps
09K01 – Auxiliary hydraulics tests
10 – Electrical equipment
10A01 – Fuse box
10A02 – Electrical diagrams
11 – Electronics
11B10 – EEM2 SisuDiesel – Description
GUF101 – SisuDiesel ELECTRONIC INJECTION – Programming
GUF102 – SisuDiesel ELECTRONIC INJECTION – Tests and diagnostics
GUF103 – SisuDiesel ELECTRONIC INJECTION – Error codes
GUF105 – SisuDiesel ELECTRONIC INJECTION – Electrical Diagrams
11C10 – DCC2 – Description
GUF211 – DCC2 (DynaVT) – Programming and setting parameters
GUF213 – DCC2 (DynaVT) – Error codes
GUF214 – DCC2 (DynaVT) – Calibrations, constants and adjustments
GUF215 – DCC2 (DynaVT) – Electrical diagrams
11D10 – Autotronic 4 – Description
GUF401 – AUTOTRONIC 4 – Programming and setting parameters
GUF402 – AUTOTRONIC 4 – Tests and diagnostics
GUF403 – AUTOTRONIC 4 – Error codes
GUF404 – AUTOTRONIC 4 – Calibration
GUF405 – AUTOTRONIC 4 – Electrical diagrams
11E10 – Autotronic 5 ParkLock – Description
GUF531 – AUTOTRONIC 5 – ParkLock DynaVT – Programming and setting parameters
GUF532 – AUTOTRONIC 5 – DynaVT ParkLock – Tests and diagnostics
GUF533 – AUTOTRONIC 5 – DynaVT ParkLock – Error codes
GUF535 – AUTOTRONIC 5 – ParkLock DynaVT – Electrical diagrams
11F10 – Autotronic 5 – Linkage – Description
GUF521 – AUTOTRONIC 5 – Linkage – Programming and setting parameters
GUF522 – AUTOTRONIC 5 – Linkage – Tests and diagnostics – MF6400/7400/8400
GUF523 – AUTOTRONIC 5 – Linkage – Error codes – MF6400/7400/8400
GUF524 – AUTOTRONIC 5 – Linkage – Calibration and adjustments
GUF525 – AUTOTRONIC 5 – Linkage – Electrical diagrams – MF6400/7400/8400
11G10 – Datatronic 3 – Description
GUF601 – DATATRONIC 3 – Programming
GUF604 – DATATRONIC 3 – Calibration and adjustments
GUF605 – DATATRONIC 3 – Electrical diagrams
GUF71 – SMS – JOYSTICK / FingerTIP – Setting parameters
GUF72 – SMS – JOYSTICK – Tests and diagnostics
GUF73 – SMS – JOYSTICK / FingerTIP – Error codes
GUF74 – SMS – JOYSTICK – Settings
GUF75 – SMS – JOYSTICK / FingerTIP – Electrical diagrams – Auto 5 linkage
11I10 – Autotronic 5 – Suspended front axle – Description
12 – Cab and equipment
12C01 – Air conditioning – General
12C02 – Standard air conditioning
12C03 – Automatic air conditioning
GUF302- AUTOMATIC AIR CONDITIONING – Tests and diagnostics
GUF303- AUTOMATIC AIR CONDITIONING – Error codes
GUF305- AUTOMATIC AIR CONDITIONING – Electrical diagrams
12C04 – Air conditioning – Refilling the unit

EXCERPT:
K . Disassembling the lower bush
Disassembling the bush (23 Fig. 13)
101.Using the lever located to the right under the steering wheel, pull the steering column as far as possible towards the driver.
102.Take off the steering wheel and the instrument panel lower cover (1). Disconnect the connectors of the reverse shuttle, wiper control unit and DOT
MATRIX keyboard (if fitted).
103.If there is not sufficient access space, also take out the upper cover (2) and instrument panel (3) (Fig. 14).
104.Remove the 4 attachment screws fixing the column base to the cab support.
105.Take off the column assembly.
106.Remove the half housings around the steering column. Take off the reverse shuttle control, lighting switch and DOT MATRIX keyboard (if fitted).
107.Remove and discard the retaining washers (1)(2).
Remove the spring (3) and lever (4) with the boot (8) and lever (6).
108.Press on the notched levers (9)(10) to compress the spring (7). Take off the nuts (14). Take off the steering racks (11) and (12).
109.Drive out the pin (15). Remove the notched levers (9)(10) and the spring (7).
110.Take out the adjusting screw (5) (3mm Allen key).
111.Disassemble the nuts (16) and their respective screws, and separate the upper articulated part (17) of the column.
112.Disassemble the nuts (18) and their respective screws, and separate the lower part (19) of the column.
113.Remove the arm (20) and brake plate and nut (21).
114.Extract the bush (23) from the housing (19).


INSTANT DOWNLOAD


Posted on

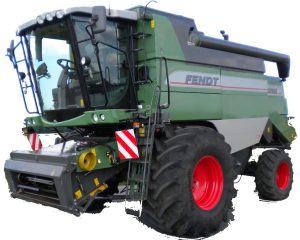
AGCO/Fendt 5220 E, 5250 E, 6250 E Combine Factory Service & Shop Manual


Pages from 327275010 – AGCO-Fendt 5180 E Workshop Manual Updating

MFEN5180EOPES.zip
Price: $39.99 USD

Complete workshop & service manual with electrical wiring diagrams for AGCO/Fendt 5220 E, 5250 E, 6250 E Combine. It’s the same service manual used by dealers that guaranteed to be fully functional and intact without any missing page.

This AGCO/Fendt 5220 E, 5250 E, 6250 E Combine service & repair manual (including maintenance, overhaul, disassembling & assembling, adjustment, tune-up, operation, inspecting, diagnostic & troubleshooting…) is divided into different sections. Each section covers a specific component or system with detailed illustrations. A table of contents is placed at the beginning of each section. Pages are easily found by category, and each page is expandable for great detail. The printer-ready PDF documents work like a charm on all kinds of devices.

FILELIST:
327186014 – AGCO/Fendt 5220 E, 5250 E, 6250 E Operator’s Manual.pdf
327208010 – AGCO/Fendt 5220 E, 5250 E, 6250 E Workshop Manual.pdf
327275010 – AGCO/Fendt 5180 E Workshop Manual Updating.pdf
LA327271011 – AGCO/Fendt 5180 E Operator’s Manual.pdf

EXCERPT:
TABLE OF CONTENTS
Sections
– GENERAL INFORMATION .. 00
– ENGINE …. 10
– LIVE PTO .. .. .. .. .. .. . 14
– TRANSMISSION .. .. .. .. …. 21
– FRONT DRIVE AXLE .. .. .. .. ….. 25
– HYDROSTATIC TRANSMISSION …. 29
– BRAKES AND CONTROL .. .. .. …. 33
– HYDRAULIC SYSTEMS … 35
– STEERING .. .. .. .. .. .. 41
– AXLE AND WHEELS .. .. .. .. ….. 44
– CAB CONDITIONING SYSTEM ….. 50
– ELECTRICAL SYSTEMS ….. 55
– ATTACHMENTS / HEADERS … 58
– PRODUCT FEEDING .. 60
– THRESHING ….. 66
– SEPARATION .. . 72
– STRAW CHOPPER … 73
– CLEANING … 74
– GRAIN STORAGE ….. 80

Posted on

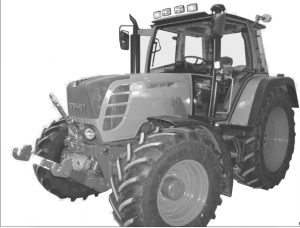
Fendt Tractor 300-series Vario COM III Factory Service & Shop Manual


Pages from X990.005.056.010 – Fendt Tractor 300-series (309-310-311-312) Vario COM III Workshop Manual

MFEN300VOPES.zip
Price: $29.99 USD

Complete workshop & service manual with electrical wiring diagrams for Fendt Tractor 300-series (309/310/311/312) Vario COM III. It’s the same service manual used by dealers that guaranteed to be fully functional and intact without any missing page.

This Fendt Tractor 300-series (309/310/311/312) Vario COM III service & repair manual (including maintenance, overhaul, disassembling & assembling, adjustment, tune-up, operation, inspecting, diagnostic & troubleshooting…) is divided into different sections. Each section covers a specific component or system with detailed illustrations. A table of contents is placed at the beginning of each section. Pages are easily found by category, and each page is expandable for great detail. The printer-ready PDF documents work like a charm on all kinds of devices.

X990.005.056.010 – Fendt Tractor 300-series (309/310/311/312) Vario COM III Workshop Manual.pdf
0000 Tractor / General system
1000 Transmission
1005 Transmission control unit
1010 Differential
1015 Axle drive
1030 Handbrake
1050 Housing
1070 Brake system
1080 Vario transmission unit
1090 Emergency control
1100 Clutch actuation system
1150 Cardan brake
1170 ML range control
1200 Front PTO
1220 Live PTO
1320 Front-wheel drive
1430 Hydrodamp
1432 Hydraulic pump
1470 Transmission lubrication system
1490 Pump drive
1530 ML adjustment
1600 Enhanced control system valves
1620 Enhanced control system pipes
2000 Engine
2010 Cylinder head
2020 Speed adjustment
2050 Cooling system
2060 Fuel system
2170 Engine brake
2180 Cold-start system
2190 Intercooler
2210 Crankcase
2250 Engine preheater
2312 Lubrication
2710 Injection pump
2712 Injectors
2714 Governor
3000 Front axle
3010 Front axle support
3020 Axle housing
3050 Suspension
3060 Suspension valve fitting
3070 Suspension pipe
3100 Track rod
3120 Steering cylinder
3170 Frame
3180 Cardan shaft
3190 Diff. lock actuation system
4000 Steering
4070 Steering wheel
4090 Hydraulic steering assembly
5000 Vehicle body
5010 Design
5030 Driver seat
5050 Trailer hitch
5161 Trailer hitch coupling
5200 Cab mount, suspension
5500 Air conditioning system
5520 Compressor drive
5530 Coolant lines
5550 Evaporator
5560 Condenser
5570 Electrical cables
8100 Cab
8113 Heater
8114 Ventilation
8117 Windscreen wipers
8121 Cable loom
8600 Power lift
8610 Electrohydraulic EPC control
8618 External control
8631 Control lifting gear
8700 Three-point hitch
8730 Lift arms
8740 Support
8800 Compressed air system
8810 Compressor
8820 Brake fittings
8830 Lines
8850 Electrical actuation system
8890 Air tank
8900 Front loader
8910 Mounting frame
8915 Hydraulic implement actuation system
8955 3. hydraulic circuit
8958 Multi-coupling
8970 Pipes
8990 Lift cylinder
9000 Electrics
9010 Alternator
9015 Starter lockout
9040 Fuses
9050 Battery system
9060 Starter motor system
9200 Front power lift
9210 Lift gear
9211 External control
9220 Cylinder
9230 Pipes
9260 Enhanced control power lift
9280 Frame
9400 Hydraulic pump assembly
9410 LS pump
9420 Transmission pump
9430 Steering pump
9500 Hydraulic pipes
9510 Base circle
9516 Power lift
9525 with oil cooler
9530 Hydraulic trailer brake
9531 Steering
9534 Reversing system
9600 Hydraulic equipment
9605 Hydraulic connections
9610 Central control block (ZSB)
9620 Valve assembly
9666 External pressure supply
9690 Valve supplement
9700 Electronics
9710 Instrument panel
9715 Terminal
9717 LBS – agricultural bus system
9720 Transducer
9730 Radar sensor
9740 E-box
9750 Transmission actuator unit
9760 Drive switch
9770 Control panel
9780 Engine EDC
9790 ECU, lift gear
9900 Service
9920 Special tools
9970 FENDIAS

Fendt 512 Wiring.pdf

EXCERPT:
Adjustment instructions for wiper blade
A = Wiper width
B = Wiping angle
C = Adapter screw in bore of wiper arm
E = Observe distance
D = Parking position
Pull forward separation point (X258) behind roof lining, guide through grommet in cab roof and connect to wiper motor (M004).
Fasten surplus separation point (arrowed) using cable tie.

Posted on

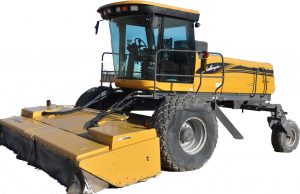
Challenger SP115C/SP185C Windrower Tractor Factory Service & Shop Manual

Pages from 79032964A – Challenger SP115C-SP185C Windrower Tractor Service Manual

MCHALLSP1X5COPEK.zip
Price: $29.99 USD

Complete workshop & service manual with electrical wiring diagrams for Challenger SP115C/SP185C Windrower Tractor. It’s the same service manual used by dealers that guaranteed to be fully functional and intact without any missing page.

This Challenger Challenger SP115C/SP185C Windrower Tractor service & repair manual (including maintenance, overhaul, disassembling & assembling, adjustment, tune-up, operation, inspecting, diagnostic & troubleshooting…) is divided into different sections. Each section covers a specific component or system with detailed illustrations. A table of contents is placed at the beginning of each section. Pages are easily found by category, and each page is expandable for great detail. The printer-ready PDF documents work like a charm on all kinds of devices.

FILELIST:
79032964A – Challenger SP115C/SP185C Windrower Tractor Service Manual.pdf; 222MB, 1,415 pages
00 – TABLE OF CONTENT.pdf
01 – General.pdf
02A – Engine Manual Drop-in.pdf
02B – Engine.pdf
03 – Cab.pdf
04 – Electrical.pdf
05 – Steering.pdf
06 – Power Train.pdf
07 – Chassis.pdf
08 – Hydraulics.pdf
09 – Accessories.pdf
10 – Reserved.pdf

EXCERPT:
General Power Train Information
Two Speed Circuit